Note
- 11 May 2023: More CardBook installation steps added.
- 10 May 2023: PrintingTools NG Options revised. Use CardBook instead of TbSync. Delivery Status Notification added.
- 2 Aug 2022: PrintingTools NG Options revised for version 2.1.4.
- 22 Mar 2022: Print page setup revised for version 91. Printing Tools NG Options revised.
- 9 Dec 2021: Exporting email procedures added.
- 29 Jun 2021: Advice against upgrading to version 78 removed because more add-ons become compatible. Some notes added.
- 16 Jan 2021: TbSync manual configuration for Google added.
- 15 Jan 2021: Google Calendar Plugin added. PrintingTools attachments per line option added. Header fixed font size revised. CardBook add-on removed because TbSync supports Google again. Lists of add-ons updated.
- 19 Nov 2020: Option set to show all folders without subscribing individually. CardBook add-on added because TbSync no longer supports Google. Lists of add-ons updated.
- 8 Sep 2020: 'Manually sort folders' add-on added.
- 12 Aug 2020: Revised to fix font for print headers only.
- 11 Aug 2020: Created.
Intro
Thunderbird is an email client.
Install Thunderbird
Download the latest release from here and install:
https://www.thunderbird.net/en-US/download/
Download old releases from here and install:
https://archive.mozilla.org/pub/thunderbird/releases
Set up the first email account.
For Gmail account, enter the Gmail address and use automatic setup.
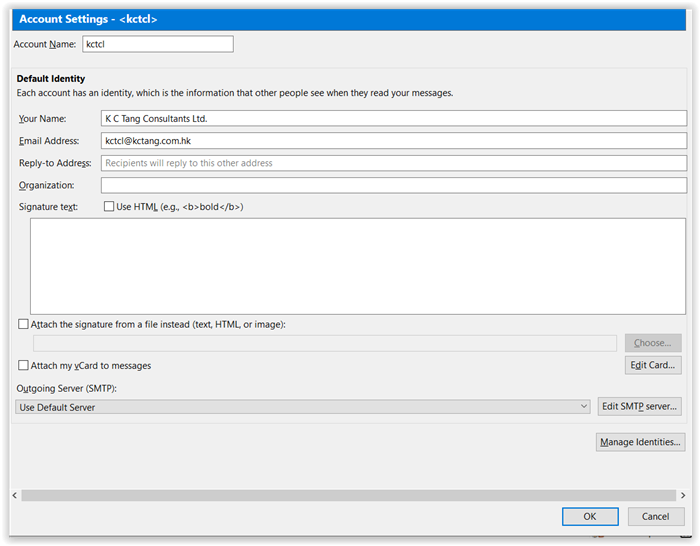
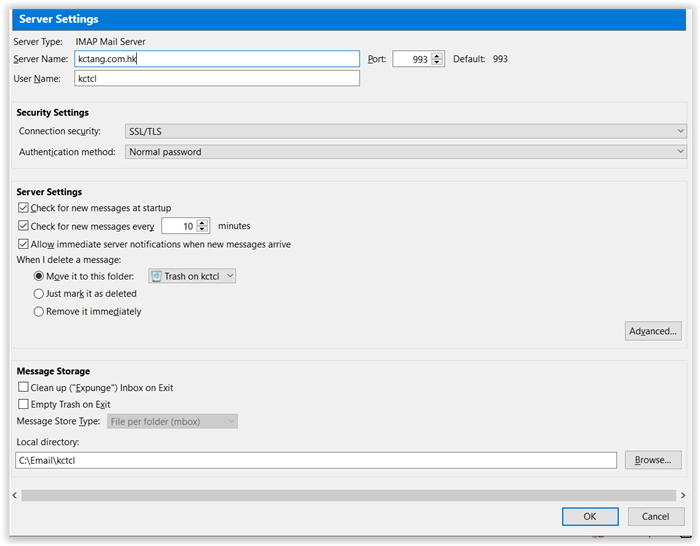
Use the following settings to manually set up email account accessing company's email server:
- Account Name: kctcl
- Your Name: K C Tang Consultants Ltd.
- Email Address: kctcl@kctang.com.hk
- Incoming Server Type: IMAP Mail Server
- Server Name: kctang.com.hk
- Port: 993
- Connection security: SSL/TLS
- Authentication method: Normal password
- Outgoing Server Name: kctang.com.hk
- Port: 465
- Connection security: SSL/TLS
- Authentication method: Normal password
Select Tools > Accounts Setting to further define or adjust the settings:
Uncheck "Show only subscribed folders" to show all folders instead of subscribing individually:
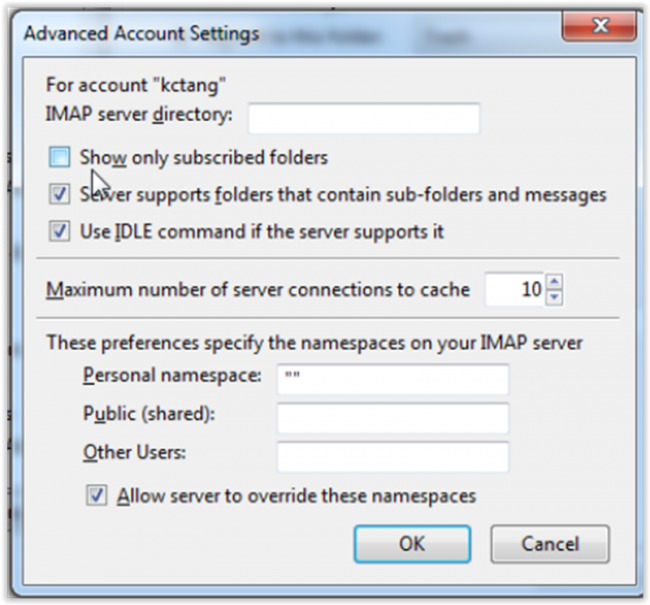
(Added, 11 Nov 2020)

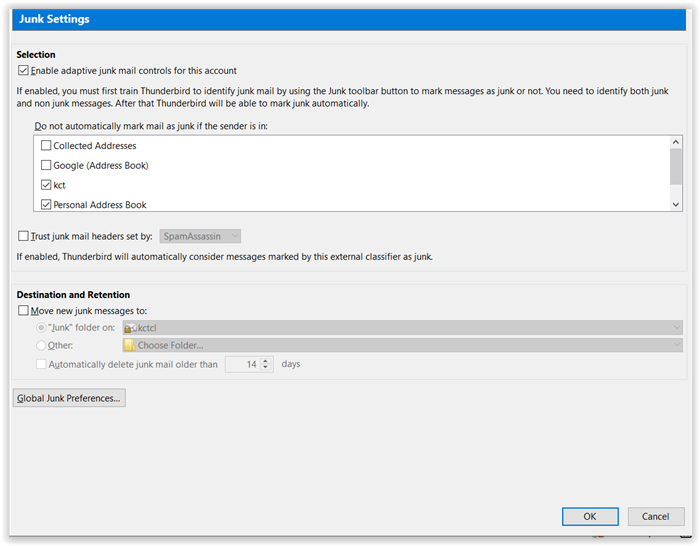
The default is to keep all messages on the local computer as shown below, but it is suggested not to do so to avoid using up local computer's storage space. Subject headings will always be downloaded. The email body and attachments will be downloaded only when being read, and may take a bit longer time, but this should be tolerable.
(Note added, 29 Jun 2021)


Select Tools > Accounts Setting > Account Actions > Add Mail Account to add other accounts.
Leave the options under Tools > Options as the default except in the following case (not required now as the Postfix configuration can be raised).
When the tls security level has to be lowered if the email server is not of the level expected by Thunderbird:
Select Tools > Options > General > Config Editor > I accept the risk > Search "security.tls" > security.tls.version.min
Change the default value "3" to "1" and select OK and exit.
(Note to adjust tls security level added, 29 Jun 2021)
Set Delivery Status Notification
Select Options > Delivery Status Notification if desired to have record of delivery:
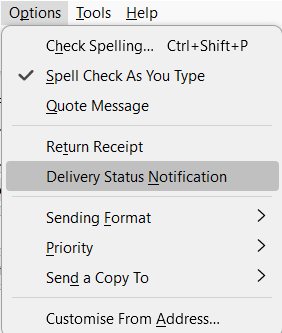
Selecting Return Receipt will require the recipient to confirm receipt. This is not quite useful.
(Session added, 10 May 2023)
Install Add-ons
Select Tools > Add-ons.
Search at "Find more extensions" for the following add-ons, install them and restart Thunderbird:
- AttachmentExtractor Continued - to download attachments (emails must have been fully downloaded before the full attachments can be extracted)
- CardBook - to sync Google contacts
- Google Calendar Plugin - to open Google calendar
- ImportExport Tools NG - to import or export emails or folders, good for exporting for archive
- Lightning - to use calendars (better use Google calendars directly)
- LookOut (fix version) - to open Outlook attachments
- Manually sort folders - to re-sequence order of accounts and folders
- PrintingTools NG - to set print page layout
- Provider for CalDAD & CardDAV - required for TbSync below (not used)
- Quick Folder Move - to move or copy emails between folders
- Remove Duplicate Messages - to remove duplicate emails
- SmartTemplate4 - to set templates for composition, reply and forwarding
- TbSync - to synchronize contact, task and calendar information (not used because of log in problem).
(List updated, 15 Jan 2021)
(Note against AttachmentExtractor added, 29 Jun 2021)
(List updated 10 May 2023)
Use Quick Folder Move
Select some messages.
Press the following keys to open a context menu, enter a few characters for the name of the destination folder to display possible choices, move down to select the folder, and press Enter.
Press:
Shift+M to move the currently selected messages to the destination folder.
Ctrl+Shift+M to repeat moving to the previously selected folder.
Shift+Y to copy the currently selected messages to the destination folder.
Ctrl+Shift+Y to repeat copying to the previously selected folder.
Shift+G to jump to the destination folder (without the need to pre-select come messages).
Set up Remove Duplicate Messages
Select Tools > Add-on Options > Remove Duplicate Options:
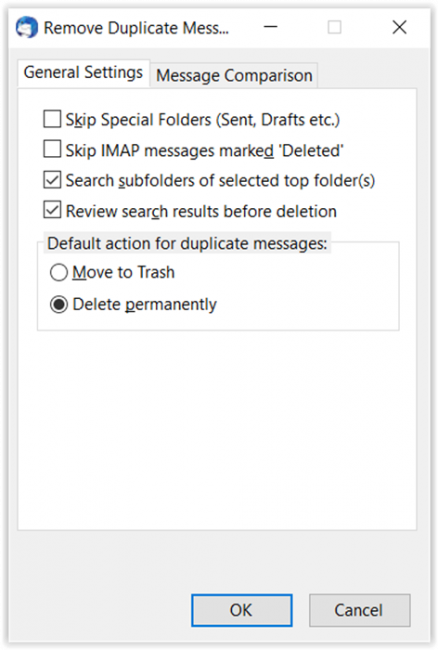
Select Move to Trash instead of Delete permanently if not sure.
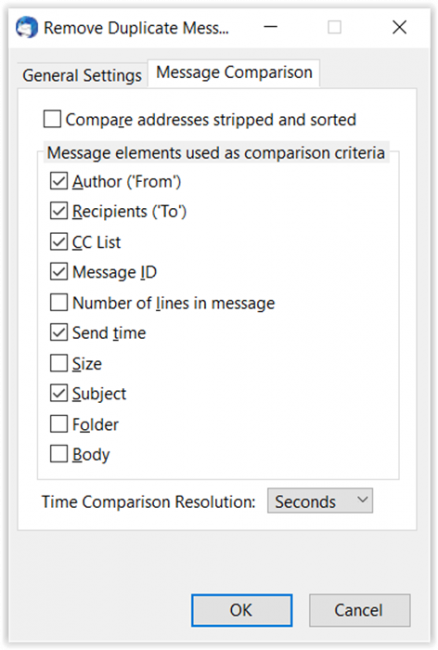
Select Folder if comparison is not across different folder.
Set up Print Page (Thunderbird version 91)
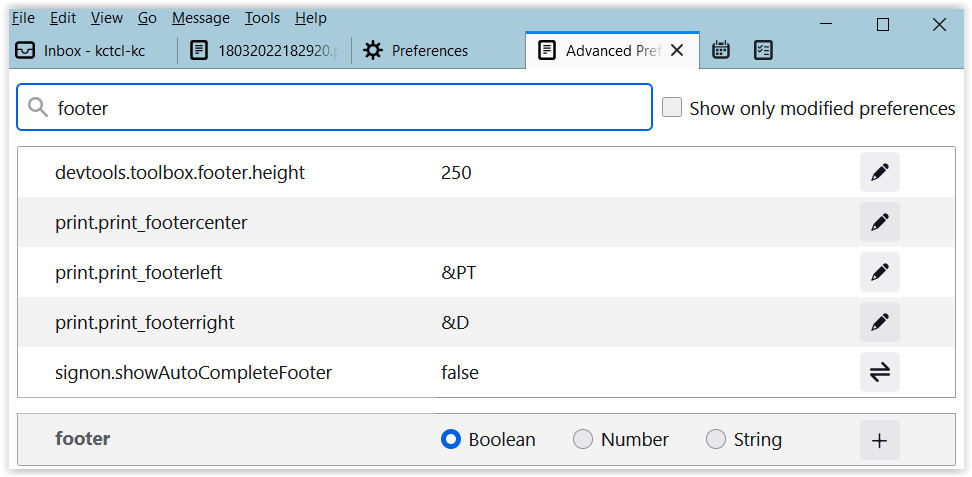
Select Tools > Preferences > General > Config Editor (at bottom of page).
Search "headerleft" and press the pencil icon to edit to enter "&T" to represent email subject.
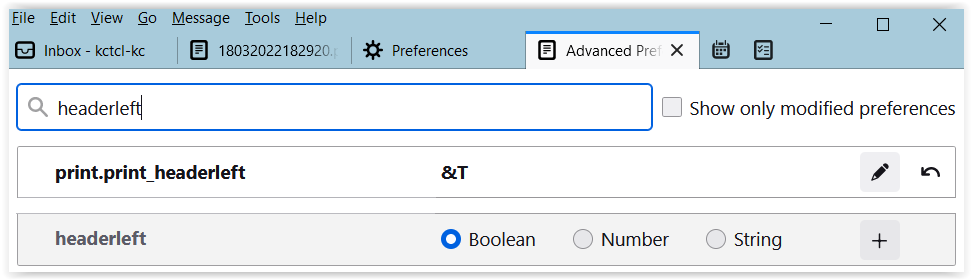
Press the refuse bin icon to remove similar but outdated setup for named printers (similarly for other settings described below.
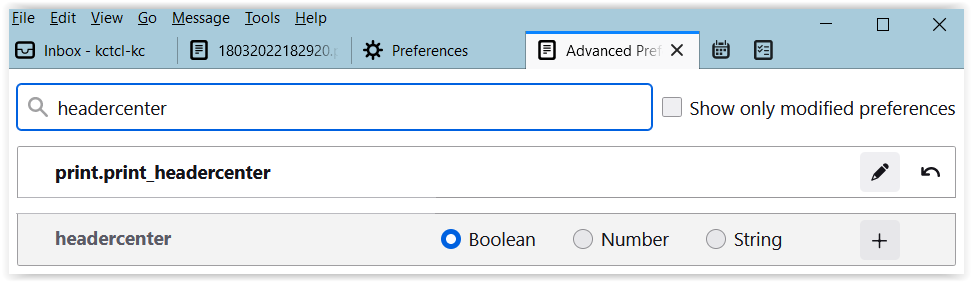
Search "headercenter" and edit to remove the value.
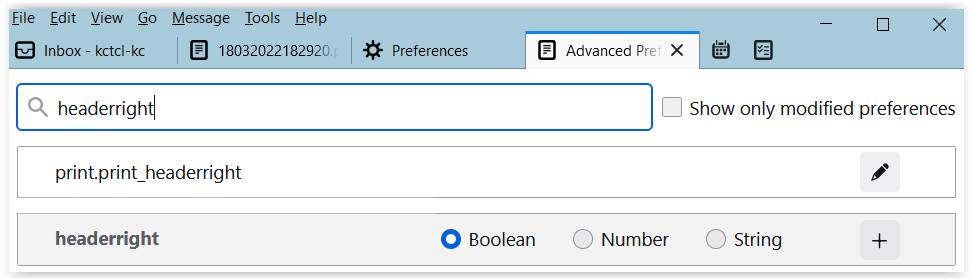
Search "headeright" and edit to remove the value.
Search "footer" and edit to set "&PT" for page number for footerleft, and "&D" for date for footerright.
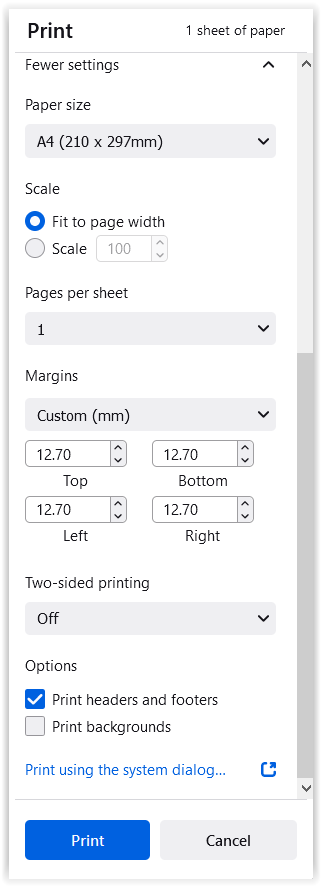
Press Ctrl-P to pop up the print menu to define the paper size, scale, margins, and options:
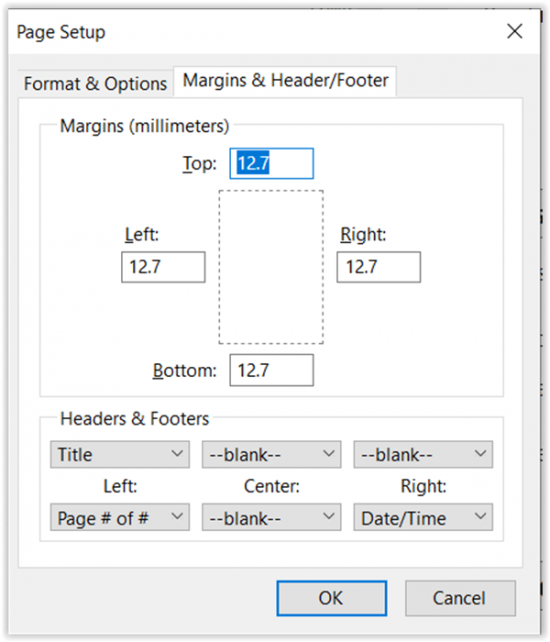
Set up Print Page (Thunderbird version 78)
Select File > Page Setup:

Set up PrintingTools NG Options
Select File > Printing Tools NG Options and set as follows:
Copy and paste this Custom date format: %a, %e %B %Y %t %H:%M:%S [GMT %z]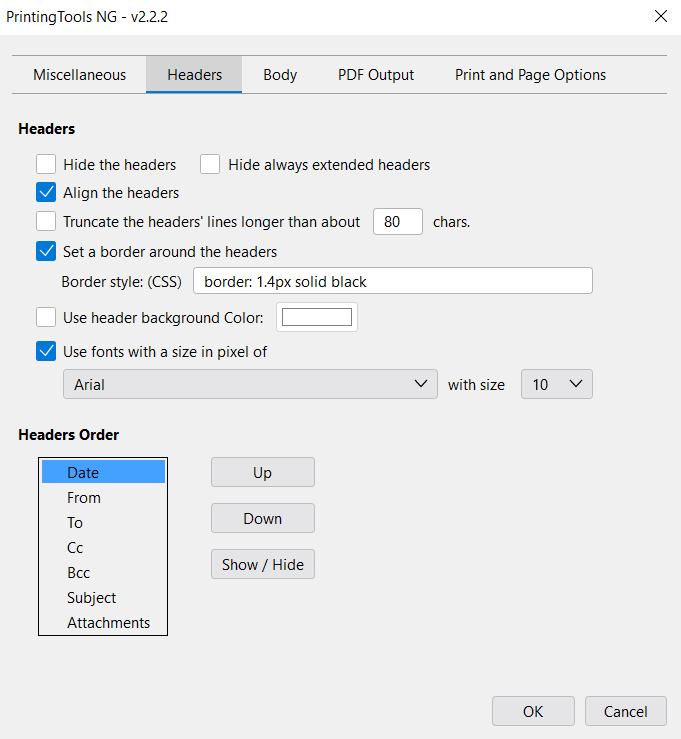

Skip PDF Output. Functions to be understood.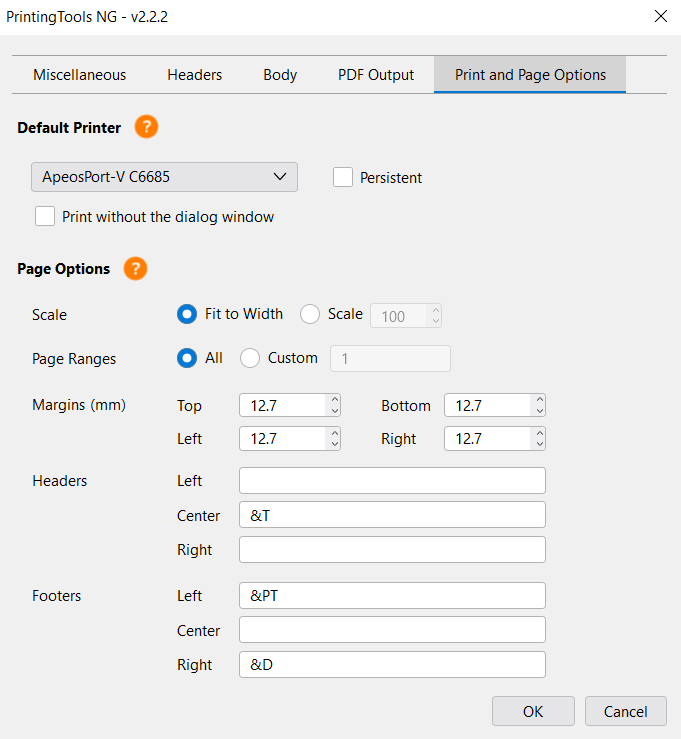
Right-click Thunderbird toolbar to customise to add the following icon:
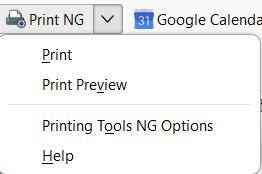
(Section updated, 10 May 2023)
Set up SmartTemplate4
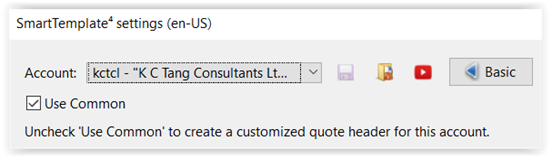
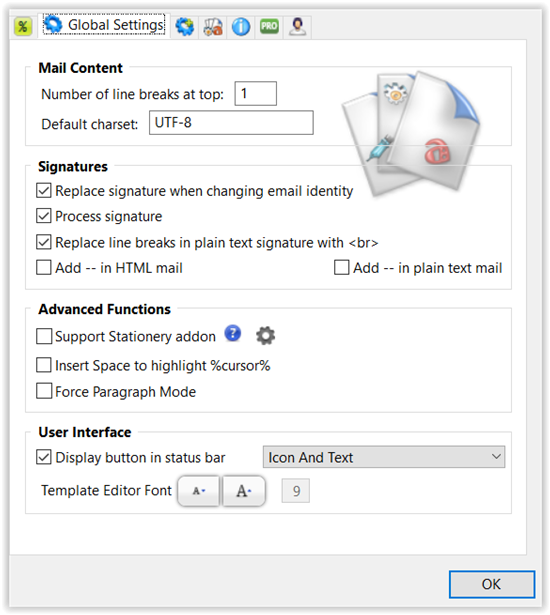
Select Tools > Add-on Options > SmartTemplate4:
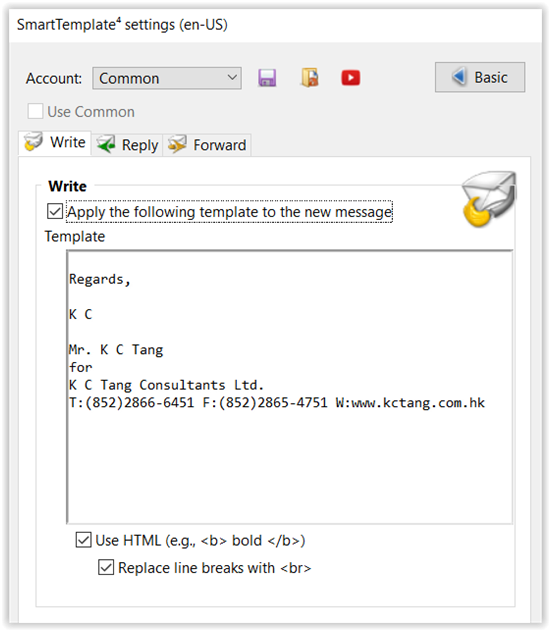
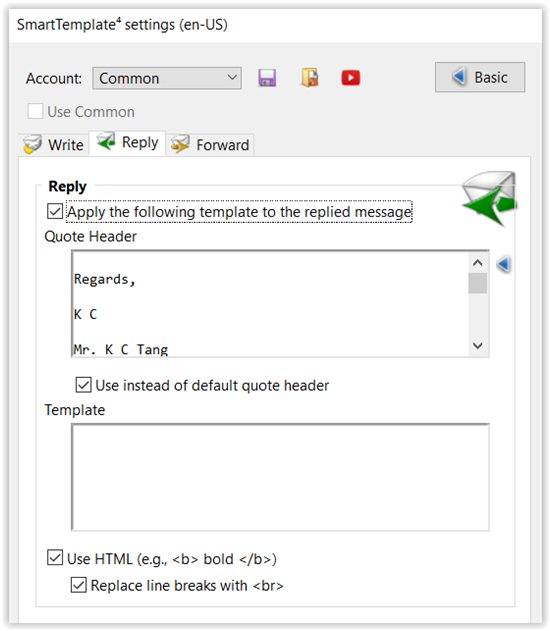

Copy and paste the following latest Code in the Quote Header of the Reply and Forward options:
<a blank line first> Regards, Mr. K C Tang <replace with your name> for K C Tang Consultants Ltd. T:(852)2866-6451 F:(852)2865-4751 W:www.kctang.com.hk <hr/> <SPAN style="FONT-SIZE: 10pt"> <b>Sent: </b>%date% <Use this to show: Sent: Mon, 14 Dec 2020 10:47:45 +0800> <b>Sent: </b>%X:=sent% %datelocal% %date_tz% <Or use this to show: Sent: Monday, Dec 14, 2020, 10:47 +0800> <b>From: </b>%from(name,bracketMail())% <b>To: </b> <SPAN style="FONT-SIZE: 8pt"> %to(name,bracketMail())%</SPAN> [[<br><b>Cc: </b> <SPAN style="FONT-SIZE: 8pt"> %cc(name,bracketMail())%</SPAN>]][[<br><b>Bcc: </b> <SPAN style="FONT-SIZE: 8pt"> %bcc(name,bracketMail())%</SPAN>]] <b>Subject: </b>%subject% </SPAN> <hr/>
(Note against date formats added, 29 Jun 2021)

Insert license key in the next menu.
Set up CardBook
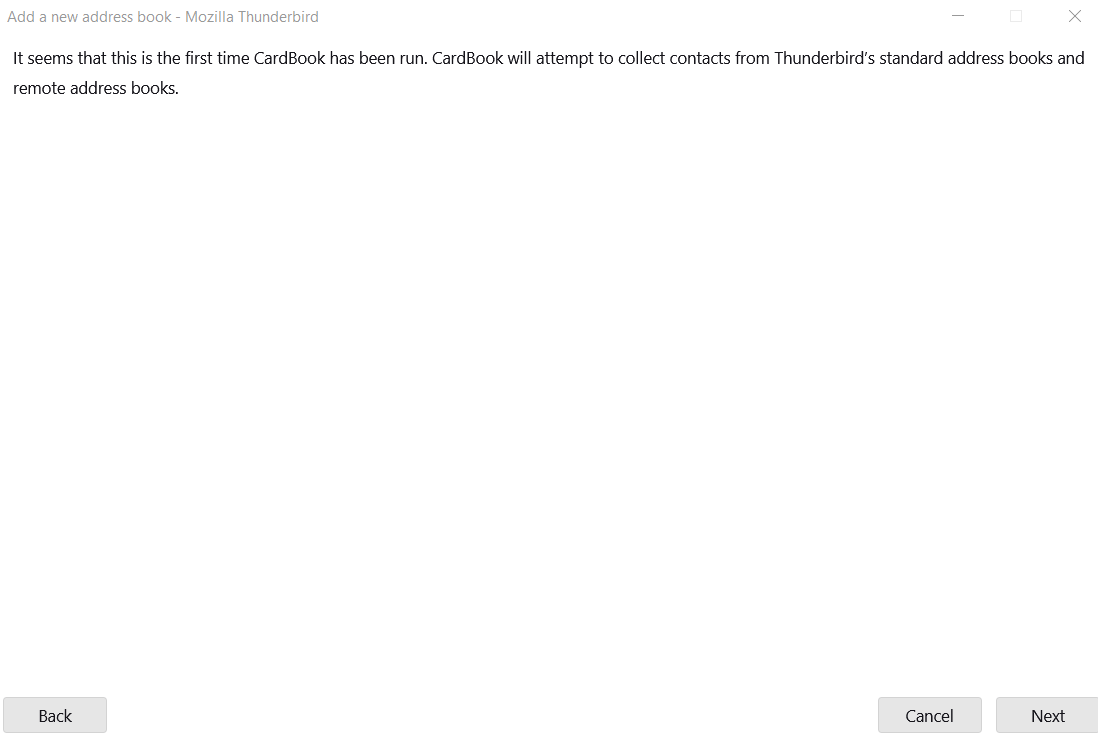
Select Tools > Add-ons and Themes > Find more add-ons > Enter CardBook to find and add the App.
Select Next when the following appears:
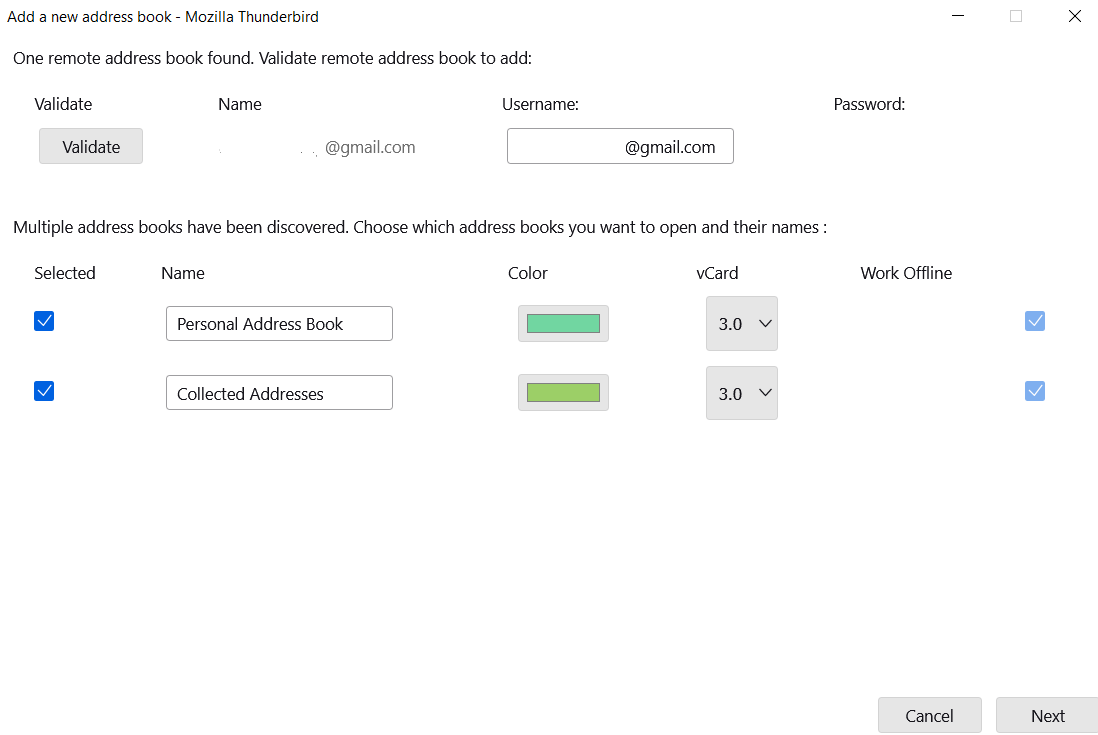
Select Validate if remote address book found (password to be entered in the next validation screen) or select Next:
The CardBook icon will appear on the right of the Toolbar.
Right-click the Toolbar to move the icon position to the left as appropriate: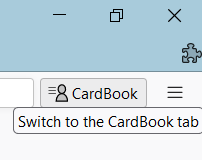
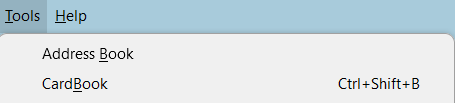
Click CardBook icon or select Tools > CardBook:
The following will show up: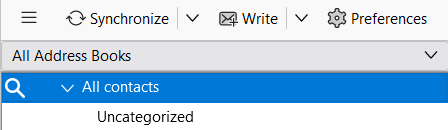
Right-click within this side window space to bring up the following and select New Address Book: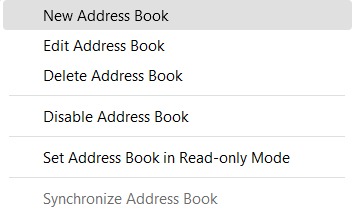
Select Remote and Next:

Select Google, enter Username and select Validate:
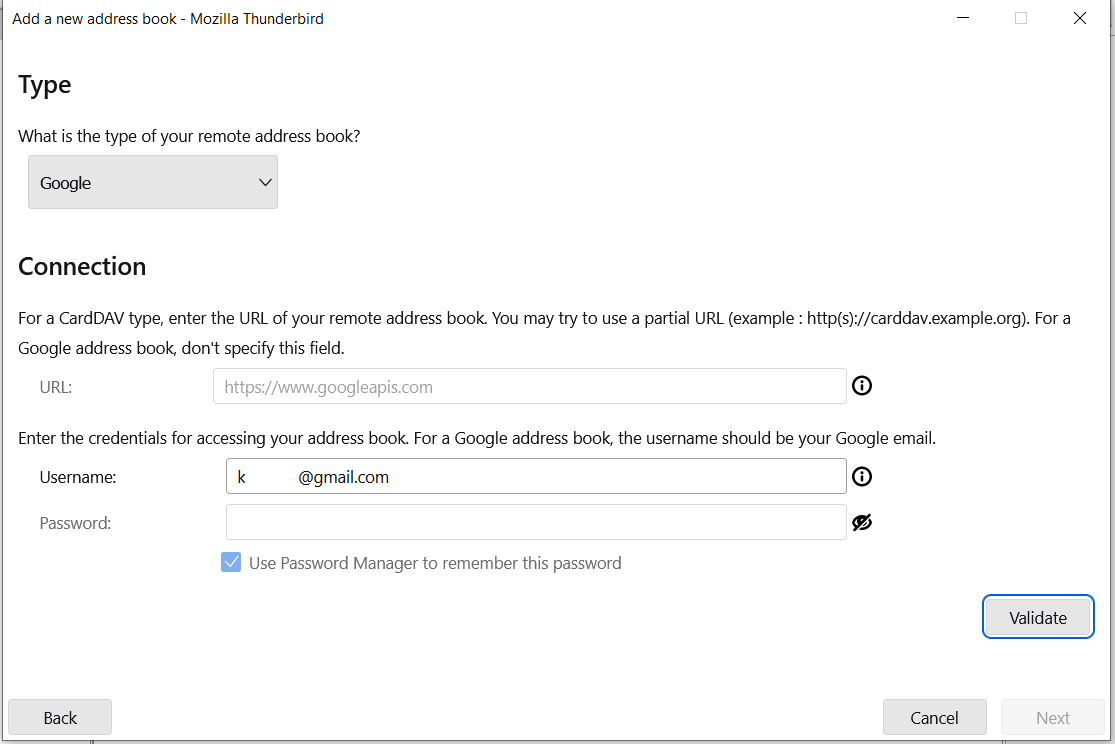
Enter password in the next Google screen and permit access to Google contacts.
The Google contacts will be synchronized for use.
Add additional address book as necessary.
Select Edit Address Book to further customise: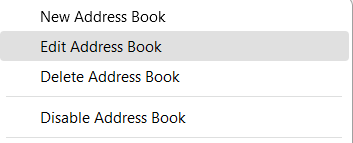
Select General to change Address Book colour:
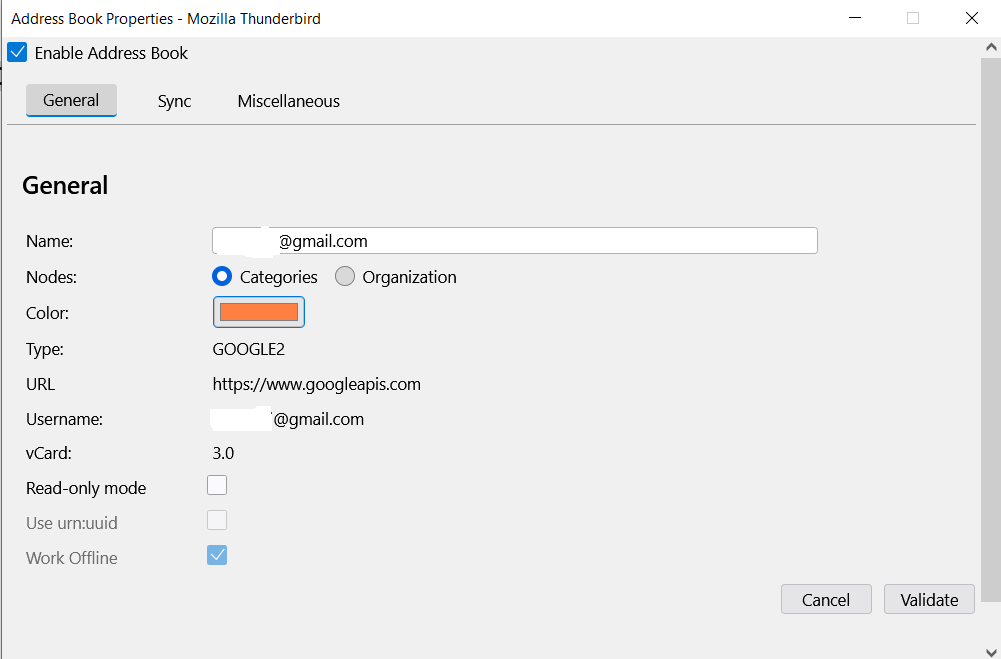
Select Sync to set synchronization interval to 15 minutes: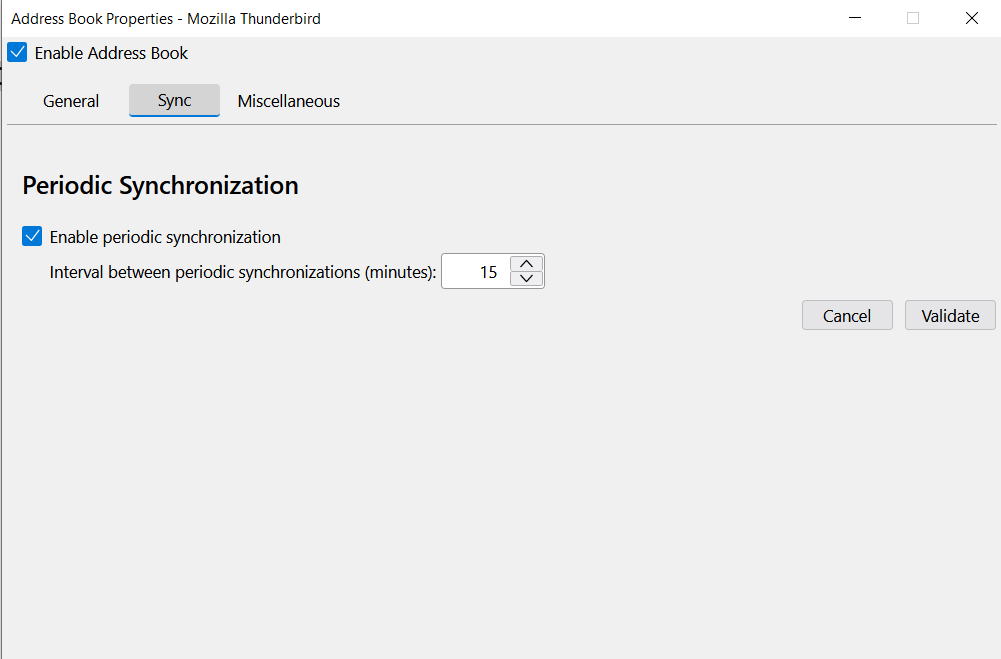
Remove the original Address Book icon from the toolbar because it will not be used anymore.
CardBook has many settings and entries for the contact but just use the simplest entries.
For the name of the contact, enter in the format of "Short company name - Full personal name" as both the Display Name and Family Name. Do not split to use Given or Other Names.
Press Synchronize in the CardBook toolbar as necessary.
(Section added, 10 May 2023)
(Updated, 11 May 2023)
Set up TbSync
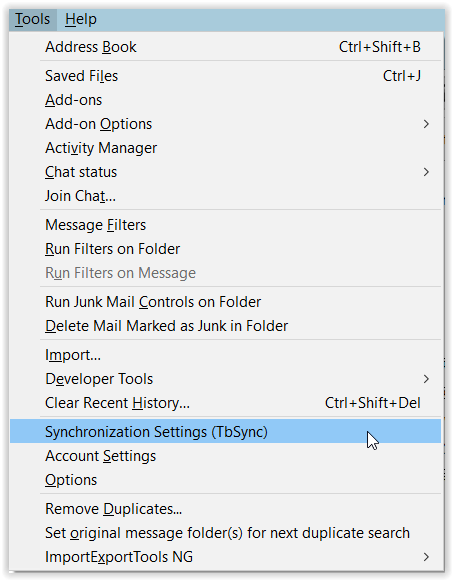
Select Tools > Synchronization Settings (TbSync):
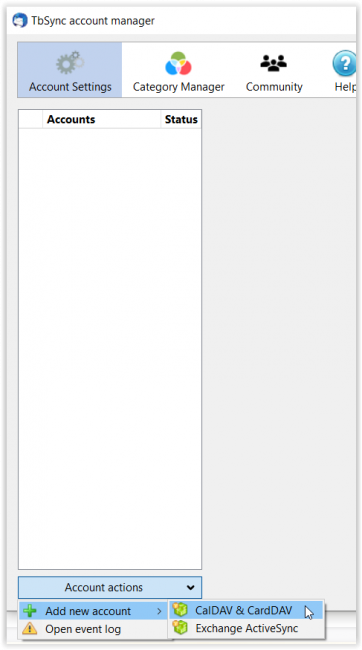
Or select Tools > Add-on Options to go to the following, then select Add new account > CalDAV & CardDAV:
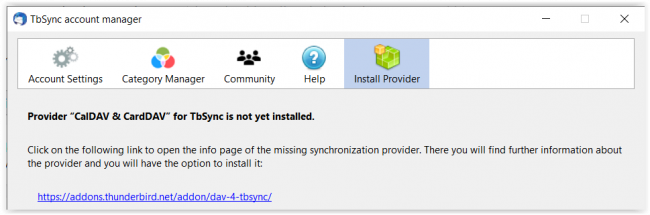
Select Install Provider > download link:
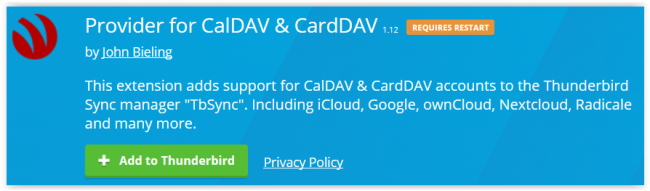
Add CalDAV & CardDAV:
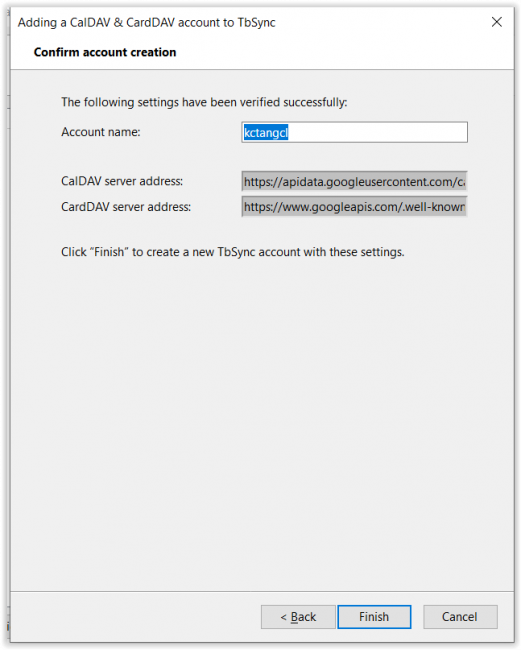
After adding, and re-starting Thunderbird as necessary, go back and select Manual Configuration > Next:
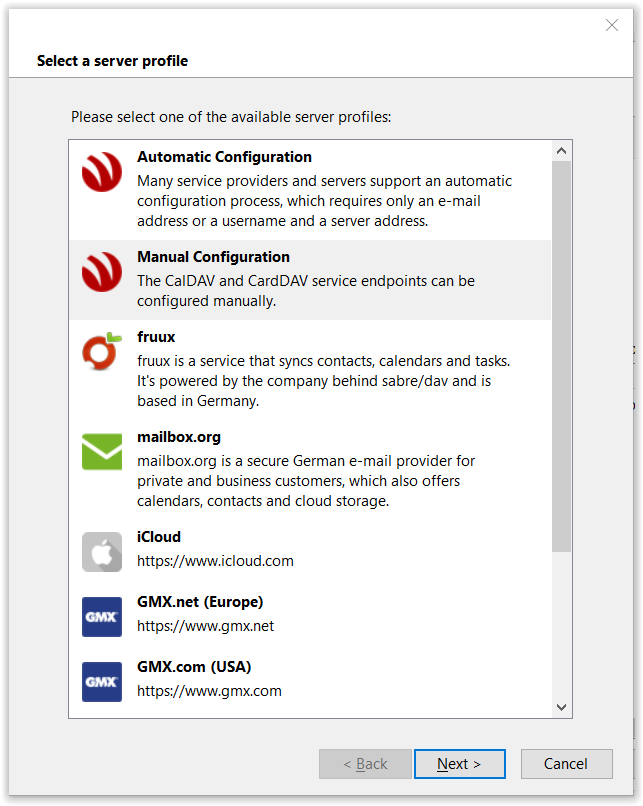
Enter
Account name: friendly account name, e.g. kctangcl
User name: gmail.com account name
CalDAV server address: https://apidata.googleusercontent.com/caldav/v2
CardDAV server address: https://www.googleapis.com/.well-known/carddav
Select Next:

(Manual configuration added, 15 Jan 2021)
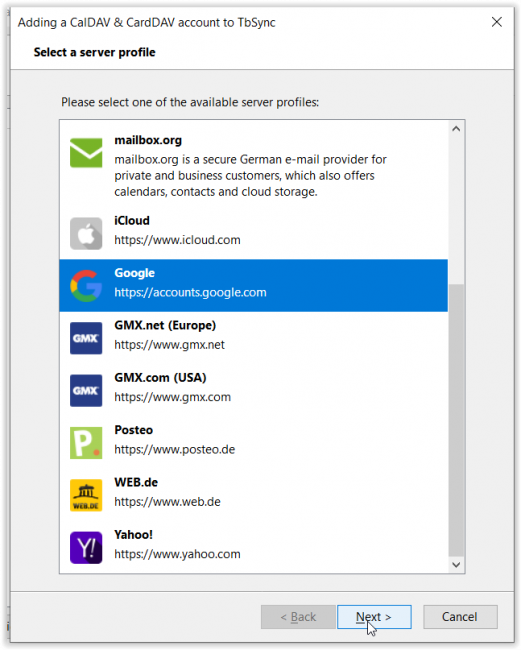
The following is an older version of TbSync which provided automatic Google support. In that case, select Google > Next:
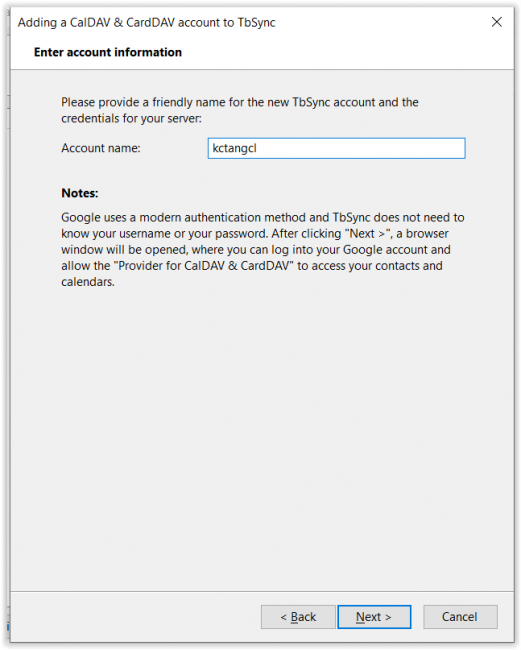
Enter a friendly account name and select Next:
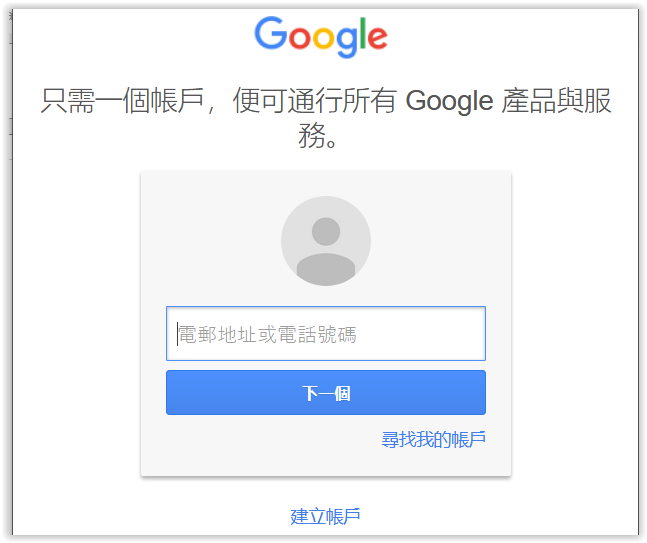
After selecting Next in the manual case or automatic case, enter Google account email address and its password (may require doing it twice):
Select Finish:
Select Enable and synchronize this account:
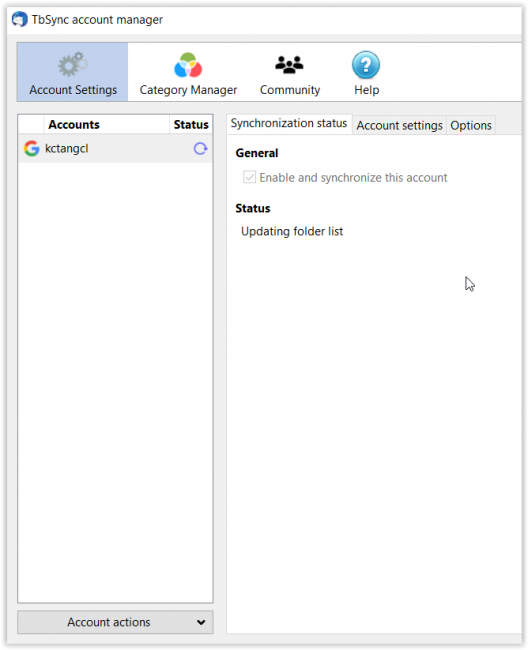
Available resources like Google address book and calendars will be displayed.
Select those to be synchronized > Synchronize now:
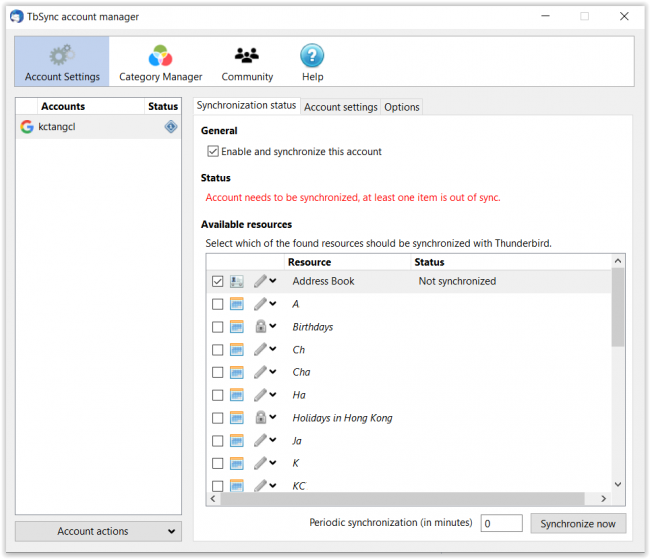
The address book and calendars will be available for use.
Change Periodic synchronization (in minutes) to 30, which is the minimum interval.
Export emails
Use ImportExportTools NG to export emails for archive.
To ensure that all email attachments have been downloaded. The email folders should be synchronised.
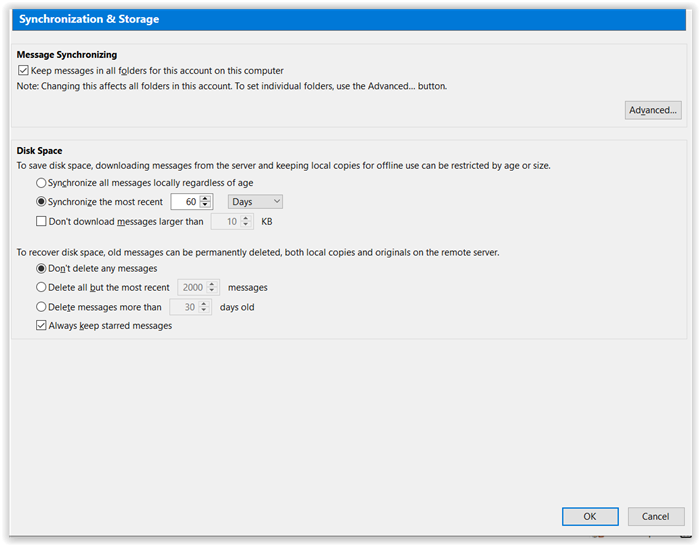
Select Tools > Account Settings > Advanced:
.jpg)
It may not be necessary to change to "Synchronise all messages locally regardless of age". Change only if the final results show that not all messages with attachments have been synchronised. Change back after use.
Select Download against folders intended to be exported:
.jpg)
Wait a while for the messages to be fully downloaded before exporting.
Alternatively, select relevant folder > Properties > Download Now to download all messages:
.jpg)
.jpg)
Select Tools > ImportExportTools NG > Options or alternatively select relevant folder > ImportExportTools NG > Options to set options:
.jpg)
Accept default options as follows:
.jpg)
Change the "format for filenames", "cut complete file path length" and "Charset for filenames" as follows:
.jpg)
Note the Custom Date format:
![]()
Accept default options as follows:
.jpg)
Accept default options as follows:
.jpg)
Select the relevant folder name and the following options to export to HTML format (with attachment):
.jpg)
Select the destination folder under which the exported emails will be saved.
After exporting, the following sub-folder for the selected source folder "XYZ" with the date and time of exporting appended will be created:
.jpg)
The following will appear under the sub-folder. The index.html will give an index page linking to all the emails and attachments under the Messages sub-sub-folder:
.jpg)
The emails under the Messages sub-sub-folder are in html format. Their filenames follows the filename format defined above. Their attachments are in the Attachments folders, one for each email with attachments.
_0.jpg)
Check whether the attachment files have been fully downloaded. If the file size is only 1KB, it means not fully downloaded in most of the cases.
The html files cannot be imported back to the email server. Export again to eml format as a double measure:
.jpg)
The exported sub-folder will have the same pair of index.html and Messages sub-sub-folder, but the index.html cannot link to email attachments. Each email has its own embedded attachments. There will be no separate Attachments folders.