Note
5/7/2025: Created with the help of Copilot
Intro
- Join slabs and beams properly in order that the quantities generated from the model are suitable for use.
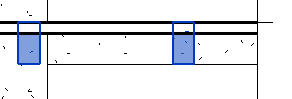
- For HKSMM, slabs should be modelled over beams, i.e. slabs should cut beams in Revit term. This in fact is Revit's default mode.
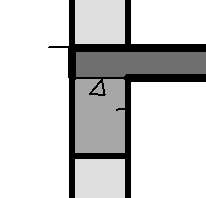
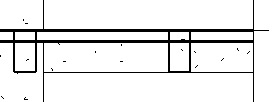
- Slabs and beams can appear to be joined / overlapped on plans and in sections but are not geometrically joined. Like the following:
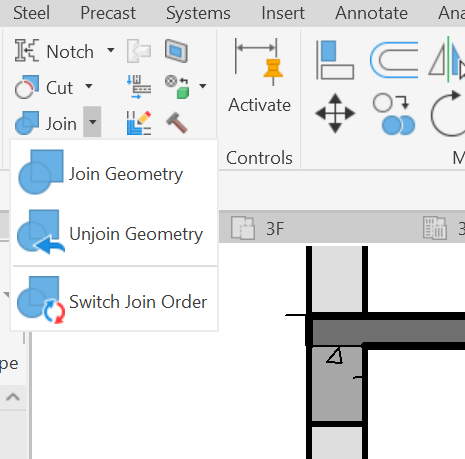
- To switch the join order, select any model element to show the Modify menu.
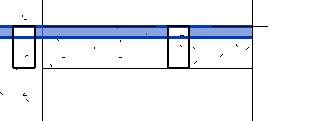
- Select Join at Geometry panel > Switch Join Order > relevant slab > relevant beam:
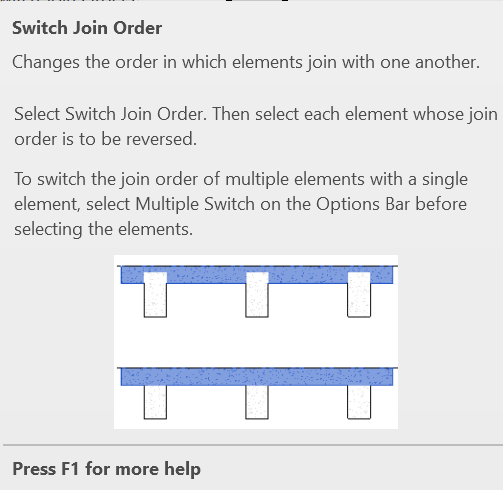
- The switch order can only rectify the problem after modelling.
- Better still, model it correctly in the first instance.
🎯 Why Beam–Slab Joins Go Wrong
Understand how these issues happen and how to catch and correct them.
- Geometry Almost Touches, But Doesn’t: Small misalignments leave elements technically unjoined.
- Sketched by Level, Not Geometry: Slabs snapped to levels or reference planes instead of actual beam faces.
- Copy/Paste Without Rejoining: Duplicated elements don’t retain join data.
- Linework Overrides or Coarse Detail: Visual tools mask missing joins in views.
- Lack of Awareness: Teams may assume visual contact equals geometric join.
✅ Beam–Slab Join QA Checklist
🧱 Geometry Placement
- ✔️ Use beam faces to sketch slabs directly.
- ✔️ Snap slab boundaries to actual beam geometry, not just to levels or reference planes.
- ✔️ Use the Align tool for precision when needed.
- ✔️ Visually check in 3D or section cuts to ensure actual contact.
- ✔️ Don’t rely on 2D guesswork.
🛠 Join Workflow Practices
- ✔️ Model slabs after beams, then join them.
- ✔️ Always use
Join Geometryexplicitly. - ✔️ Rejoin elements after edits to beam/slab placement.
- ✔️ Don’t assume visual contact means joined—confirm using automated tool.
- ✔️ Confirm joins using automated tool.
🧙♂️ Visual Deceptions
- ✔️ Avoid Linework overrides that hide gaps and make unjoined elements appear cleanly cut in views.
- ✔️ Use Fine detail in review views. Coarse and Medium may mask join gaps.
- ✔️ Run a visual audit by resetting overrides in key views.
🔁 Modeling Efficiency
- ✔️ Rejoin geometry after copy-paste or grouping, Join conditions are not preserved by default when duplicating elements.
- ✔️ Use automated tool to check.
📚 Team Awareness & Training
- ✔️ Train modelers on the purpose and impact of join geometry.
- ✔️ Include checklist in onboarding and BIM standards.
Automated checking tools
- pyRevit scripts have been written to :
- list unjoined slabs and beams,
- join them, and
- switch to slab over beam mode,
- for all beams and slab in close proximity.
- Individual manual adjustments are required for exceptional items.
- Some adjustments cannot be reversed if the model is saved.
- The model should be inspected to see whether the adjustments are correct before saving the model for further use.