Note
2 Aug 2024: Sequence of re-installing software packages added.
28 May 2019: Notes regarding unsuccessful installation added. Showing boot messages added.
7 May 2019: Contents added.
25 Dec 2014: First created as a flysheet without its own contents.
Intro
Ubuntu is a linux server software.
It has a desktop version and a server version, amongst other products.
The kernels of the desktop version and the server version are the same. The installation procedures are slightly different.
The desktop version provides a graphical user interface and the server version has a text based user interface, though a graphical user interface can subsequently be installed on the server version. Once installed with the graphical user interface, the two versions would not look much different to the users.
For small system, the desktop version should be easier to use.
Download
Download free of charge from https://ubuntu.com/desktop.
Install
Read installation guides:
Read fuller user guide here.
Set up storage drives
When allocating drive spaces, choose "Something else" with the desktop version and "manual" with the server version if one does not want to adopt the default settings, e.g. if one wants to have more options, such as setting one drive for "/boot" partition and one for "/" root system partition.
Set the computer bios to boot from the selected boot up disk. Remember to save the setting.
It is said that the boot partition needs only be about 300 Mb big. However, experience tells that it gets full easily because of frequent updating of the kernels and retainage of the last few kernels in the boot partition.
To remove kernels no longer needed to be retained, execute:
$ sudo apt autoremove
However, sometimes, the 300Mb boot partition has gone up to 100% full and insufficient to contain the required last few kernels such that there are no unused kernels to be removed to free up space.
Therefore, it is recommended to set up a boot partition of 1Gb.
Our company set-up:
- boot partition on the smaller SSD disk sold with the computer (now changed to a partition on a normal harddisk because of replacement of harddisk)
-
(updated, 17/8/2024)
- root system partition on the bigger hard disk relocated from old computer
- additional hard disks mounted on the system for storage of data
To see disks mounted, execute:
$ df -h
The mounting configuration file is contained in /etc/fstab.
To mount disk using graphical user interface permanently, click "Activities" , enter "disk" and select the "Disks":
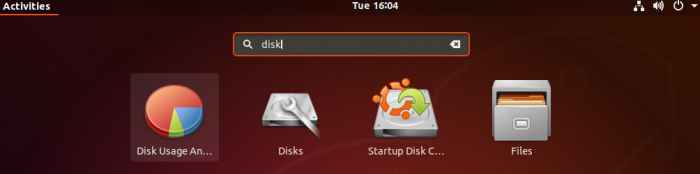
Mounting using "Disks" would change /etc/fstab permanently, without the need to change the /etc/fstab file manually.
Install application software packages
Update the software repository:
$ sudo apt update
Install software package:
$ sudo apt install <name of software>
Uninstall software package, keeping its configuration files:
$ sudo apt remove <name of software>
Uninstall software package and its configuration files:
$ sudo apt purge <name of software>
Alternatively, to bring up the graphical software package installation manager, execute:
$ sudo synaptic
or, on the graphical desktop, click "Activities" , enter "synaptic".
Upgrade Ubuntu release
Upgrade Ubuntu release:
$ sudo do-release-upgrade
Re-install
If it is necessary to re-install Ubuntu, back up everything first.
Ubuntu usually can recognize the existing boot and root systems and data disks when Ubuntu is re-installed.
Try to keep the new co-existing with the old and change later after the system is running.
Keep the existing configurations and re-use the existing configuration files as much as possible.
Most of the configuration files are stored in the /etc directory.
If Ubuntu is freshly installed, copy back the files and directories of the application software to the new system before re-installing the application software, e.g. the following files or directories:
- /etc/aliases
- /etc/aliases.db
- /etc/anacrontab
- /etc/apache2
- /etc/ca-certificates
- /etc/ca-certificates.conf
- /etc/dovecot
- /etc/hostname
- /etc/hosts
- /etc/openvpn
- /etc/phpmyadmin
- /etc/postfix
- /etc/samba
- /etc/vsftpd.conf
- /etc/vsftpd.chroot_list
Do not copy back the /etc/fstab file because the file system configuration there is no longer applicable to the new system and copying back will cause the new system not re-bootable.
If copied back, use "Disk" software mentioned above to make some changes so that the /etc/fstab file reflects the latest configuration, before re-booting.
The information of the previous user names, groups and passwords are contained in the following files:
- /etc/passwd
- /etc/group
- /etc/gshadow
- /etc/shadow
Use text editor and spreadsheet software to pick out old information in the old files and not superseded by the new information and copy it cover to the new files to enable the users to access their previous data directories, otherwise, re-redefine all the user names and passwords one by one.
Re-install the additional application software after coping back as described above.
The software might have updated the default configuration files over time but usually would tolerate using the old configuration files. Therefore, it is preferred to keep using the old configuration files to ensure that the software is successfully re-installed before making changes. There may be very slight changes to new configuration files. The installation process will usually prompt to ask which file to keep and give an opportunity to see a comparison. It may be better to record the changes first and change later. Using the new configuration files in conjunction with the old physical configurations may cause the software not workable. Carefully check for any slight changes to the new configuration files if using the new configuration files to add the old configuration settings.
If re-installation is not successful after :
$ sudo apt install <name of software>
try:
$ sudo apt remove <name of software>
or even:
$ sudo apt purge <name of software>
or even remove the software directory before:
$ sudo apt install <name of software>
Usually, it is the configuration which is causing problems.
(The following added, 28 May 2019)
The "remove" option will leave behind the user modified configuration files.
Rename them.
Re-install the application software.
Use the new configuration file if see if the application software can run successfully.
If yes, copy the user modifications in the old configuration file to the new so far as compatible, and see whether the software application can run successfully.
The "purge" option will remove all configuration files and other related software. Care should be exercised to review that the related software would not be required by other software.
Removing the software directory is the extreme option with little additional effect.
Sequence of re-installing software packages
(section added, 2 August 2024)
Software packages should be re-installed in the following sequence after a fresh system installation:
- Install Samba file server for Windows: to enable immediate use of file server
- Install network file system - set up client computer: so that NAS (network attached system) hard disks can be connected to use backups there by backintime
- Install backintime: to enable restoration of system files and other files
- Install OpenSSH services: to enable remote text terminal access to the server
- Install Ftp server: to enable remote download from the server if necessary
- Install OpenVPN: services to enable access to Samba file server
- Install TigerVNC: to enable remote access to the server's GUI desktop
- Install Postfix + Dovecot email servers: to enable use of email servers
- Install Apache2 web server
- Install MySQL server + PHP + phpMyAdmin
- Install Drupal 10 content management system
- Install Roundcube webmail client
Show messages when booting
(section added, 28 May 2019)
Execute:
$ sudo gedit /etc/default/grubSpecify:
#GRUB_CMDLINE_LINUX_DEFAULT="quiet splash"    (uncomment the default)
GRUB_CMDLINE_LINUX_DEFAULT=""                 (add)
Execute:
$ sudo update-grub