Computer Application 電腦應用
Computer Application 電腦應用 KCTangCommonly used Ubuntu Linux commands 常用的Ubuntu Linux指令
Commonly used Ubuntu Linux commands 常用的Ubuntu Linux指令 KCTangNote
18/7/2026: "Backup a directory of files", "Mount devices" and "Set up SSH keys to access remote computer" updated, and "Define time scheduled jobs" and "Install Chrony" sections added.
15/7/2026: "Update firmware" section added.
6/7/2026: More commands added to view system information.
23/4/2026: "Switch user" section added.
3/2/2026: "Recreate deleted user with specific UID" and "Recreate mailbox-only account" sections added.
29/1/2026: "micro" added as an editor. "gksudo gedit" removed.
29/7/2022: Setting up SSH keys added.
18/4/2022: cp -Rav added.
14/4/2022: Command to delete multiple empty sub-directories added.
18/12/2021: Updated.
6/10/2018: Updated.
27/9/2018: Updated.
21/3/2018: Updated.
27/8/2017: Created.
Intro
$ = the terminal command prompt against which commands are entered.
sudo = superuser acting as the root user.
<text> = information to be entered, angle brackets themselves are not to be entered.
[abc] = options a, b and c, brackets are not necessary.
Capitals and small letters behave differently.
Switch user
(section added, 23/4/2026)
Precede a terminal command with "sudo" if acting like the root user is required.
$ sudo <command statement>- Files created to be owned by the superuser.
Switch to act as the root user:
$ sudo -iExit root:
# exitSwitch to act as another user, and exit later:
$ sudo -u <another_name> -i
$ exit- No need to precede with sudo.
- Cannot act as the root user.
- Files created to be owned by "another_name".
View system information
(more commands added, 6/7/2026)
Show who am I:
$ whoamiShow current date and time:
$ dateShow this month's calendar:
$ calList processes with details like user ids, process ids (PID), CPU/memory usages, and commands of the current user:
$ ps auxor
$ ps -ef- showing less columns
or
$ ps aux | less- giving a progressive list
or
$ ps aux | grep dovecot- filter to show lines containing "dovecot"
or
$ ps -f- showing processes in the current terminal session
Show process id of a process by name:
$ pgrep -l dovecotList commands and process ids of the current user:
$ lsof -iList commands and process ids of all users:
$ sudo lsof -iShow real-time view of running processes:
$ top- press "q" to exit
- press "Shift + P" to sort by CPU
- press "Shift + M" to sort by memory
Aternatively:
$ htop- press "F10" to exit
List active internet connections (only servers)
$ sudo netstat -lptuor
$ sudo netstat -lptunDisplay disk space:
$ dfDisplay disk space in a more readable format:
$ df -hDisplay file contents:
$ cat <directory>/<sub-directory>/<filename>Use path and file names
<directory path> = <directory>/<sub-directory> referring from the current directory, without filename stated.
<filename path> = <directory>/<sub-directory>/<filename> referring from the current directory.
Precede with "/" if referring the path from the root directory. Deleting files under a sub-directory but incorrectly referring to the root directory is dangerous. Better avoid referring from the root directory.
Use "*" as a wildcard to represent texts before or after directory or file name, e.g. "*name", "name*" or "*" for any name.
Use "." alone to represent the current directory.
Use "../" to represent the directory immediately above the current directory.
Use "/." at the end to represent all under the stated <directory path>, e.g. "<sub-directory>/."
Search things
Find files with filenames containing <filename> in <directory path>:
$ find <directory path> -name "<filename>"Use "-iname" to ignore upper or lower case differences.
Find the files and open for editing:
$ find <directory path> -iname "<filename>" -exec micro '{}' \;Find text in files:
$ grep -[options] <text> <filename path>where option:
- -i = ignore upper or lower case differences
- -r = search sub-directories recursively
- -h = hide names of files preceding lines of output
- -w = search for exact text
- -c = count the number of matches
- -n = precede lines of output with the numbers of lines containing the text
- -v = show only lines not containing the text
- -l = list filenames only
- --colour = display the output in colour
Adjust disk space
Find duplicate files across several directories and replace duplicate files with hard links to save space:
$ sudo rdfind -makehardlinks true <directory path 1> <directory path 2>note: rdfind downloadable at https://rdfind.pauldreik.se/rdfind.1.html#lbAG.
Recover such harddisk space of deleted files not reported by "$ df":
$ cd /<directory name of the harddisk>
$ sudo dd if=/dev/zero of=tempfile
$ sudo rm tempfileEdit files
Text editor
$ sudo micro <filename path>or text editor
$ sudo nano <filename path>or GUI editor
$ sudo gedit <filename path>Shutdown and start up
Shutdown the system:
$ sudo shutdownShutdown and reboot the system:
$ sudo rebootStart a service:
$ sudo systemctl start <service name>or older method:
$ sudo service <service name> startor even older method:
$ sudo /etc/init.d/<service name> startRestart a service:
$ sudo systemctl restart <service name>or older method:
$ sudo service <service name> restartor even older method:
$ sudo /etc/init.d/<service name> restartStop a service:
$ sudo systemctl stop <service name>or older method:
$ sudo service <service name> stopor even older method:
$ sudo /etc/init.d/<service name> stopMount devices
(updated 18/7/2026)
Mount a single device, e.g. Network attached system, qnap2:
$ sudo mkdir /mnt/qnap2
$ sudo mount /mnt/qnap2
Can use /media or any /<folder> instead of /mnt.
Remounting required after reboot.
Umount single device "/mnt/qnap2":
$ sudo umount -l /mnt/qnap2Check devices defined in the filesystem table file "fstab" to be mounted upon booting:
$ cat /etc/fstabCheck devices actually mounted (this would show more than those defined in "fstab"):
$ sudo mount -lSet up SSH keys to access remote computer
(section added, 29/7/2022)
(updated, 15/7/2026)
SSH keys
rsa key is older.
ed25519 key is newer
Generate public/private rsa key pair:
$ sudo ssh-keygen -t rsa
(or)
$ sudo ssh-keygen -t ed25519
Enter file in which to save the key (/root/.ssh/<'id_rsa' or 'id_ed25519'>): <accept or change>
Skip entering passphrase if you do not want to use it upon logging in with ssh.
Skip it for use with remote drive to be automatically mounted.
If "sudo" is not used, the prompted file to save will be "/home/<your_user_name>/.ssh/<'id_rsa' or 'id_ed25519'>".
Use "sudo" because mounting remote drive would need "root".
If the file already exists, answer overwrite or not.
id_rsa (private key) and id_rsa.pub (public key) will actually be created.
or
id_ed25519 (private key) and id_ed25519.pub (public key) will actually be created.
Copy the public key to the remote computer connectable via <port_number>:
$ sudo ssh-copy-id -i /root/.ssh/id_rsa.pub -p <port_number> <login_name>@<remote_computer_address>
(or)
$ sudo ssh-copy-id -i /root/.ssh/id_ed25519.pub -p <port_number> <login_name>@<remote_computer_address>
Enter password to the remote login name.
It will check whether the key has already existed.
Add "-f" if desired to force copy to overwrite an existing key:
$ ssh-copy-id -f -i /root/.ssh/id_rsa.pub -p <port_number> <login_name>@<remote_computer_address>
(or)
$ ssh-copy-id -f -i /root/.ssh/id_ed25519.pub -p <port_number> <login_name>@<remote_computer_address>
Verify by logging in after successful copying:
$ sudo ssh -i /root/.ssh/id_rsa.pub -p <port_number> <login_name>@<remote_computer_address>
(or)
$ sudo ssh -i /root/.ssh/id_ed25519.pub -p <port number> <login_name>@<remote_computer_address>
If login successful, you are at the command prompt of the remote computer and can execute commands there:
$ ls -la .ssh
(to show)
$ ls -la .ssh/authorized_keys
(which contains the copied public key)
Enter "exit" after use.
Mount using a script file
To mount the remote computer (NAS qnap2) on /mnt/qnap2:
$ sudo micro setupsshfs.shEnter in the file:
sudo sshfs -o IdentityFile=/root/.ssh/id_rsa,port=12022,reconnect,ServerAliveInterval=15,ServerAliveCountMax=3,uid=1000,gid=1000,idmap=user,allow_other <login_name>@<remote_computer_address>:</remote/path> /mnt/qnap2No space permitted except as shown.
Save and exit.
Execute to mount:
$ sudo mkdir /mnt/qnap2
$ ./setupsshfs.sh
(to mount)
$ df -h
$ ls -ls /mnt/qnap2
(to verify)
This method is stable but the mounted drive needs to be remounted after re-booting.
Mount using fstab
To make the mounting permanent, configure in /etc/fstab:
$ sudo micro /etc/fstabAdd the following line:
sshfs#<login_name>@<remote_computer_address>:</remote/path>: /mnt/qnap2 fuse IdentityFile=/root/.ssh/id_rsa,port=<port number>,reconnect,ServerAliveInterval=15,ServerAliveCountMax=3,uid=1000,gid=1000,idmap=user,allow_other,_netdev 0 0No space permitted except as shown.
Save and exit.
Execute to mount:
$ sudo systemctl daemon-reload
$ sudo mount /mnt/qnap2
(or)
$ sudo mount -a
$ df -h
(to see whether actually mounted on /mnt/qnap2)
Try this to connect the mount if the remote computer was not connected when the computer was booted:
$ ls /mnt/qnap2However, this method is not very stable.
Mount using systemd service
The best is to configure it as a systemd service:
$ sudo micro /etc/systemd/system/mnt-qnap2.mountEdit as:
[Unit]
Description=SSHFS mount for QNAP2
After=network-online.target
Wants=network-online.target

[Mount]
What=sshfs#<login name>@<remote computer address>:</remote/path>
Where=/mnt/qnap2
Type=fuse
Options=IdentityFile=/root/.ssh/id_rsa,port=12022,reconnect,ServerAliveInterval=15,ServerAliveCountMax=3,uid=1000,gid=1000,idmap>

# no space permitted

[Install]
WantedBy=multi-user.target

[Service]
Restart=on-failure
RestartSec=120
TimeoutSec=10- TimeoutSec=10 → each sshfs attempt gives up after 10 seconds if the NAS isn’t reachable.
- RestartSec=120 → systemd waits 2 minutes before trying again.
Save and exit.
Execute to mount:
$ sudo systemctl daemon-reload
$ sudo systemctl enable mnt-qnap2.mount
$ sudo systemctl start mnt-qnap2.mount
$ sudo systemctl status mnt-qnap2.mount
See "setupsshfs.txt" in our administrator's home folder to see our company's exact settings for the above three methods.
Add or delete groups and users
Create new group:
$ sudo addgroup <new group name>Create new user, with a group and a home directory of the same name created if not already existing:
$ sudo adduser <new user name>To verify:
$ ls -lh /homeshows that the new directory has "drwxr-xr-x" permissions, i.e. "d" for directory with "rwx" owner permissions but "r-x" group and others' permissions.
Add a user to a group:
$ sudo adduser <user name> <group name>Delete user, and group of the same name, keeping the home directory:
$ sudo deluser <user name>Delete group:
$ sudo delgroup <group name>Change ownership
Change file or directory ownership:
$ chown -R <owner name>:<group name> <filename path>where:
- -R = recursively from and below if <filename> is a sub-directory
Change permissions
Change file or directory permissions:
$ chmod -R [ugoa][-+=][rwxXst] <filename path>where:
- -R = recursively from and below if <filename> is a <sub-directory>
- u=owner, g=group, o=others, a=all
- -+= mean minus, add or equal permissions
- r=read, w=write and delete, x=execute file or change directory into; Xst=for more special choices
- e.g. "u+rw" = add read and write permission to owner
An alternative form is:
$ chmod -R <ugo> <filename path>where:
- <ugo> is a 3 digit number where u=owner, g=group, o=others
- each digit can be:
- 0 for nothing
- 1 for execute "x"
- 2 for write "w"
- 3 = 1 + 2 = "wx"
- 4 for read "r"
- 5 = 4 + 1 = "rx"
- 6 = 4 + 2 = "rw"
- 7 = 4 + 2 + 1 = "rwx"
therefore:
- 666 = read and write permissions to all
- 777 = read, write and execute permissions to all
Change password
Change own password:
$ passwdChange other user 's password:
$ sudo passwd <other user's name>Recreate deleted user with specific UID
(section added, 3/2/2026)
To recreate deleted user account:
- Existing email folders: /home/xyz/Maildir
- User ID = 1234
- User name = xyz
Open Command Prompt.
Check the presence of directory xyz and the UID of the Maildir is 1234:
> ls -ls /home
> sudo ls -ld /home/xyz/Maildir
Re-create full user account with the same UID and login shell:
> sudo useradd -u 1234 -d /home/xyz -s /bin/bash xyz- -u 1234 → sets the UID to 1234
- -d /home/xyz → sets the home directory
- -s /bin/bash → sets the default shell
Set the password for the re-created user:
> sudo passwd xyzEnter and confirm the password.
Fix ownership of the Maildir (if needed) if the Maildir or home directory files are not owned by UID 1234 after recreating the user:
> sudo chown -R xyz:xyz /home/xyzEnsure UID is 1234 and Maildir is accessible:
> id xyz
> sudo -u xyz ls /home/xyz/Maildir
If another user already exists with UID 1234, resolve that conflict first (either delete or re-assign that user).
Always back up the Maildir before making changes, just in case ownership or permissions get misapplied.
Recreate mailbox-only account
(section added, 3/2/2026)
To recreate deleted user account for mail delivery:
- Existing email folders: /home/xyz/Maildir
- User ID = 1234
- User name = xyz
Open Command Prompt.
Check the presence of directory xyz and the UID of the Maildir is 1234:
> ls -ls /home
> sudo ls -ld /home/xyz/Maildir
Re-create mailbox-only account with the same UID but without login shell:
> sudo useradd -u 1234 -d /home/xyz -s /usr/sbin/nologin xyz-s /usr/sbin/nologin → prevents shell login
Set a locked password o nobody can log in interactively:
> sudo passwd -l xyzEnter and confirm the password.
Fix ownership of the Maildir (if needed) if the Maildir or home directory files are not owned by UID 1234 after recreating the user:
> sudo chown -R xyz:xyz /home/xyzEnsure UID is 1234 and Maildir is owned by xyz.
> id xyz
> ls -ld /home/xyz/Maildir
If another user already exists with UID 1234, resolve that conflict first (either delete or re-assign that user).
Always back up the Maildir before making changes, just in case ownership or permissions get misapplied.
Optional: Restrict home directory access if you want to prevent accidental browsing:
> sudo chmod 700 /home/xyz- Only xyz (and root) can access it.
The account will still be valid for mail delivery and IMAP/POP access using Postfix + Dovecot.
The nologin shell ensures it can’t be used for SSH or console login.
Create directories
Make new directory:
$ mkdir <directory>Make new directory and sub-directory in one go, "-p" means making parent directory also:
$ mkdir -p <directory>/<sub-directory>Remove files and directories
$ rmdir <directory path>Remove one empty sub-directory and its parent directory in one go:
$ rmdir /<parent directory>/<sub-directory>Remove all empty sub-directories and their parent directories in one go:
$ cd <directory>
$ find . -type d -empty -print -delete
If directory is empty, print name then delete.
(added, 14/4/2022)
Remove file:
$ rm <filename path>Remove files and directories starting from and below sub-directory, even for empty sub-directory:
$ rm -r <directory path>List and change directories
List names of current directory contents, hiding entries starting with ".":
$ lsList current directory contents, with more detailed information:
$ ls -[options]where options
- l = list also permissions, owners, date and size
- a = list also entries starting with "."
- h = to be used in conjunction with "l", show file sizes in "K" or "M"
List other directory contents:
$ ls -[options] <directory path>Change working directory:
$ cd <directory path>Copy files and directories
(section added, 18/4/2022)
Copy a file within the same directory:
$ cp <source filename> <new filename>Copy a file across different directories, keeping the same filename:
$ cp <source directory>/<sub-directory>/<filename> <target directory>/<sub-directory>/.to give:
<target directory>/<sub-directory>/<filename>Copy a file across different directories, to a new filename:
$ cp <source directory>/<sub-directory>/<filename> <target directory>/<sub-directory>/<new filename>to give:
<target directory>/<sub-directory>/<new filename>Omit:
<source directory>/<sub-directory>/if copying files in the current directory.
Copy directories recursively, keeping the directory name:
$ cp -R <source directory>/<sub-directory A> <target directory>/.to give:
<target directory>/<sub-directory A>Copy directories recursively:
$ cp -R <source directory>/<sub-directory A> <target directory>/<sub-directory B>If sub-directory B exists, all files and directories under sub-directory A will be copied under sub-directory B.
If sub-directory B does not exist, it will be created, and all files and directories under sub-directory A will be copied under it.
Copy directories recursively (-R) keeping original attributes (-a) and showing verbose progress (-v):
$ cp -Rav <source directory>/<sub-directory A> <target directory>/<sub-directory B>Move files and directories
Backup a directory of files
(updated, 19/7/2026)
Archive (-a) all files under a sub-directory (A) and all sub-sub-directories underneath to the same sub-directory name under another sub-directory (B) keeping all the file attributes, symbolic links and time-stamps unchanged, preserving hard-links (-H) and displaying the progress verbosely (-v) and the numbers in human-readable format (-h):
$ sudo rsync -aHvh <source directory>/<sub-directory A> <target directory>/<sub-directory B>/to give:
<target directory>/<sub-directory B>/<sub-directory A>The command can be used repeatedly to update the files in sub-directory A in the new location. If the source files have not been changed, no over-writing copying will be done. This would save time and is better than the cp command.
Options:
-a = archive mode (permissions, symlinks, etc.)
-A = preserve ACL permissions
-H = use hard links
-X = preserve extended attributes
-v = verbose
--ignore-existing = skips files that already exist on the destination
--remove-source-files = remove from source
--dry-run = shows what would happen, but doesn’t actually copy.
--info=progress2 = gives a running count of files and progress
/A/B/ /C/D/means rsync folders and files under B/ to under D/.
/A/B /C/D/means rsync B to under D/.
Update firmware
(section added, 15/7/2026)
The server may notify that "n devices have a firmware upgrade available. Run `fwupdmgr get-upgrades` for more information."
Check available upgrades:
$ sudo fwupdmgr get-upgradesApply the upgrades:
$ sudo fwupdmgr updateReboot:
$ sudo rebootVerify no more upgrades:
$ sudo fwupdmgr get-devices
$ sudo fwupdmgr get-upgrades
Note:
- Backup important data before updating (rare risk of instability).
- Keep using AC power while upgrading.
- Do not interrupt the update process — forced shutdowns can affect hardware.
- Some updates are staged and applied at the next reboot.
- Check vendor support: not all devices publish firmware via LVFS; unsupported ones require manual vendor tools.
- Logs: If something fails, check
/var/log/fwupd.logfor details.
Define time scheduled jobs
(section added, 18/7/2026)
However, Ubuntu does not have those files, meaning that all users can use cron.
List to show users permitted to use cron:
$ ls -l /var/spool/cron/crontabsTo enable user crontab:
Check where the user and "crontab" are in groups:
$ groupsIf not in, add user to the crontab group:
$ sudo usermod -aG crontab <user name>Log out and back in (or reboot) to apply group membership.
Try again:
$ crontab -eEnter as a simple test:
* * * * * echo "Cron test $(date)" >> ~/cron_test.logSave and exit. Within a minute or two, you should see lines appearing in ~/cron_test.log. That proves the user crontab is active.
Add user, alternatively:
$ sudo touch /etc/cron.allow
$ echo <user name> | sudo tee -a /etc/cron.allow
Give a complete snapshot of all scheduled jobs on the system:
$ echo "=== User crontab ==="; crontab -l 2>/dev/null
$ echo "=== Root crontab ==="; sudo crontab -l
$ echo "=== /etc/cron.d ==="; sudo grep -r . /etc/cron.d/ 2>/dev/null
$ echo "=== cron.daily ==="; ls /etc/cron.daily
$ echo "=== cron.weekly ==="; ls /etc/cron.weekly
$ echo "=== cron.monthly ==="; ls /etc/cron.monthly
$ echo "=== anacrontab ==="; cat /etc/anacrontab
Show what is actually running:
journalctl -u cron
(or)
grep CRON /var/log/syslog
Install Chrony
(section added, 19/7/2026)
Chrony is a modern time synchronization service that keeps the server’s system clock accurate by using the Network Time Protocol (NTP).
It has not been properly installed when Ubuntu 26.4 is freshly installed. The error message appears only when the server is starting up and is only seen when the starting up messages roll up the screen.
The following can verify and rectify as necessary:
Make sure chrony is installed:
$ sudo apt update
$ sudo apt install chrony -y
Ensure the _chrony user/group exist:
$ sudo adduser --system --no-create-home --group --shell /usr/sbin/nologin _chronyFix ownership of chrony directories:
$ sudo chown -R _chrony:_chrony /var/lib/chrony
$ sudo mkdir -p /run/chrony
$ sudo chown _chrony:_chrony /run/chrony
(Optional) Fix or disable keyfile:
$ sudo chown root:_chrony /etc/chrony/chrony.keys
$ sudo chmod 640 /etc/chrony/chrony.keys
or comment out 'keyfile /etc/chrony/chrony.keys' in /etc/chrony/chrony.conf.
Reload systemd and restart chrony:
$ sudo systemctl daemon-reexec
$ sudo systemctl daemon-reload
$ sudo systemctl enable chrony
$ sudo systemctl restart chrony
$ sudo systemctl status chrony
Verify synchronization:
$ chronyc tracking
$ chronyc sourcesSet Up Ubuntu Server 架設Ubuntu伺服器
Set Up Ubuntu Server 架設Ubuntu伺服器 KCTangNote
17/7/2026: Retained list of files expanded. Typo corrected.
29/1/2026: "gedit" changed to "micro". Add Editors section added.
2/8/2024: Sequence of re-installing software packages added.
28/5/2019: Notes regarding unsuccessful installation added. Showing boot messages added.
7/5/2019: Contents added.
25/12/2014: First created as a flysheet without its own contents.
Intro
Ubuntu is a linux server software.
It has a desktop version and a server version, amongst other products.
The kernels of the desktop version and the server version are the same. The installation procedures are slightly different.
The desktop version provides a graphical user interface and the server version has a text based user interface, though a graphical user interface can subsequently be installed on the server version. Once installed with the graphical user interface, the two versions would not look much different to the users.
For small system, the desktop version should be easier to use.
Download
Download free of charge from https://ubuntu.com/desktop.
Install
Read installation guides:
Read fuller user guide here.
Set up storage drives
When allocating drive spaces, choose "Something else" with the desktop version and "manual" with the server version if one does not want to adopt the default settings, e.g. if one wants to have more options, such as setting one drive for "/boot" partition and one for "/" root system partition.
Set the computer bios to boot from the selected boot up disk. Remember to save the setting.
It is said that the boot partition needs only be about 300 Mb big. However, experience tells that it gets full easily because of frequent updating of the kernels and retainage of the last few kernels in the boot partition.
To remove kernels no longer needed to be retained, execute:
$ sudo apt autoremoveHowever, sometimes, the 300Mb boot partition has gone up to 100% full and insufficient to contain the required last few kernels such that there are no unused kernels to be removed to free up space.
Therefore, it is recommended to set up a boot partition of 1Gb.
Our company set-up:
- boot partition on the smaller SSD disk sold with the computer (now changed to a partition on a normal harddisk because of replacement of harddisk)
-
(updated, 17/8/2024)
- root system partition on the bigger hard disk relocated from old computer
- additional hard disks mounted on the system for storage of data
To see disks mounted, execute:
$ df -hThe mounting configuration file is contained in /etc/fstab.
To mount disk using graphical user interface permanently, click "Activities" , enter "disk" and select the "Disks":
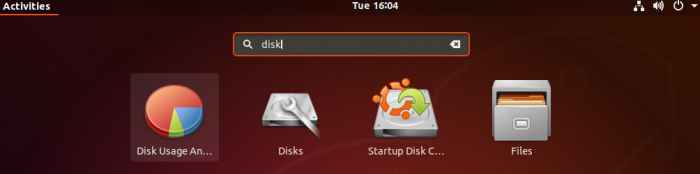
Mounting using "Disks" would change /etc/fstab permanently, without the need to change the /etc/fstab file manually.
Install application software packages
Update the software repository:
$ sudo apt updateInstall software package:
$ sudo apt install <name of software>Uninstall software package, keeping its configuration files:
$ sudo apt remove <name of software>Uninstall software package and its configuration files:
$ sudo apt purge <name of software>Alternatively, to bring up the graphical software package installation manager, execute:
$ sudo synapticor, on the graphical desktop, click "Activities" , enter "synaptic".
Add Editors
(section added, 29/1/2026)
Install editors:
$ sudo apt install micro
$ sudo apt install nano
$ sudo apt install gedit
micro and nano are text editors to be run inside a command line terminal.
gedit is a GUI editor which may be pre-installed.
micro is more convenient to use because it can use Ctrl-C or Ctrl-Shift-C to copy and Ctrl-V or Ctrl-Shift-V to paste when used inside the command line terminal on the server.
However, when the server is accessed through ssh from Windows command prompt or PowerShell, Ctrl-C, Ctrl-Shift-C, Ctrl-V or Ctrl-Shift-V are used by Windows for its clipboard.
Ctrl-C or Ctrl-Shift-C inside micro still copies text in micro, but Ctrl-V or Ctrl-Shift-V inside micro pastes text copied in Windows clipboard not micro's clipboard.
To resolve the conflict, disable Ctrl-Shift-V in Windows command prompt or PowerShell:
- Open Windows command prompt or PowerShell.
- Right click the top border bar of the command window to show a pull down menu.
- Select Settings > Actions.
- Move the mouse display arrow down to Paste, next to the box on the right containing ctrl+shift+v.
- Select on the right pen icon > Delete icon > Yes, delete key binding icon.
- Select Save at the bottom.
- Select X on the right of Settings at the top border bar to return to the command window.
This configuration has the following benefits:
- Using Ctrl-C or Ctrl-Shift-C in micro or Windows (anywhere) copies the text there.
- Using Ctrl-Shift-V in micro pastes text copied in micro's clipboard.
- Using Ctrl-V in micro pastes text copied in Windows clipboard.
Upgrade Ubuntu release
Upgrade Ubuntu release:
$ sudo do-release-upgradeRe-install
If it is necessary to re-install Ubuntu, back up everything first.
Ubuntu usually can recognize the existing boot and root systems and data disks when Ubuntu is re-installed.
Try to keep the new co-existing with the old and change later after the system is running.
Keep the existing configurations and re-use the existing configuration files as much as possible.
Most of the configuration files are stored in the /etc directory.
If Ubuntu is freshly installed, copy back the files and directories of the application software to the new system before re-installing the application software, e.g. the following files or directories:
- /etc/aliases
- /etc/aliases.db
- /etc/anacrontab
- /etc/apache2
- /etc/arangodb3
- /etc/ca-certificates
- /etc/ca-certificates.conf
- /etc/dovecot
- /etc/exports
- /etc/hostname
- /etc/hosts
- /etc/letsencrypt
- /etc/openvpn
- /etc/phpmyadmin
- /etc/postfix
- /etc/samba
- /etc/ssh
- /etc/vsftpd.conf
- /etc/vsftpd.chroot_list
(list expanded, 18/7/2026)
Do not copy back the /etc/fstab file because the file system configuration there is no longer applicable to the new system and copying back will cause the new system not re-bootable.
If copied back, use "Disk" software mentioned above to make some changes so that the /etc/fstab file reflects the latest configuration, before re-booting.
The information of the previous user names, groups and passwords are contained in the following files:
- /etc/passwd
- /etc/group
- /etc/gshadow
- /etc/shadow
Use text editor and spreadsheet software to pick out old information in the old files and not superseded by the new information and copy it cover to the new files to enable the users to access their previous data directories, otherwise, re-redefine all the user names and passwords one by one.
Re-install the additional application software after coping back as described above.
The software might have updated the default configuration files over time but usually would tolerate using the old configuration files. Therefore, it is preferred to keep using the old configuration files to ensure that the software is successfully re-installed before making changes. There may be very slight changes to new configuration files. The installation process will usually prompt to ask which file to keep and give an opportunity to see a comparison. It may be better to record the changes first and change later. Using the new configuration files in conjunction with the old physical configurations may cause the software not workable. Carefully check for any slight changes to the new configuration files if using the new configuration files to add the old configuration settings.
If re-installation is not successful after :
$ sudo apt install <name of software>try:
$ sudo apt remove <name of software>or even:
$ sudo apt purge <name of software>or even remove the software directory before:
$ sudo apt install <name of software>Usually, it is the configuration which is causing problems.
(The following added, 28/5/2019)
The "remove" option will leave behind the user modified configuration files.
Rename them.
Re-install the application software.
Use the new configuration file if see if the application software can run successfully.
If yes, copy the user modifications in the old configuration file to the new so far as compatible, and see whether the software application can run successfully.
The "purge" option will remove all configuration files and other related software. Care should be exercised to review that the related software would not be required by other software.
Removing the software directory is the extreme option with little additional effect.
Sequence of re-installing software packages
(section added, 2/8/2024)
Software packages should be re-installed in the following sequence after a fresh system installation:
- Install Samba file server for Windows: to enable immediate use of file server
- Install network file system - set up client computer: so that NAS (network attached system) hard disks can be connected to use backups there by backintime
- Install backintime: to enable restoration of system files and other files
- Install OpenSSH services: to enable remote text terminal access to the server
- Install Ftp server: to enable remote download from the server if necessary
- Install OpenVPN: services to enable access to Samba file server
- Install TigerVNC: to enable remote access to the server's GUI desktop
- Install Postfix + Dovecot email servers: to enable use of email servers
- Install Apache2 web server
- Install MySQL server + PHP + phpMyAdmin
- Install Drupal 10 content management system
- Install Roundcube webmail client
Show messages when booting
(section added, 28/5/2019)
Execute:
$ sudo micro /etc/default/grubSpecify:
#GRUB_CMDLINE_LINUX_DEFAULT="quiet splash"    (comment out the default)
GRUB_CMDLINE_LINUX_DEFAULT=""                 (add)
(typo corrected, 17/7/2026)
Execute:
$ sudo update-grub
Install Samba file server for Windows
Install Samba file server for Windows KCTangNote
7/7/2026: Minor typo in "Define Crontab" corrected.
29/1/2026: "nano" changed to "micro".
31/10/2025: "recycle.exclude" corrected.
26/2/2023: Trash folder added.
28/7/2022: Correct the positions of two statements. "gedit" changed to "nano" in case non gui interface is used.
7/5/2019: Slight adjustments. "gksudo gedit" changed to "sudo gedit" as Ubuntu 18.04 dropped "gksudo".
25/12/2014: First created.
Intro
Samba file server enables specified directories to be accessible by Windows computers on the same network.
Install
Install the packages:
$ sudo apt update
$ sudo apt install samba
$ sudo apt install samba-vfs-modules
samba-vfs-modules is used to enable Trash folder.
(vsf-modules added, 26/2/2023)
Define a workgroup
Edit the config file:
$ sudo micro /etc/samba/smb.conf
Define workgroup name as "kctcl" in the "[global]" section:
workgroup = kctcl
Uncomment to restrict access to server users only:
security = user
Add the following if OpenVPN used:
hosts allow = 192.168.0. 10.8.0. 127.0.0.
(added. 7/5/2019):
Put the last two statements under the "[global]" section after "Networking" instead of at the end, otherwise "security = user" will apply to the last shared directory causing it to be non-assessible.
(added, 28/7/2022)
Define directories to be shared
Add a section at the end to share directories:
[<sub-directory name or other short name>]
pth = /<directory name>/<sub-directory name>
browseable = yes
guest ok = yes
read only = no
create mask = 0775
directory mask = 0775
# do not include the next two lines if access is restricted to the owning user (added 7 May 2019)
force user = nobody
force group = nogroup
# Enable Trash folder, KCTang 18/1/2023
vfs object = recycle
# Specify a folder relative to the path above
# Do not specify absolute path unless the path is outside the path above
# The folder will be created automatically upon first deletion
# Hidden folder (prefixed with '.') not used
# Use %U if want to record the user name, not used KCTang 26/2/2023
#recycle:repository = Trash/%U
recycle:repository = Trash
# Mode permits all users to delete
recycle:directory_mode = 0775
# Change last accessed time when moved to the Trash folder
recycle:touch = yes
# Keep modified time
recycle:touch_mtime = no
# Keep folder tree
recycle:keeptree = yes
# Files of the same name deleted will be kept with newer deleted file named as "Copy # of ..."
recycle:versions = yes
# Exclusions
recycle:exclude = *.tmp, ~*, thumb.db
(Trash folder added, 26/2/2023)
("recycle.exclude" corrected, 31/10/2025)
Create the directory to be shared, if not already existing:
$ sudo mkdir -p /<directory name>/<sub-directory name>
Change ownership of the directory:
$ sudo chown nobody:nogroup /<directory name>/<sub-directory name>
Start service
Start or restart Samba service whenever the config file is changed:
$ sudo systemctl restart smbd nmbd
or, if ".service" is not automatically appended when executing the above command:
$ sudo systemctl restart smbd.service nmbd.service
Define Crontab
Define crontab to delete Samba Trash files older than 30 days:
$ sudo crontab -e
Edit to include:
#Delete Samba Trash files older than 30 days
0 0 * * * /usr/bin/find /kctcl/Trash -type f -atime +30 -delete
(added, 26/2/2023)
(minor typo corrected, 7/7/2026)
Install network file system
Install network file system KCTangNote
- 17/7/2026: "Mount and connect to remote computer" added.
- 29/1/2026: "gedit' changed to "micro".
- 22/8/2022: Client mount setting revised.
- 17/8/2022: Client mount setting revised.
Intro
NFS network file system enables sharing of directories on a Ubuntu server to another Ubuntu client computer.
Install on server computer
Install network file system:
$ sudo apt-get install nfs-kernel-server
Configure to specify the directory to be exported:
$ sudo micro /etc/exports
Specify:
/<directory exported> <ip address of computer to export to> (rw, sync, no_root_squash)
where "rw" = read and write.
Start the server, required after any rebooting:
$ sudo systemctl start nfs-kernel-server
or
$ sudo service nfs-kernel-server start
Set up client computer
Install nfs-common on the client side:
$ sudo apt install nfs-common
Create a local directory:
$ sudo mkdir -p /media/<local directory>
(or use "mnt' instead of "media")
Mount the remote directory temporarily:
$ sudo mount <ip address of NFS server>:/<directory exported from the NFS server> /media/<local directory>
(or use "mnt' instead of "media")
but remounting required after every reboot.
To keep the mounting permanently unaffected by reboot, edit "fstab" file:
$ sudo micro /etc/fstab
Add a line:
<ip address of NFS server>:/<directory exported from the NFS server> /media/<local directory> nfs auto,vers=4.0 0 0
(or use "mnt' instead of "media")
(revised 17/8/2018, "defaults" changed to "auto")
(revised 22/8/2022, "vers=4.0" added)
Mount again all devices as defined in the "fstab" file after changes:
$ sudo mount -a
Check devices actually mounted (this would show more than those defined in "fstab"):
$ sudo mount -l
Mount and connect to remote computer
(section added, 17/7/2026)
See Set up SSH keys to access remote computer.
Install backintime
Install backintime KCTangNote
17/7/2026: SSH settings added.
31/1/2023: Updated.
12/5/2020: Updated.
30/5/2019: Created.
Intro
backintime enables incremental backup of files.
Listing it as the first application software to be installed after installing Ubuntu is an indication of the importance of backing up files.
Install
Execute:
$ sudo apt install backintime*$ sudo apt install backintime-qt
(updated 12/5/2020)
Bring up
Select Activities.
Type "ba" to bring up some application icons:

Select Back in Time (root) to show the front page:

Alternatively, execute
$ sudo i backintime
or
$ pkexec backintime
However, the terminal commands are not reliable to bring up backintime. Using the graphical desktop is more reliable.
(updated 12/5/2020)
Config
Select the setting button:

Select the General page.
Select Mode = Local for local drives:
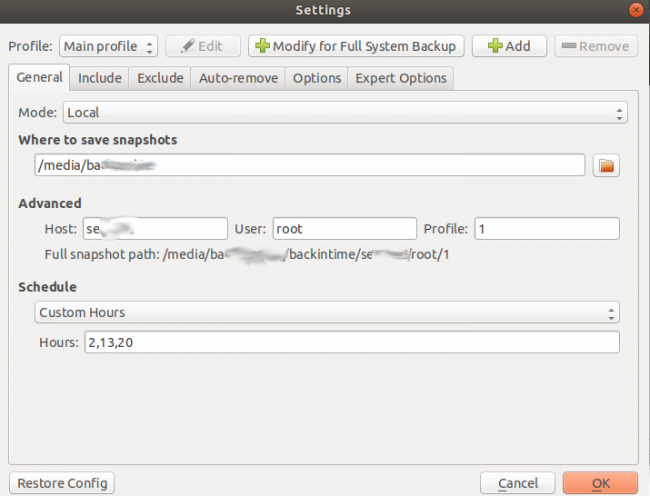
Specify:
- where to save snapshots
- host computer name, user name "root" to have widest permission, profile starting with 1
- scheduled intervals and hours to save snapshots.
For accessing remote computer, see Set up SSH keys to access remote computer for creating keys first and come back.
Select Mode = SSH for remote drives:
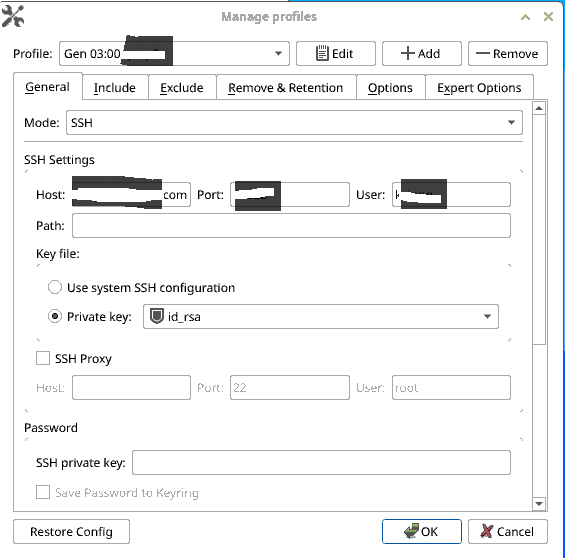
- Host = <remote_computer_address>
- Post = port number permitted by the remote computer to access it
- User = <login_name>
The <login_name> and <remote_computer_address> should match those used to create the SSH keys.
Select Private key. Choose <Select another file>:
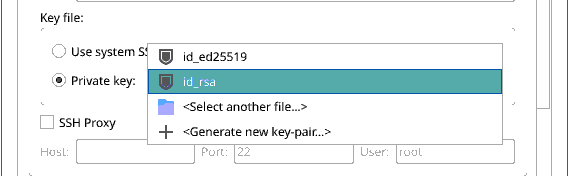
The local computer's /root directory will be opened for choosing keys.
Select "id_rsa":
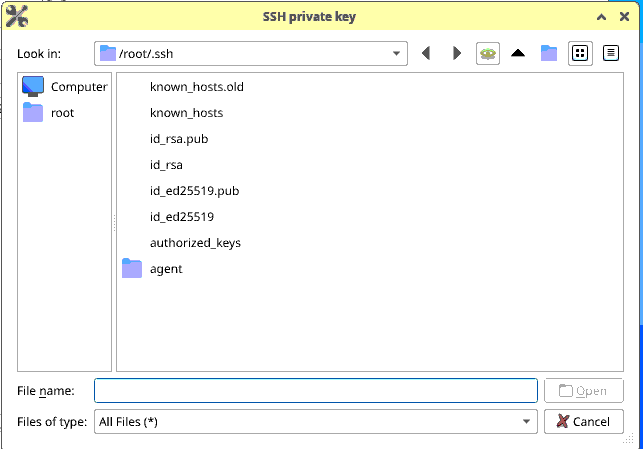
Click Open to confirm, and exit to the General page.
Go back to the General page, if it is also exited.
Specify:
- scheduled intervals and hours to save snapshots
(SSH settings added, 17/7/2026)
Select the Include page > Add folder to select the folders to include in backup :
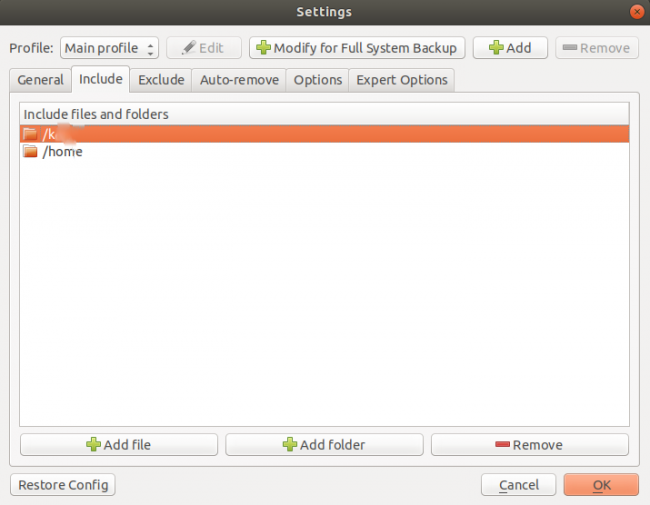
Add file can only include files not a whole folder.
Select Exclude page.
Generally accept the default exclusions.
Select Add folder to select sub-folders to be excluded from the backup when their parent folders have been included:

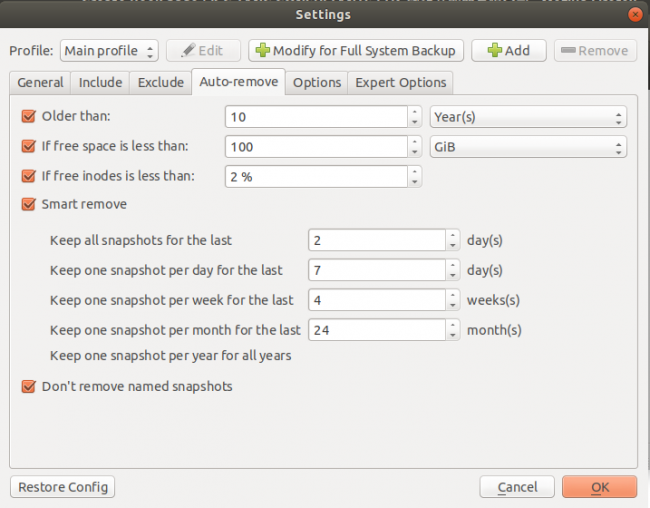
Select Auto-remove to set time criteria to automatically remove old spanshots:
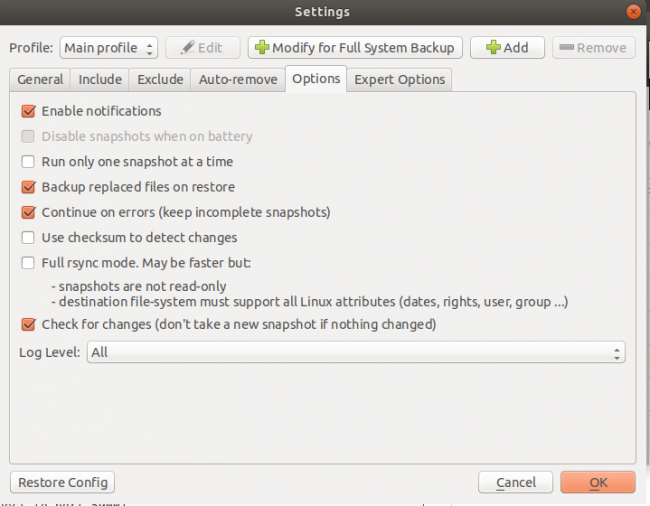
Select Options page.
Generally accept the default settings.
Select Expert Options page.
Generally accept the default settings.
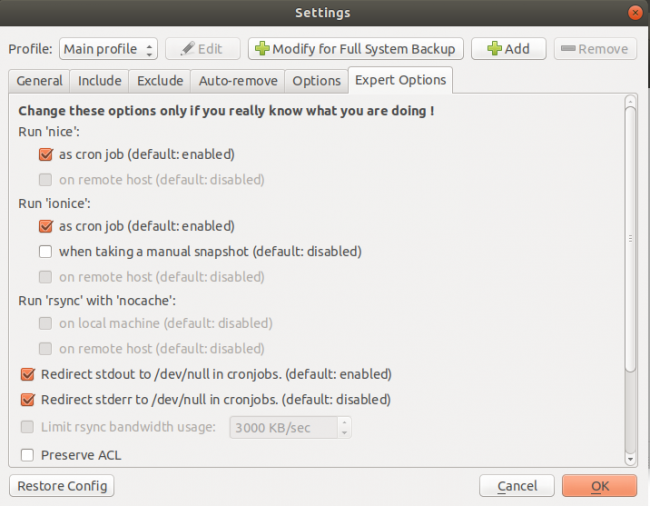
Select OK to save.
Exit the software. It will run at the specified times.
Take snapshot any time
Bring up the front page:
Select the take snapshot button:

It would take some time to take a snapshot depending on the extent of file changes since the last snapshot.
Restore
Restore backup files when the present files have been lost or corrupted.
Bring up the front page:

Select:
- the desired snapshot in the left window
- the desired backup folder in the middle window
- one or more folders or files in the right window
Select the restore button:

Select whether to backup local files with a trailing suffix before restoring the old files:
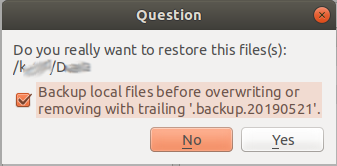
Select Yes to proceed if for sure.
Folders and files will be restored.
It would take some time depending on the size to be restored.
Let the process finish with the use permissions set back to the original state.
If only the folders in the middle window is selected before the restore button is selected, this message will appear to indicate that the "/" root folder will be restored:
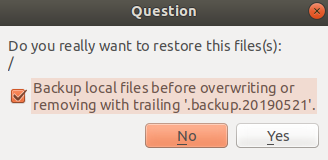
It is important not to just select the folders in the middle window and select the restore button to proceed, because it will easily restore files to the "/" root directory and overwrite the still valid system and programme files in the root directory to cause problems.
Repair
Sometimes, backintime cannot be brought up to run, even after a removal and re-installation.
This can be caused by the removal of some other programmes which backintime depends on but which have been removed when some other application software is removed. Re-installation of backintime may not bring them back.
The following shows the programmes which backintime depends on:
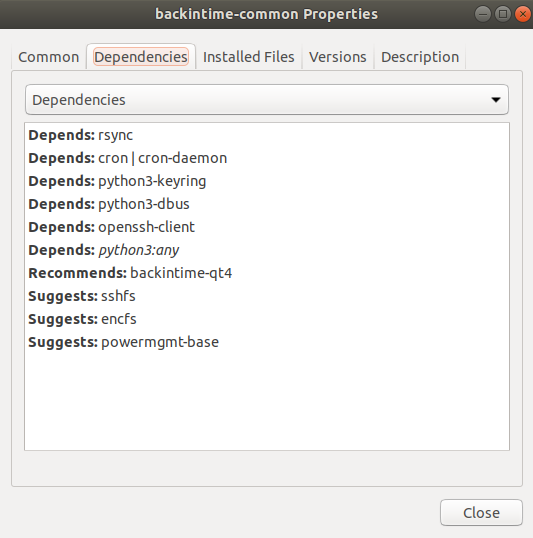
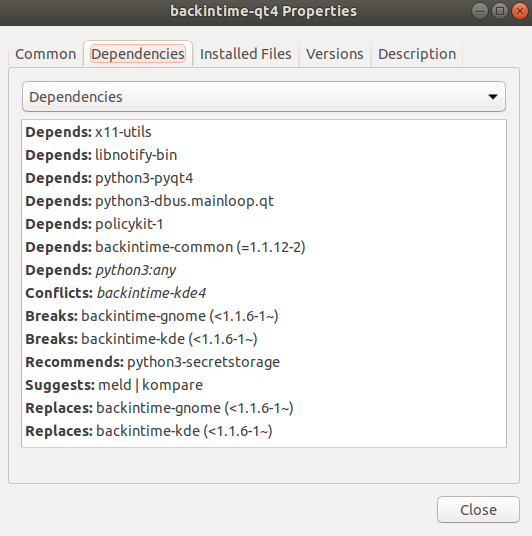
Try to re-install the missing programmes:
$ sudo apt install <name of programme>
rsync, python3, openssh-client are likely missing programmes.
In case of the following error:
Traceback (most recent call last):
  File "/usr/share/backintime/common/backintime.py", line 28, in <module>
    import config
  File "/usr/share/backintime/common/config.py", line 45, in <module>
    import tools
  File "/usr/share/backintime/common/tools.py", line 37, in <module>
    from packaging.version import Version
ModuleNotFoundError: No module named 'packaging'
Execute:
$ sudo apt install python3-packaging
(last 2 paragraphs added, 31/1/2023)
Install OpenSSH services
Install OpenSSH services KCTangNote
29/1/2026: "gedit" changed to "micro".
8/12/2024: moved to "install VNC Server" page.
26/5/2020: systemctl file command revised.
27/5/2019: Security settings added.
11/4/2018: Page added.
Intro
OpenSSH enables remote client computers and smartphones to access the server computer's text based terminal shell in a secured manner. "SSH" stands for secured shell.
Install OpenSSH server
Execute:
$ sudo apt install openssh-server
The software will be installed at /etc/ssh.
In case of complaint of no directory, execute to make directory first:
$ sudo mkdir /etc/ssh
Edit config file:
$ cd /etc/ssh
$ sudo micro sshd_config
Specify:
# Port 22                             (which is the default port)
Port 2nnn                             (change to some other 4-digit port, 2nnn)
# PermitRootLogin prohibit-password   (meaning no password required)
PermitRootLogin no                    (meaning no root login)
(security settings added, 27 May 2019)
Restart the service:
$ sudo systemctl restart sshd.service
or
$ sudo systemctl restart ssh.service
Check status:
$ sudo systemctl status sshd.service
If found disabled:
$ sudo systemctl enable ssh
(status check added, 26 May 2020)
Change the internet router to permit the use of port 2nnn.
The above is already sufficient for use. Read https://help.ubuntu.com/lts/serverguide/openssh-server.html for more configurations, if desired.
Install SSH client on Windows
Download Putty from https://www.putty.org/ and install.
Enter the Host Name, change the Port to 2nnn, highlight Default Settings and press Save:
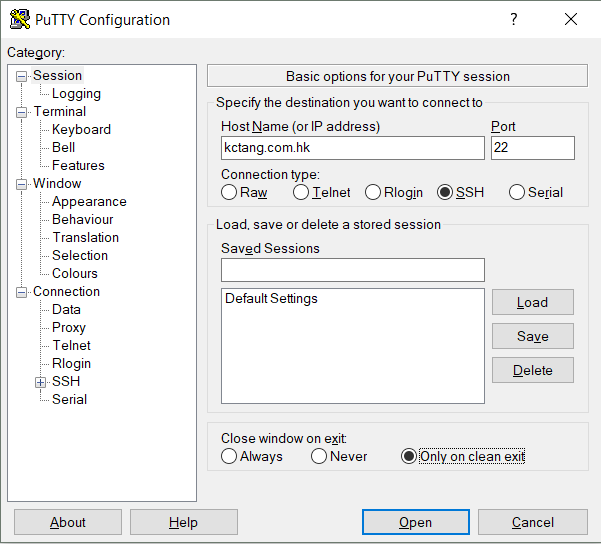
"Only on clean exit" is the default. When the server's terminal window is exited with "exit" or "logoff", the PuTTY screen and connection would only close if other processes using the PuTTY connection have all been closed.
Press Open.
Accept the next screen to confirm the server's security key shown, if trusted. This would be necessary for the first time only.
Log in as the usual command terminal. No graphical interface is provided.
Use PuTTYgen that comes installed with PuTTY to generate key pairs, only if required. Read its Help.
Install VNC server
Install VNC server KCTangNote
17/7/2026: Updated.
22/4/2026: Updated.
29/1/2026: "gedit" changed to "micro".
11/6/2025: Updated.
8/12/2024: Created.
Intro
VNC server enables remote access to the graphical desktop of Ubuntu server.
There are different VNC server packages: x11vnc, Tight VNC server, Tiger VNC server, etc.
x11vnc is described on a different page.
Set router
Set the internet router to permit access to the server through ports 5900, 5901, 5902, etc.
Disable Wayland
(no longer required for Ubuntu 26.04 LTS, 17/7/2026)
Ubuntu-desktop uses gdm3 (Wayland) display manager. Wayland is not compatible with VNC servers.
Execute to disable Wayland:
$ sudo micro /etc/gdm3/custom.conf
Remove "#" to uncomment the following line:
#WaylandEnable=false
Reboot the computer.
Install VNC server
Log in an account on the server directly or via a SSH client such as Putty installed as Install OpenSSH services.
Execute:
$ sudo apt install xfce4 xfce4-goodies dbus-x11            [desktop GUI]
$ sudo apt install tigervnc-standalone-server              [now used]
or
$ sudo apt install tightvncserver
$ vncpasswd
Password:
Verify:
Would you like to enter a view-only password (y/n)? n
(xfce4 desktop used, 23/4/2026)
(xfce4-goodies and dbus-x11 aded, 17/7/2026)
The password will be stored in the file ~/.vnc/passwd, i.e. home/<current user>/.vnc/passwd.
Execute to create a file:
$ micro .vnc/xstartupto contain:
#!/bin/sh
unset SESSION_MANAGER
unset DBUS_SESSION_BUS_ADDRESS
# Load X resources if present
[ -r $HOME/.Xresources ] && xrdb $HOME/.Xresources
# Start XFCE as the main session
exec startxfce4
to replace the following for lighter desktop:
#!/bin/sh
unset SESSION_MANAGER
unset DBUS_SESSION_BUS_ADDRESS
[ -x /etc/vnc/xstartup ] && exec /etc/vnc/xstartup
[ -r $HOME/.Xresources ] && xrdb $HOME/.Xresources
export XKL_XMODMAP_DISABLE=1
export XDG_CURRENT_DESKTOP="GNOME-Flashback:Unity"
export XDG_MENU_PREFIX="gnome-flashback-"
gnome-session --session=gnome-flashback-metacity --disable-acceleration-check &
(added to define in xstartup, 11/6/2025)
(xstartup revised, 22/4/2026)
Execute to create a file:
$ micro startvnc.shto contain:
#!/bin/bash
./stopvnc.sh
# Start fresh VNC session with XFCE
tigervncserver :2 -localhost -alwaysshared -geometry 1600x900
Execute to create another file:
$ micro stopvnc.shto contain:
#!/bin/bash
vncserver -kill :2
rm -rf /tmp/.X2-lock /tmp/.X11-unix/X2 ~/.vnc/*:2.pid ~/.vnc/*:2.log
#EOF
to replace the following for cleaner start and stop:
#!/bin/bash
vncserver -kill :2
vncserver :2 -localhost -alwaysshared -geometry 1600x900
vncserver -kill :2 = kill any existing VNC server at port 5902
vncserver :2 = start a new VNC server at port 5902
-xstartup /usr/bin/gnome-session-classic = use gnome-session-classic as the server desktop
(updated not to define desktop here, 11/6/2025)
(new startvnc and stopvnc used, 22/4/2026)
-localhost = permit access via a SSH tunnel from a remote client computer or mobile phone that the user is using, and not permit access via internet browser
-alwaysshared = permit sharing the server desktop with other remote computers or mobile phones
-geometry 1600x900 = screen size 1600x900
The server desktop will not be seen on the server itself. It is a virtual desktop accessible to other remote computers or mobile phones. This is a called "headless" server.
The VNC server will stay until it is killed by command: vncserver -kill :2
Execute to start the vncserver:
$ ./startvnc.shStart again after server reboot.
Set up SSH tunnel via Putty
Putty has been used for OpenSSH as Install OpenSSH services.
Configure a SSH tunnel by entering the Source port and Destination as follows, then press Add to move the setting to the upper window:
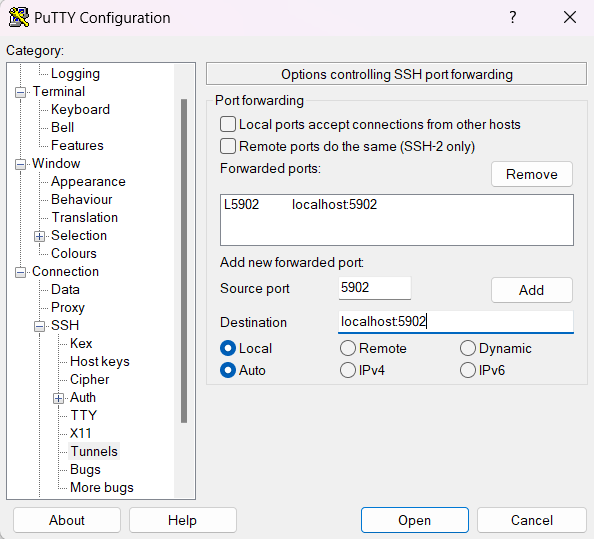
With "Local" selected, the Source port means the port of the client computer. It can be "5900" or any free port, e.g. 5902 in this case. "Localhost:5902" at the Destination means the server computer, not the client computer. "5902" refers to the port number on the server computer providing VNC server service.
Go back to the first screen, highlight Default Settings and press Save again.
Log in to the same user account used to start the VNC server.
Install VNC viewer
Download and install a VNC viewer app on the local computer.
There are many VNC viewer apps, such as:
RealVNC at: https://www.realvnc.com/en/connect/download/vnc/
UltraVNC at: https://uvnc.com/downloads/ultravnc.html
There are also mobile phone apps. The setting is similar.
For RealVNC Viewer, after installation, select File > New connection to show:
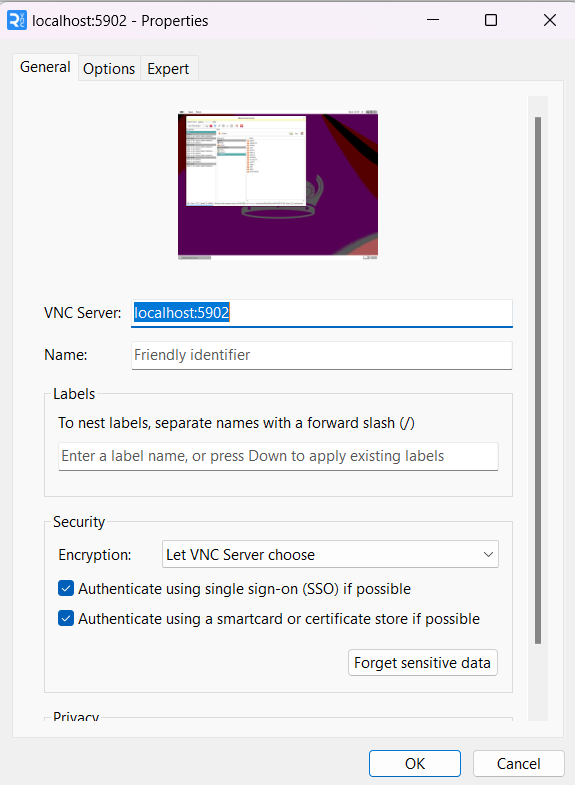
For VNC Server, enter:
kctang.com.hk: 5902 for access via an internet browser where the server port is set to 5902, or
localhost: 5902for use when "-localhost" is included in the start server file, for access via a SSH tunnel from the remote device to the server where the server port is set to 5902. This is more secure.
Press OK to save as an icon:
![]()
Click the icon to open the password screen, and enter the password previously set for the server:
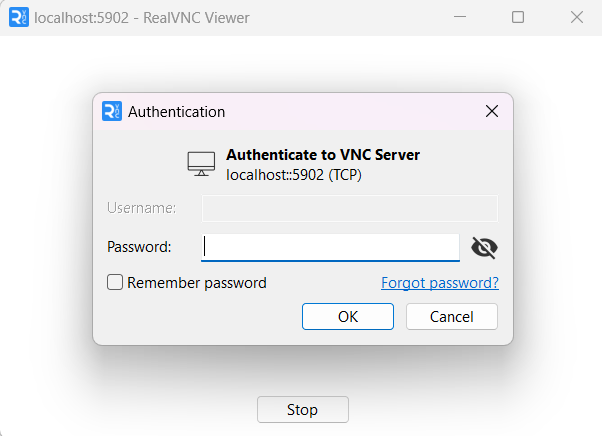
The server screen will appear.
Install Brave web browser
(section added, 19/7/2026)
Firefox comes with Ubuntu desktop. However it has been found that it does not work with Ubuntu 26.4 and xfce4 desktop. The same applies to Chromium-browser and Google Chrome installed afterward.
Brave web browser is found to be workable.
Install as follows:
$ sudo apt install apt-transport-https curl
$ sudo curl -fsSLo /usr/share/keyrings/brave-browser-archive-keyring.gpg \
  https://brave-browser-apt-release.s3.brave.com/brave-browser-archive-keyring.gpg
$ echo "deb [signed-by=/usr/share/keyrings/brave-browser-archive-keyring.gpg] \
  https://brave-browser-apt-release.s3.brave.com/ stable main" | \
  sudo tee /etc/apt/sources.list.d/brave-browser-release.list
$ sudo apt update
$ sudo apt install brave-browser
Set Brave as Default in XFCE
Go to Settings → Preferred Applications → Web Browser.
Choose Custom command and enter:
/usr/bin/brave-browser %sOr reset via terminal:
$ xdg-settings set default-web-browser brave-browser.desktopRemove Firefox (apt + snap), Chromium (apt + snap) and Google Chrome, if desired:
$ sudo apt purge firefox
$ sudo snap remove firefox
$ sudo rm -rf /home/super/snap/firefox
$ sudo apt purge chromium-browser chromium
$ sudo snap remove chromium
$ sudo rm -rf /home/super/snap/chromium
$ sudo apt purge google-chrome-stable
$ sudo rm -rf /etc/apt/sources.list.d/google-chrome.list
$ sudo rm -rf /etc/apt/sources.list.d/google-chrome.list.save
$ sudo apt autoremove --purge
$ sudo apt clean
$ which firefox chromium-browser google-chrome brave-browser
(check any remaining)
Install x11vnc
Install x11vnc KCTangNote
29/1/2026: "gedit' changed to "micro".
28 May 2019: Disabling Wayland added.
18 May 2019: Page added.
Intro
x11vnc enables remote access to the graphical desktop of Ubuntu server.
Set router
Set the internet router to permit access to the server through ports 5900, 5901, etc.
Disable Wayland
(section added, 28 May 2019)
Ubuntu-desktop uses gdm3 (Wayland) display manager. Wayland is not compatible with Xorg dispaly server used by x11vnc.
Execute to disable Wayland:
$ sudo micro /etc/gdm3/custom.conf
Remove "#" to uncomment the following line:
#WaylandEnable=false
Reboot the computer.
Install
Execute:
$ sudo apt install x11vnc
$ sudo apt install xvfb
xvfb provides a virtual X window, which is required for the -create option below.
Start
Execute:
$ x11vnc                    (not requiring a password to connect to port 5900)
or
$ x11vnc -rfbport <port number>
or
$ x11vnc -usepw             (requiring a password to connect)
or
$ x11vnc -create -usepw     (create a virtual desktop)
The default port to connect from client computers is 5900.
Specify 5901 for the <port number> if connection is to be permitted at port 5901.
Connection with or without password is possible.
Execute to set up password:
$ x11vnc -storepasswd
The password will be stored in the file ~/.vnc/passwd, i.e. home/<current user>/.vnc/passwd.
Connection is possible if there is already a graphical desktop logged on at the server. The screen movement at the server and the client computer will be synchronised. This would be good for monitoring the screen movement at the server.
If there is no graphical desktop logged on at the server, then:
- use the "-create" option
- connect remotely which should show a terminal window at the server
- execute at the terminal window to bring up other software, such as:
-
$ firefox
$ nautilus
- or the graphical session:
-
$ gnome-session
- click Activities to access other software.
The remote screen movement will not be seen at the server.
Ubuntu-desktop with gdm3 is used above.
x11vnc does not work well with gdm3 (Wayland) desktop. Therefore, just use gdm3 desktop.
Gnome (Wayland) desktop also does not permit the starting of backintime
Stop
Press Ctrl-C to terminate the connection.
Install Ftp server
Install Ftp server KCTangNote
29/1/2026: "nano" changed to "micro".
26 Apr 2022: "gedit" changed to "nano". Minor error corrected.
5 Sep 2019: "0755" changed to "0775" for "Ftp" directory.
7 May 2019: "gksudo gedit" changed to "sudo gedit" as Ubuntu 18.04 dropped "gksudo".
25 Dec 2014: Created.
Intro
FTP server enables directories to be accessible for downloading or uploading by users outside the local network.
Install
Install the package:
$ sudo apt-get install vsftpd
Edit config file:
$ sudo micro /etc/vsftpd.conf
Uncomment the following line to enable uploading:
write_enable=YES
Define as the following line to change the default directory permissions to 775 (drwxrwxr-x) and default file permissions to 664 (-rw-rw-r--):
local_umask=002
Uncomment the following lines to restrict users to their home except for those listed in the file represented by "chroot_list_file":
chroot_local_user=YES
chroot_list_enable=YES
chroot_list_file=/etc/vsftpd.chroot_list
("vsftpd.choot_list" corrected as "vsftpd.chroot_list", 7 May 2019)
Save file after uncommenting.
Specify users who can go outside their home by inserting their user login names one on each line in the file represented by "chroot_list_file":
$ sudo micro /etc/vsftpd.chroot_list
("vsftpd/chroot_list" corrected as "vsftpd.chroot_list", 7 May 2019)
Restart ftp service whenever the config files are changed:
$ sudo systemctl restart vsftpd
or
$ sudo service vsftpd restart
Set the internet router to re-direct ftp connections to server port 21.
Set up a root FTP Directory to contain all FTP job folders
Change directory to the top directory assessible for use by Windows network through Samba:
$ cd /<full directory path from root>
Make a directory specially for FTP storage, called "Ftp" in this example:
$ sudo mkdir Ftp
Change its ownership so that it can be accessed by Windows network:
$ sudo chown nobody:nogroup Ftp
Change its permissions to "read only" for other users:
$ sudo chmod 0775 Ftp
("0755" changed to "0775" because for unknown reasons sub-directory cannot be created under "Ftp", 5 Sep 2019)
Check setting:
$ ls -ls
should show "drwxrwxr-x" and "nobody nogroup" against the "Ftp" item.
(drwxr-xr-x corrected as drwxrwxr-x, 26 Apr 2022)
Create a ftp user for specific job
Create a new user with authority to download and upload the job ftp directory:
$ sudo adduser <ftp user name>
Change the new user's root directory from /home/<ftp user name> to the job ftp directory:
$ sudo usermod -d /<full directory path from root>/Ftp/<job name> <ftp user name>
- <ftp user name> and <job name> can be the same or different
- <job name> will become ftp users' root directory, they will be restricted to see only files at or below the root directory, they will not see the name of <job name> or the directory structure outside the root directory
- Instead of <job name>, a further sub-directory such as <job name>/<sub job name> may be defined as the root directory
- The directory /<full directory path from root>/Ftp/<job name> will still exist but not be used for ftp
Set up a ftp directory for specific job for downloading
Create a job ftp directory under the Ftp directory:
- using Windows Explorer:
\\<server name>\<full folder path from server>\Ftp\<job name>
- or at the server terminal:
$ cd /<full directory path from root>/Ftp $ sudo mkdir <job name> $ sudo chown nobody:nogroup <job name> $ ls -ls
should show "drwxr-xr-x" or "drwxrwxr-x" and "nobody nogroup" against the <job name> item.
Further sub-directories may be created similarly for downloading purposes.
Set up a ftp directory for specific job for uploading
Create an "upload" sub-directory under the job ftp directory:
- using Windows Explorer:
\\<server name>\<full folder path from server>\Ftp\<job name>\upload
- or at the server terminal:
$ cd /<full directory path from root>/Ftp/<job name> $ sudo mkdir upload $ sudo chown nobody:nogroup upload
Change its permissions on the server to enable "write" for all:
$ cd /<full directory path from root>/Ftp/<job name>
$ sudo chmod a+w upload
Check settings:
$ ls -ls
should show "drwxrwxrwx" and "nobody nogroup" against the "upload" item.
Upload or download
Internally, use Windows file explorer to copy or move files between the Windows networked computers to the ftp directories:
- copy files to \\< server name>\<full folder path from server >\Ftp\<job name> for downloading
- copy files from \\<server name>\<full folder path from server >\Ftp\<job name>\upload after uploading by others
Externally, inform external users the ftp user login name i.e. <ftp user name> and password for downloading or uploading.
Install OpenVPN services
Install OpenVPN services KCTangNote
- 8/7/2026: Explanatory notes added to server.conf.
- 2/7/2026: "persist-key" deprecated.
- 18/2/2026: server and client config files adjusted to keep shared but idle folders connected.
- 17/2/2026: "Check ta.key" section added.
- 16/2/2026: server.conf updated. "build-client-full" added. "Revoke a client" section added.
- 29/1/2026: "nano" changed to "micro".
- 7/1/2026: Configure firewall re-written. Check connections added.
- 31/10/2025: Sections on OpenVPN Connect and Blocking by firewall added.
- 30/7/2024: Updated for PEM pass phrase. "$" prompts changed to "#" when in root mode.
- 15/7/2023: Windows folder to contain config files revised.
- 26/4/2022: Cipher added.
- 18/1/2022: Installation procedures updated.
- 11/4/2018: Re-direct function added.
- 2/9/2018: Revised to suit Ubuntu 18.04 which requires a change of the network card device name.
Intro
OpenVPN enables remote client computers and smartphones to access VPN server's files and structure, and optionally re-direct clients' IP traffic through the VPN server.
Install VPN server for accessing file server
Switch to root:
$ sudo -sInstall openvpn and easy-rsa:
# apt install openvpn easy-rsaSet up public key infrastructure:
# mkdir /etc/openvpn/easy-rsa/
# cp -r /usr/share/easy-rsa/* /etc/openvpn/easy-rsa/
# micro /etc/openvpn/easy-rsa/vars
Define in vars:
export KEY_COUNTRY="CN"
export KEY_PROVINCE="HK"
export KEY_CITY="HongKong"
export KEY_ORG="K C Tang Consultants Ltd"
export KEY_EMAIL="kctang@kctang.com.hk"
export KEY_OU=kctclVPN
export KEY_NAME=kctclVPN
# next line added to avoid error when building the certificate and key
export KEY_ALTNAMES=kctclVPN
Generate master Certificate Authority (CA) certificate and key:
# cd /etc/openvpn/easy-rsa/
# source vars
# ./easyrsa init-pki
# ./easyrsa build-ca
Enter New CA Key Passphrase: <>
Re-enter New CA Key Passphrase: <>
Enter PEM pass phrase (if prompted): <>
Verifying - Enter PEM pass phrase (if prompted): <>
(last two lines added, 30/7/2024)
Enter Common Name: kctclVPN
Generate a key pair for the server:
# ./easyrsa gen-req kctclVPN nopassAccept Common Name default [kctclVPN]: <enter key>
Generate Diffie Hellman parameters and generate certificate for the server (the output will be placed in subdirectory pki/:
# ./easyrsa gen-dh
# ./easyrsa sign-req server kctclVPN
Check and confirm the Common Name: yes
Enter pass phrase (i.e. the PEM pass phrase if entered above, otherwise the CA Key Passphrase): <>
(last line revised to mention PEM pass phrase, 30/7/2024)
Copy certificates and keys generated in subdirectory pki/ to /etc/openvpn/:
# cp pki/dh.pem pki/ca.crt pki/issued/kctclVPN.crt pki/private/kctclVPN.key /etc/openvpn/Config server.conf:
# cd /
# cp /usr/share/doc/openvpn/examples/sample-config-files/server.conf    /etc/openvpn/
# micro /etc/openvpn/server.conf
Define as follows:
# Core settings
port 1194
proto udp
dev tun

# Crypto setup
# Enter the paths if files not in the same directory as the server.conf file
ca </path to file/>ca.crt
cert </path to file/>kctclVPN.crt
key </path to file/>kctclVPN.key
dh </path to file/>dh.pem # not dh2048.pem
tls-auth ta.key 0
cipher AES-256-GCM
crl-verify /etc/openvpn/crl.pem
# this is to check for revoked users, crl = certificate revocation list

duplicate-cn
# this is to enable multiple simultaneous connections using the same certificate/common name

# Network topology
topology subnet
server 10.8.0.0 255.255.255.0
ifconfig-pool-persist /var/log/openvpn/ipp.txt
# ifconfig-pool-persist should follow afer server

# Routes pushed to clients (change the third "0" to match the server's internal network ip)
# push should follow after server
#push "route 192.168.0.0 255.255.255.0"

# Keepalive and permissions
keepalive 10 30
explicit-exit-notify 1
user nobody
group nogroup
# persist-key # not required, set as default now
persist-tun

# Logging and verbosity
status /var/log/openvpn/openvpn-status.log
verb 3
(cipher added, 26/4/2022)
(crl-verify, topology subnet and push added, rows re-grouped, 16/2/2026)
(keepalive changed from 120 to 30 to restart tunnel quicker, 18/2/2026)
("persist-key" deprecated, 2/7/2026)
(explanatory notes added, 8/7/2026)
Generate ta.key for tls-auth:
# cd /etc/openvpn
(not this: openvpn --genkey tls-auth ta.key)
# openvpn --genkey secret ta.key
(not --secret)
(clarified, 16/2/2026)
Config sysctl.conf:
# micro /etc/sysctl.confUncomment the following line to enable IP forwarding:
net.ipv4.ip_forward=1Reload sysctl.conf:
# sysctl -p /etc/sysctl.confStart the server:
# systemctl start openvpn@server
# systemctl status openvpn@server
Check if OpenVPN created a tun0 interface:
# ifconfig tun0Check syslog if tun0 does not appear:
# grep -i vpn /var/log/syslogExit from root:
# exit
$
Set the internet router to re-direct OpenVPN connections to server port 1194.
Extend to re-direct clients' IP traffic through VPN server
(section added 5/4/2018)
Define optionally in server.conf to re-direct clients' IP traffic such as web browsing and DNS lookups to go through the VPN server, i.e. the clients will appear to use the IP of the VPN server instead of the actual IP of the clients for internet traffic:
Config server.conf:
$ sudo micro /etc/openvpn/server.confDefine by uncommenting the following line:
push "redirect-gateway def1 bypass-dhcp"Some guide suggests to add the following, but this results in email server not working: (10 April 2018)
push "dhcp-option DNS 10.8.0.1"Some other guides suggest to uncomment the following, this works: (10 April 2018)
push "dhcp-option DNS 208.67.222.222"
push "dhcp-option DNS 208.67.220.220"
However, it is found that it still works when the above two lines are left commented. Therefore, the only line needing change is the 'redirect-gateway' line. (2 Sep 2018)
Execute to restart the service:
$ sudo systemctl restart openvpn@serverExecute to see the network card device names:
$ ip routeFind the output line beginning with "default", e.g.:
default via 192.168.0.1 dev enp4s0 proto static metric 100The name "enp4s0" after the word "dev" is the default network card device name. Previously, the default name is "eth0", but this has been changed after Ubuntu 16.04.
(2/9/2018)
Execute with the default name inserted after "-o":
$ sudo iptables -t nat -A POSTROUTING -s 10.8.0.0/24 -o enp4s0 -j MASQUERADENote that the iptables configuration will be lost after reboot.
Store the current iptables configurations:
$ sudo sh -c "iptables-save > /etc/iptables.up.rules"View and remove any configurations no longer applicable:
$ sudo micro /etc/iptables.up.rulesDo the same whenever the iptables configurations have been changed.
Config file for use on reboot:
$ sudo micro /etc/network/interfacesDefine to reuse the stored configurations:
auto lo
iface lo inet loopback
post-up iptables-restore < /etc/iptables.up.rules
Generate files for each Windows client
Switch to root:
$ sudo -sGenerate a certificate and private key for each client user of <username>:
# cd /etc/openvpn/easy-rsa/
# ./easyrsa build-client-full <username> nopass
(which represents the following two)
# ./easyrsa gen-req <username> nopass
# ./easyrsa sign-req client <username>
(build-client-full added, 16/2/2026)
Check and confirm the Common Name: yes
Enter Passphrase as previously defined: <>
Copy or move client's certificate and key to a Samba directory, which is for temporary use only: to enable emailing:
# cd /etc/openvpn/easy-rsa/
# cp pki/ca.crt pki/issued/<username>.crt pki/private/<username>.key /<Samba directory>/
# cd /etc/openvpn/
# cp ta.key /<Samba directory>/
Change the owners of the files:
# cd /<Samba directory>
# chown nobody:nogroup ca.crt ta.key <username>.crt <username>.key
# chmod 644 ca.crt ta.key <username>.crt <username>.key
Create a <username>.txt under the Samba directory and define it to contain:
client
dev tun
proto udp
remote kctang.com.hk 1194
resolv-retry infinite
nobind
keepalive 10 30
inactive 600
explicit-exit-notify 1
persist-tun
mute-replay-warnings
ca ca.crt
cert <\\path\\><username>.crt
key <\\path\\><username>.key
remote-cert-tls server
tls-auth ta.key 1
cipher AES-256-GCM
auth-nocache
verb 3
(cipher added, 26/4/2022)
(keepalive, inactive and explicit-exit-notify added to keep shared but idle folder connected, 18/2/2026)
("persist-key" deprecated and removed, 2/7/2026)
Specify path in Windows format if ca.crt, ta.key, <username>.crt, and <username>.key are to be saved in a folder different from <username>.txt.
Change filename from <username>.txt to <username>.ovpn. Creating as a txt file first permits editing by the usual text processors. Watch out that the line breaks are using Windows' linebreak code.
E-mail ca.crt, ta.key, <username>.crt, <username>.key, and <username>.ovpn files to the client computer.
Remove the files:
# rm ca.crt ta.key <username>.crt <username>.key <username>.ovpnExit from root:
# exit
$
Install OpenVPN Connect on Windows client computer
(Section added on 31/10/2025)
OpenVPN Connect or OpenVPN Community Edition can be used on Windows client computer to connect to the VPN server. The former is simpler.
Download OpenVPN Connect Windows Installer from https://openvpn.net/client/ and install.
After the installation, the initial screen will require the import of a connection profile:
- Choose import from file.
- Browse to the folder containing the <username>.opvn file.
- Upload the file.
- The ca.crt, ta.key, <username>.crt, and <username>.key in the same folder should still remain because they will be imported automatically.
After the import, select Connect to connect to the server.
Set the firewall as described below.
(file manager access moved away, 7/1/2026)
Check ta.key
(section added, 17/2/2026)
Check the checksum of ta.key which has been stored in different folders to ensure that its content remains unchanged.
Server command prompt:
# sudo sha256sum /etc/openvpn/ta.key
(original location)
# sha256sum /kctcl/Data/openvpn/ta.key
(Samba directory)
Client Windows Powershell prompt:
$ Get-FileHash -Algorithm SHA256 "C:\Users\<username>\OneDrive\Documents\openvpn\ta.key"
(temporary OneDrive folder)
$ Get-FileHash -Algorithm SHA256 "C:\Users\<username>\OpenVPN\config\ta.key"
(or)
$ Get-FileHash -Algorithm SHA256 "C:\Program Files\OpenVPN\config\ta.key"
(or)
$ Get-FileHash -Algorithm SHA256 "C:\Program Files\OpenVPN\config-auto\ta.key"
(final config folder)
Revoke a user
(section added, 16/2/2026)
Revoke a user's access permission:
# sudo -s
# cd /etc/openvpn/easy-rsa/
# ./easyrsa revoke <username>
(to revoke a user)
# ./easyrsa gen-crl
(to generate certificate revocation list)
# openssl crl -in pki/crl.pem -text -noout
(to check the updated list)
# openssl x509 -in pki/issued/<username>.crt -noout -serial
(to confirm a specific user is invoked)
# cp pki/crl.pem /etc/openvpn/crl.pem
(to copy the final folder)
# systemctl restart openvpn@server
(to update the service to block names on the list)
# exit
Install Community Edition on Windows client computer
Install Community Edition
Download OpenVPN Community Edition Windows Installer from https://openvpn.net/community/ and install.
An OpenVPN GUI icon should appear at the bottom system tray, with no connection yet.
Save ca.crt, ta.key, <username>.crt, <username>.key, and <username>.ovpn files (emailed from the server) under:
- C:\Program Files\OpenVPN\config-auto\ (for use as a service)
or
- C:\Program Files\OpenVPN\config\ (for use with GUI).
(revised 15/7/2023)
Set the firewall as described below.
(file manager access moved away, 7/1/2026)
Run on Windows client as a service
To start OpenVPN automatically as a service every time after rebooting:
- Click Windows Start > search for Services.
- Right-click OpenVPN Interactive Service > Properties > Start or Restart.
- Change Startup type to Automatic.
- Click OK.
(file manager access moved away, 7/1/2026)
Run on Windows client using GUI
To start OpenVPN manually every time after rebooting, or re-connect after loss of connection after sleep or hibernation::
- Right-click OpenVPN GUI icon on Desktop.
- Click Run this program as an administrator > Yes.
Or
- Click the OpenVPN GUI icon on the bottom system tray to connect or right-click the icon and click Connect.
Configure firewall if using Netgear Amour powered by Bitdefender
(Section added, 31/10/2025)
(Section re-written, 7/1/2026)
If Netgear Amour powered by Bitdefender is used as the network security app:
- Open the app interface.
- Select Protection > Firewall > Settings > Rules.
Unblock All applications: Select Add rule if newly created, or click open the item to select Edit rule:
- Rule name:
All applications(automatically created -- no path needed, may be calledSystemorsvchost.exe) - Why: Handles SMB traffic (TCP 445) through the VPN.
- Settings:
- Apply this rule to all applications:
On - Program path: (hidden)
- Permission:
Allow - Network Type:
Any Network - Protocol:
6. TCP - Direction:
Both - Custom remote address:
On - IP:
10.8.0.1 - Port:
445
- Apply this rule to all applications:
- Save after setting.
- All applications should be shown as allowed.
Unblock openpvn.exe: Select Add rule if newly created, or click open the item to select Edit rule:
- Rule name:
openvpn.exe - Why: Creates and maintains the VPN tunnel.
- Settings:
- Program path:
C:\Program Files\OpenVPN\bin\openvpn.exe - Permission:
Allow - Network Type:
Any Network - Protocol:
Any - Direction:
Both
- Program path:
- Save after setting.
- openvpn.exe should be shown as allowed.
Select Protection > Firewall > Network Adapters, and set:
- Wi‑Fi:
Public/Dynamic - OpenVPN TAP‑Windows6:
Home/Office
Open file manager and enter \\10.8.0.1 to access the VPN server. All clients will use the same \\10.8.0.1 to map the actual different ip addresses assigned by the VPN server.
If connection is not successful, restart the computer.
Trouble shoot as described below.
If still not successful, check Fix Windows 11 Version 23H2 Network Connection Problems.
If successful, map drive as described below.
Check in case of trouble
(Section added, 7/1/2026)
Run Windows PowerShell as Administrator.
Ping the VPN server:
> ping 10.8.0.1
(to check for VPN service/adapters issue)
> Test-NetConnection 10.8.0.1 -Port 445
(to test SMB port)
> net view \\10.8.0.1
(to check for shared resources)
If all failed and error 53, check firewall settings as described above.
If firewall settings fail:
- Uninstall OpenVPN (Community/Connect).
- Remove TAP/Wintun adapters in Device Manager.
- Reboot.
- Reinstall OpenVPN (Community/Connect).
- Configure Firewall settings.
If shares listed, map drive as described below.
Map drive for quick access
- Open file manager and enter \\10.8.0.1 to access the VPN server.
- Right-click the desired folder.
- Click Map network drive.
- Choose a drive name (e.g.
Z) to represent the folder. - Click Finish.
Alternatively, run Windows PowerShell as Administrator:
> net use Z: \\10.8.0.1\<shared folder> /user:kctang.com.hk\<username>(alternative added, 7/1/2026)
Fix Windows 11 Version 23H2 Network Connection Problems
Fix Windows 11 Version 23H2 Network Connection Problems KCTangNote
- 31/10/2025: Created.
Intro
This webpage describes possible solutions to the network connection problems when Windows 11 Home Edition is updated to Version 23H2 or later.
The problems arise because those versions change the underlying network connection mechanism and make the computer not compatible.
There are many suggested solutions given on the internet, but try those described here first.
Wifi network device not working
After Version 23H2 or 24H2 is installed and in the process of setting up drivers or add-ons, there can be no wifi network connection to download drivers to go further because the network drivers already on the computer are not compatible and there is no way to use the wifi network to download its own drivers.
Do the following:
- Use another computer to download the network driver, or copy the driver from computer of similar model.
- Store the driver on a USB drive. The best option would be to have this done before upgrading.
- Insert the USB drive to the computer to upgrade.
- Go back to the relevant setting up page and browse to find the driver.
- Select the driver and install.
- Continue with the setting up if the installation can make the network device work.
Inability to connect to VPN server and Samba server
Try the solution described in Install OpenVPN services first.
If the solution does not work, try the following which is to disable security check for Samba connection.
- Press the Windows icon key.
- Enter registry to show the item for Registry Editor.
- Select Registry Editor to open it.
- Move down to: Computer\HKEY_LOCAL_MACHINE\SYSTEM\CurrentControlSet\Services\LanmanWorkstation\Parameters.
- Click EnableSecuritySignature on the right to open a menu to change the value data to 0.
- Click RequireSecuritySignature on the right to open a menu to change the value data to 0.
- Move to: Computer\HKEY_LOCAL_MACHINE\SYSTEM\CurrentControlSet\Services\LanmanServer\Parameters.
- Click EnableSecuritySignature on the right to open a menu to change the value data to 0.
- Click RequireSecuritySignature on the right to open a menu to change the value data to 0.
If the above parameters do not exist:
- Click top menu Edit > New > DWORD (32-bit) Value to create a new item.
- Rename the item as the above.
- Click open the item to change the value data to 0.
Exit Registry Editor.
Reboot the computer.
See whether the connection can be successful.
Install Postfix + Dovecot e-mail server
Install Postfix + Dovecot e-mail server KCTangNote
- 12/7/2026: Dovecot 2.4 and its conf files freshly installed because of many changes to the command names used. 99-mail-stack-delivery.conf updated to suit Dovecot 2.4 and is to override all other default conf files. Minor updating to Postfix conf files.
- 25/6/2026: Increase imap-login process limit.
- 29/1/2026: Change "nano" to "micro".
- 14/4/2025: Re-arrange sections with some updates.
- 12/4/2025: Update ClamAV and amavis.
- 8/2/2025: Change maximal_queue_lifetime and bounce_queue_lifetime from 0 to 60s to give more time for the receiving server to process
- 7/1/2025: Revise ip address. Delete "mail.kctang.com.hk".
- 7/10/2024: Add also "mail.kctang.com.hk" as email domain name.
- 19/9/2024: Delete separate configuration instructions for spamassassin. Change micro to nano as non-graphical editor.
- 13/2/2023: Use Letsencrypt ssl. Change gedit to micro as non-graphical editor.
- 11/2/2023: Add full config files. Correct opendkim socket.
- 1/2/2023: Correct typos.
- 10/10/2022: Add DKIM setting.
- 18/6/2021: Adjust TLS setting.
- 5/1/2021: Increase imap-login process limit. List Dovecot full custom settings.
- 9/12/2020: Define cron job to delete filtered mails.
- 20/9/2020: Stop using mail-stack-delivery.
- 8/5/2020: Correct typo errors.
- 30/5/2019: Add anti-virus and spam mail filtering.
- 17/5/2019: Add copying emails to external accounts.
- 7/5/2019: Change "gksudo gedit" to "sudo gedit" as Ubuntu 18.04 dropped "gksudo". Add header_checks. Add auto creation of Trash folders. Add webmaster.
- 29/9/2018: Add "body_checks" for spam control.
- 20/9/2018: Increase message_size_limit to 20 times the default.
- 5/4/2018: Increase message_size_limit to 10 times the default.
- 25/12/2018: Publish on web.
- 12/4/2014: Specify maximal_queue_lifetime to notify unsuccessful delivery immediately.
- 2/4/2014: Specify fully qualified domain name.
Intro
Postfix is a mail transfer agent (MTA) responsible for sending out and receiving emails between servers.
Dovecot is a mail delivery agent (MDA) responsible for sending out and receiving emails between a server and its users.
Mail-stack-delivery was a combined package containing both Postfix and Dovecot. It is now no longer supported.
Re-direct to server ports
Set the internet router to re-direct the following connections to server ports:
- SMTP = port 25 (for receiving or sending emails)
- secure SMTP = port 465 (for receiving or sending emails securely)
- IMAP = port 143 (for retrieving emails)
- secure IMAP = port 993 (for retrieving emails securely)
- POP3 = port 110 (for retrieving emails)
Install both Postfix and Dovecot
Ubuntu 20.04 does not support the combined package "mail-stack-delivery" anymore.
Install Dovecot and Postfix individually:
$ sudo apt install dovecot-imapd dovecot-pop3d
$ sudo apt install postfix
However, the previous config file "/etc/dovecot/conf.d/99-mail-stack-delivery.conf" is still retained for use, because "99" represents the last and overriding config file. This eliminates the need to change the individual config files.
(revised to install individually, 20/9/2020)
Reconfigure Postfix
Reconfig:
$ sudo dpkg-reconfigure postfixUse Tab key to change selection.
Select "Internet Site".
Enter the following information:
System mail name: <fully qualified domain name, such as "kctang.com.hk">
Root and postmaster mail recipient: <such as "kctang">
Other destinations to accept mail: <fully qualified domain name, such as "mail.kctang.com.hk" and "kctang.com.hk">, <server name such as "server">, localhost.localdomain, localhost
Force synchronous updates on mail queue: No
Local networks: <leave it blank to accept the default>
Use procmail for local delivery: No
Mailbox size limit (bytes): 0
Local address extension character: +
Internet protocols to use: all
("mail.kctang.com.hk" also added, 7/10/2024)
Edit "main.cf" settings:
$ sudo micro /etc/postfix/main.cfSpecify in full:
# See /usr/share/postfix/main.cf.dist for a commented, more complete version

# Debian specific:  Specifying a file name will cause the first
# line of that file to be used as the name.  The Debian default
# is /etc/mailname.
#myorigin = /etc/mailname

smtpd_banner = $myhostname ESMTP $mail_name (Ubuntu)
biff = no

# appending .domain is the MUA's job.
#append_dot_mydomain = no
# last line commented as obsolete, KCTang 12/7/2026

# Uncomment the next line to generate "delayed mail" warnings
#delay_warning_time = 4h

#readme_directory = no
# last line commented as obsolete, KCTang 12/7/2026

# See http://www.postfix.org/COMPATIBILITY_README.html -- default to 2 on
# fresh installs.
compatibility_level = 2

# the following automatically set by dpkg-reconfigure postfix
myhostname = kctang.com.hk
# fully qualified domain name instead of server name used,
# otherwise some servers would not accept e-mails sent without fully qualified domain name, 2/4/2014

alias_maps = hash:/etc/aliases
alias_database = hash:/etc/aliases
myorigin = /etc/mailname
mydestination = mail.kctang.com.hk,kctang.com.hk,server3,localhost.localdomain,localhost
relayhost =
mynetworks = 127.0.0.1/32 192.168.0.19/32 10.8.0.1/32 [::1]/128 [fe80::d732:96d2:c380:fd6d]/128 [fe80::2d5f:fcae:5284:48cf]/128
mailbox_size_limit = 0
recipient_delimiter = +
inet_interfaces = all

# ALL the following added to default
inet_protocols = all
# home_mailbox = Maildir/ # commented, KCTang 11/7/2026
mailbox_command = /usr/lib/dovecot/deliver -c /etc/dovecot/dovecot.conf -m "${EXTENSION}"

message_size_limit = 204800000
# last line added to increase the default to 10 times, KCTang 5/4/2014
# increased to 20 times, KCTang 20/9/2018

maximal_queue_lifetime = 10s
# last line added to report unsuccessful delivery immediately instead of after the default of 5 days, KCTang 12/4/2014
# changed from 0 to 10s, KCTang 8/2/2025

bounce_queue_lifetime = 10s
# last line added, this should not be bigger than maximal_queue_lifetime, KCTang 20/5/2019
# changed from 0 to 10s, KCTang 8/2/2025

# smtpd setting
#smtpd_proxy_timeout = 240s
smtpd_sasl_type = dovecot
smtpd_sasl_path = private/dovecot-auth
smtpd_sasl_local_domain = $myhostname

smtpd_sasl_security_options = noanonymous,noplaintext
# noplaintext in last line added to prevent unencrypted credentials, KCTang 13/2/2023

smtpd_sasl_tls_security_options = noanonymous
# last line added, KCTang 13/2/2023

#broken_sasl_auth_clients = yes
# last line commented as obsolete, KCTang 12/7/2026

smtpd_sasl_auth_enable = yes
smtpd_sasl_authenticated_header = yes
smtpd_recipient_restrictions =
   reject_unknown_sender_domain
   reject_unknown_recipient_domain
   reject_unauth_pipelining
   permit_mynetworks
   permit_sasl_authenticated
   reject_unauth_destination
   check_policy_service unix:private/policyd-spf
# last line added to enable spf, KCTang 19/2/2022
smtpd_relay_restrictions =
   permit_mynetworks
   permit_sasl_authenticated
   defer_unauth_destination
smtpd_sender_restrictions = reject_unknown_sender_domain

# TLS parameters
#smtp_use_tls = yes
# last line commented as obsolete, KCTang 12/7/2026
smtp_tls_security_level=may
smtpd_tls_security_level=may
smtp_tls_note_starttls_offer=yes
smtpd_tls_loglevel = 1
smtpd_tls_received_header = yes

# use the following two as provided as default
#smtpd_tls_cert_file=/etc/ssl/certs/ssl-cert-snakeoil.pem
#smtpd_tls_key_file=/etc/ssl/private/ssl-cert-snakeoil.key

# use the following two if self define key and certificate
#smtpd_tls_key_file=/etc/ssl/private/server.key
#smtpd_tls_cert_file=/etc/ssl/certs/server.crt

# use the following two if using letsencrypt, KCTang 13/2/2023
# using those set up when setting up Apache2 web server, actually they are soft-linked to the following files, KCTang 19/9/2024
smtpd_tls_cert_file=/etc/letsencrypt/live/kctang.com.hk/fullchain.pem
smtpd_tls_key_file=/etc/letsencrypt/live/kctang.com.hk/privkey.pem

# use the following if using self certification authority
#smtp_tls_CApath=/etc/ssl/certs/

smtp_tls_session_cache_database = btree:${data_directory}/smtp_scache
smtpd_tls_session_cache_database = btree:${data_directory}/smtpd_scache
smtpd_tls_auth_only = yes
smtpd_tls_mandatory_ciphers = medium
# smtpd_tls_mandatory_protocols = SSLv3, TLSv1 # commented, replaced below, KCTang 18/6/2021
# next 2 lines added to enhance security, KCTang 1/7/2021
smtp_tls_mandatory_protocols = !SSLv2, !SSLv3, !TLSv1, !TLSv1.1
smtpd_tls_mandatory_protocols = !SSLv2, !SSLv3, !TLSv1, !TLSv1.1

#tls_random_source = dev:/dev/urandom
# last line commented as obsolete, KCTang 12/7/2026

#header_checks = regexp:/etc/postfix/header_checks
# last line added to check headers, KCTang 30/9/2018, disabled after using amavis 1/6/2019

#body_checks = regexp:/etc/postfix/body_checks
# last line added to refer to another file to check contents of email bodies, KCTang 29/9/2018, disabled after using amavis 1/6/2019

# virtual_alias_domains = kctang.com.hk
# last line added on 17/5/2019, but disabled since same domain name already defined as destination above, KCTang 20/5/2019

virtual_alias_maps = hash:/etc/postfix/virtual
# last line added to forward emails to another server, KCTang 17/5/2019

content_filter = smtp-amavis:[127.0.0.1]:10024
# last line added for amavis, KCTang 1/6/2019

# the following line added to enable spf, KCTang 19/2/2022
policyd-spf_time_limit = 3600

# Milter configuration, added but disabled, KCTang 2/6/2019, enabled again, KCTang 19/2/2022
milter_default_action = accept
milter_protocol = 6
smtpd_milters = local:opendkim/opendkim.sock
non_smtpd_milters = $smtpd_milters
(full file given, 11/2/2023)
(updated, 13/2/2023)
(note regarding letsencrypt added, 19/9/2024)
(updated, 12/7/2026)
Edit "master.cf" settings:
$ sudo micro /etc/postfix/master.cfSpecify in full:
# Postfix master process configuration file.  For details on the format
# of the file, see the master(5) manual page (command: "man 5 master" or
# on-line: http://www.postfix.org/master.5.html).
#
# Do not forget to execute "postfix reload" after editing this file.
#
# ==========================================================================
# service type  private unpriv  chroot  wakeup  maxproc command + args
#               (yes)   (yes)   (no)    (never) (100)
# ==========================================================================
smtp        inet  n       -       y       -       -       smtpd
#smtp       inet  n       -       y       -       1       postscreen
#smtpd      pass  -       -       y       -       -       smtpd
#dnsblog    unix  -       -       y       -       0       dnsblog
#tlsproxy   unix  -       -       y       -       0       tlsproxy
#submission inet  n       -       y       -       -       smtpd
#  -o syslog_name=postfix/submission
#  -o smtpd_tls_security_level=encrypt
#  -o smtpd_sasl_auth_enable=yes
#  -o smtpd_tls_auth_only=yes
#  -o smtpd_reject_unlisted_recipient=no
#  -o smtpd_client_restrictions=$mua_client_restrictions
#  -o smtpd_helo_restrictions=$mua_helo_restrictions
#  -o smtpd_sender_restrictions=$mua_sender_restrictions
#  -o smtpd_recipient_restrictions=
#  -o smtpd_relay_restrictions=permit_sasl_authenticated,reject
#  -o milter_macro_daemon_name=ORIGINATING
smtps       inet  n       -       y       -       -       smtpd
# last line uncommented, KCTang 2/4/2014
#  -o syslog_name=postfix/smtps
  -o smtpd_tls_wrappermode=yes
# last line added to force use of TLS, KCTang 2/4/2014
  -o smtpd_sasl_auth_enable=yes
# last line uncommented to enable STARTTLS authentication, KCTang 2/4/2014
#  -o smtpd_reject_unlisted_recipient=no
#  -o smtpd_client_restrictions=$mua_client_restrictions
#  -o smtpd_helo_restrictions=$mua_helo_restrictions
#  -o smtpd_sender_restrictions=$mua_sender_restrictions
#  -o smtpd_recipient_restrictions=
  -o smtpd_relay_restrictions=permit_sasl_authenticated,reject
# last line uncommented to reject if not authenticated, KCTang 2/4/2014
  -o milter_macro_daemon_name=ORIGINATING
# last line uncommented, KCTang 2/4/2014
#628      inet  n       -       y       -       -       qmqpd
pickup    unix  n       -       y       60      1       pickup
  -o content_filter=
  -o receive_override_options=no_header_body_checks
# last two lines added for anti-spam, KCTang 29/5/2019
cleanup   unix  n       -       y       -       0       cleanup
qmgr      unix  n       -       n       300     1       qmgr
#qmgr     unix  n       -       n       300     1       oqmgr
tlsmgr    unix  -       -       y       1000?   1       tlsmgr
rewrite   unix  -       -       y       -       -       trivial-rewrite
bounce    unix  -       -       y       -       0       bounce
defer     unix  -       -       y       -       0       bounce
trace     unix  -       -       y       -       0       bounce
verify    unix  -       -       y       -       1       verify
flush     unix  n       -       y       1000?   0       flush
proxymap  unix  -       -       n       -       -       proxymap
proxywrite unix -       -       n       -       1       proxymap
smtp      unix  -       -       y       -       -       smtp
relay     unix  -       -       y       -       -       smtp
  -o syslog_name=postfix/$service_name
#  -o smtp_helo_timeout=5 -o smtp_connect_timeout=5
  -o smtp_connect_timeout=60s
# last line added, KCTang 10/3/2021
showq     unix  n       -       y       -       -       showq
error     unix  -       -       y       -       -       error
retry     unix  -       -       y       -       -       error
discard   unix  -       -       y       -       -       discard
local     unix  -       n       n       -       -       local
virtual   unix  -       n       n       -       -       virtual
lmtp      unix  -       -       y       -       -       lmtp
anvil     unix  -       -       y       -       1       anvil
scache    unix  -       -       y       -       1       scache
postlog   unix-dgram n  -       n       -       1       postlogd
#
# ====================================================================
# Interfaces to non-Postfix software. Be sure to examine the manual
# pages of the non-Postfix software to find out what options it wants.
#
# Many of the following services use the Postfix pipe(8) delivery
# agent.  See the pipe(8) man page for information about ${recipient}
# and other message envelope options.
# ====================================================================
#
# maildrop. See the Postfix MAILDROP_README file for details.
# Also specify in main.cf: maildrop_destination_recipient_limit=1
#
maildrop  unix  -       n       n       -       -       pipe
  flags=DRhu user=vmail argv=/usr/bin/maildrop -d ${recipient}
#
# ====================================================================
#
# Recent Cyrus versions can use the existing "lmtp" master.cf entry.
#
# Specify in cyrus.conf:
#   lmtp    cmd="lmtpd -a" listen="localhost:lmtp" proto=tcp4
#
# Specify in main.cf one or more of the following:
#  mailbox_transport = lmtp:inet:localhost
#  virtual_transport = lmtp:inet:localhost
#
# ====================================================================
#
# Cyrus 2.1.5 (Amos Gouaux)
# Also specify in main.cf: cyrus_destination_recipient_limit=1
#
#cyrus     unix  -       n       n       -       -       pipe
#  user=cyrus argv=/cyrus/bin/deliver -e -r ${sender} -m ${extension} ${user}
#
# ====================================================================
# Old example of delivery via Cyrus.
#
#old-cyrus unix  -       n       n       -       -       pipe
#  flags=R user=cyrus argv=/cyrus/bin/deliver -e -m ${extension} ${user}
#
# ====================================================================
#
# See the Postfix UUCP_README file for configuration details.
#
uucp      unix  -       n       n       -       -       pipe
  flags=Fqhu user=uucp argv=uux -r -n -z -a$sender - $nexthop!rmail ($recipient)
#
# Other external delivery methods.
#
ifmail    unix  -       n       n       -       -       pipe
  flags=F user=ftn argv=/usr/lib/ifmail/ifmail -r $nexthop ($recipient)
bsmtp     unix  -       n       n       -       -       pipe
  flags=Fq. user=bsmtp argv=/usr/lib/bsmtp/bsmtp -t$nexthop -f$sender $recipient
scalemail-backend unix    -    n    n    -    2    pipe
  flags=R user=scalemail argv=/usr/lib/scalemail/bin/scalemail-store ${nexthop} ${user} ${extension}
mailman   unix  -       n       n       -       -       pipe
  flags=FR user=list argv=/usr/lib/mailman/bin/postfix-to-mailman.py
  ${nexthop} ${user}

# the following added, KCTang 29/5/2019
smtp-amavis     unix    -       -       -       -       2       smtp
  -o smtp_data_done_timeout=1200
  -o smtp_send_xforward_command=yes
  #-o disable_dns_lookups=yes
  # last line obsolete, replaced with next line, KCTang 12/7/2026
  -o smtp_dns_support_level=disabled
  -o max_use=20
127.0.0.1:10025 inet    n       -       -       -       -       smtpd
  -o content_filter=
  -o local_recipient_maps=
  -o relay_recipient_maps=
  -o smtpd_restriction_classes=
  -o smtpd_delay_reject=no
  -o smtpd_client_restrictions=permit_mynetworks,reject
  -o smtpd_helo_restrictions=
  -o smtpd_sender_restrictions=
  -o smtpd_recipient_restrictions=permit_mynetworks,reject
  -o smtpd_data_restrictions=reject_unauth_pipelining
  -o smtpd_end_of_data_restrictions=
  -o mynetworks=127.0.0.0/8
  -o smtpd_error_sleep_time=0
  -o smtpd_soft_error_limit=1001
  -o smtpd_hard_error_limit=1000
  -o smtpd_client_connection_count_limit=0
  -o smtpd_client_connection_rate_limit=0
  -o receive_override_options=no_header_body_checks,no_unknown_recipient_checks,no_milters

# the following added for spf, KCTang 1/6/2019
policyd-spf   unix  -       n       n       -       0       spawn
  user=policyd-spf argv=/usr/bin/policyd-spf
(full file given, 11/2/2023)
(updated, 12/7/2026)
Create "body_checks" file, if required:
$ sudo micro /etc/postfix/body_checksSpecify one or more lines of texts within //:
/unique text contained in email you do not want to receive/ DISCARD
"DISCARD" means delete from the server.
Create "header_checks" file, if required:
$ sudo micro /etc/postfix/header_checksSpecify similarly.
(header checks added, 7/5/2019)
Change Dovecot settings
Edit config file:
$ sudo micro /etc/dovecot/conf.d/99-mail-stack-delivery.confNote that a number of default config files are contained in sub-directory "conf.d". To override them, create a config file beginning with "99" so that it is read the latest to override the others. The name is based on the previous "mail-stack-delivery" config file, but can be any.
Specify in full:
# This conf file shows custom settings to override those in the conf files provided by Dovecot
# Re-arranged to follow .conf file sequence, KCTang 12/7/2026

# use "telnet <domain name> <143, 110, 993 or 995>" to test connections.
# press "Ctrl-]" to escape, and enter "quit" to exit.
# use "doveconf -n | grep <text>" to debug individual settings
# use "doveconf -n" see the full settings
# use "openssl s_client -connect <domain name>:993 -quiet" and
# use "openssl s_client -connect <domain name>:995 -quiet" to verify TLS handshakes.
# press Ctrl-C to exit.

# protocols = imap pop3 sieve
protocols = imap pop3

# IMAP configuration
protocol imap {
        mail_max_userip_connections = 500
        # 10 in last line increased to 1000, KCTang 25/5/2019
        # 1000 reduced to 500, KCTang 26/6/2019
        imap_client_workarounds = delay-newmail
}

# POP3 configuration
protocol pop3 {
        mail_max_userip_connections = 50
        # 10 in last line increased to 50, KCTang 25/5/2019
        pop3_client_workarounds = outlook-no-nuls oe-ns-eoh
}

# Authentication configuration
auth_mechanisms = plain login
auth_username_chars = abcdefghijklmnopqrstuvwxyzABCDEFGHIJKLMNOPQRSTUVWXYZ01234567890.-_@

# 10-auth.conf
auth_allow_cleartext = no # force TLS, no plaintext auth

# 10-mail.conf
#mail_location = maildir:~/Maildir:LAYOUT=fs
# LAYOUT=fs added to last line, to use "/" instead of "." to denote sub-folders, KCTang 25/5/2019
# The above 2 lines replaced by the following for Dovecot 2.4, KCTang 12/7/2026
mail_driver = maildir
mail_path   = /home/%{user}/Maildir
# mail_inbox_path = /home/%{user}/Maildir/INBOX
# last line forces to have "INBOX"; next line does not, and is used to maintain compatibility with the existing email folders
mail_inbox_path = /home/%{user}/Maildir
mailbox_list_layout = fs
namespace inbox {
  inbox = yes
  separator = /
  prefix =
  subscriptions = yes
  list = yes
  # The following are to auto create Trash folders.
  # Trash folders would not be backed up with back-in-time,
  # and therefore would need to be re-created after email recovery is done from back-in-time.
  mailbox Trash {
    auto = subscribe
  }
}

# 10-master.conf
service imap-login {
  # inet_listener imap inserted, KCTang 12/7/2026
#  inet_listener imap {
#    port = 143
#  }
  inet_listener imaps {
    port = 993
    ssl = yes
  }
  # process_limit increased to 200, KCTang 4/1/2021
  # process_limit increased to 500, KCTang 25/6/2026
  process_limit = 500
}
service pop3-login {
#  inet_listener pop3 {
#    port = 110
#  }
  inet_listener pop3s {
    port = 995
    ssl = yes
  }
  process_limit = 100
}
service auth {
  # Postfix smtp-auth
  unix_listener /var/spool/postfix/private/dovecot-auth {
    mode = 0660
    user = postfix
    group = postfix
  }
}
# The following added to resolve stats-writer failure, KCTang 3/6/2021
# Changed from 0660 to 0666 to give permissions, KCTang 22/7/2024
service stats {
  unix_listener stats-reader {
    user = root
    group = root
    mode = 0666
  }
  unix_listener stats-writer {
    user = root
    group = dovecot
    mode = 0666
  }
}
#service managesieve-login {
#  inet_listener sieve {
#    port = 4190
#  }
#}
#service managesieve {
#}

# 10-ssl.conf
ssl = yes
# original codes as 10-ssl.conf for Dovecot 2.4
# ssl_server_cert_file = /etc/dovecot/private/dovecot.pem
# ssl_server_key_file = /etc/dovecot/private/dovecot.key
# use letsencrypt ssl, KCTang 13/2/2023
ssl_server_cert_file = /etc/letsencrypt/live/kctang.com.hk/fullchain.pem
ssl_server_key_file = /etc/letsencrypt/live/kctang.com.hk/privkey.pem

#ssl_client_ca_dir =

ssl_min_protocol = TLSv1.2
ssl_cipher_list = HIGH:!aNULL:!MD5

# 15-lda.conf
protocol lda {
  postmaster_address = admin@%d
#  mail_plugins = sieve
  quota_full_tempfail = yes
  deliver_log_format = msgid=%m: %$
  rejection_reason = Your message to <%t> was automatically rejected:%n%r
}

# 90-sieve conf
#sieve = file:/var/lib/dovecot/sieve/default.sieve
#sieve_dir = /var/lib/dovecot/sieve/
(full file given, 11/2/2023)
(updated, 13/2/2023)
(updated, 25/6/2026)
(updated for Dovecot 2.4, 12/7/2026)
Activate the changes:
$ sudo systemctl reload postfix
or
$ sudo service postfix reload
and
$ sudo systemctl restart dovecot
or
$ sudo service dovecot reload
Verify success
See whether the Postfix server is running:
$ telnet localhost 25should display:
220 kctang.com.hk ESMTP Postfix (Ubuntu)
ehlo localhostshould display the following:
250-kctang.com.hk
250-PIPELINING
250-SIZE 204800000
250-VRFY
250-ETRN
250-STARTTLS
250-ENHANCEDSTATUSCODES
250-8BITMIME
250-DSN
250-SMTPUTF8
250 CHUNKING
Ctrl-]to exit to "telnet >" prompt.
quitto exit telnet.
Try also:
$ telnet localhost 993("993", not "995", 1/2/2023)
similarly:
$ telnet localhost 465should display either one:
Connected to localhost
Connected to kctang.com.hk
"Ctrl-]"to exit to "telnet >" prompt.
quitto exit telnet.
Specify internal email forwarding
Edit "aliases" file:
$ sudo micro /etc/aliasesSpecify:
postmaster: kctang
webmaster: kctang
kctcl: kctcl, kctclpop
meaning:
- forwarding e-mails sent to postmaster@localhost and webmaster@localhost to kctang@localhost, no email will be left at postmaster or webmaster
(webmaster added, 7/5/2019)
- forwarding e-mails sent to kctcl@localhost to kctcl@localhost (itself) and to kctclpop@localhst, i.e. making a copy
"localhost" means "kctang.com.hk" in our case. For the email user name before "@", there is no need to create a file system user account for it if all emails addressed to it are forwarded elsewhere. The name serves as an alias only of the email account forwarded to.
(added, 17/5/2019)
Activate setting everytime the "aliases" file has been changed:
$ sudo newaliasesCopy to external email accounts
(section added, 17/5/2019)
Execute:
$ sudo micro /etc/postfix/main.cfSpecify at the end of the file (already shown above):
virtual_alias_domains = kctang.com.hk
virtual_alias_maps = hash:/etc/postfix/virtual
Execute:
$ sudo micro /etc/postfix/virtualSpecify to make a copy to itself and a copy to the external email account:
# from               to one or more addresses, separated by a space
kctang@kctang.com.hk kctang@kctang.com.hk name1@external.account.name
kctcl@kctang.com.hk  kctcl@kctang.com.hk name2@external.account.name
Omit making a copy to itself if only email forwarding is required.
Save and exit.
Execute after the "virtual" file is created or changed:
$ sudo postmap /etc/postfix/virtualExecute:
$ sudo systemctl restart postfixTest by sending emails.
Install anti-virus ClamAV
(section added, 30/5/2019)
(heading changed, not just daemon, 13/4/2025)
Install ClamAV:
$ sudo apt update
$ sudo apt install clamav clamav-daemon   (clamav-freshclam and clamavscan also automatically installed)
$ clamscan --version                      (check if clamav is running)
$ sudo dpkg-reconfigure clamav-daemon     (must be done, generally accept all defaults, set yes to scan emails)
$ sudo systemctl restart clamav-freshclam (should have been installed, restart to refresh)
$ sudo systemctl restart clamav-daemon    (ditto)
$ sudo systemctl status clamav-freshclam  (check if running)
$ sudo systemctl status clamav-daemon     (check if running, OK if reported "/bin/mkdir /run/clamav (code=exited, status=1/FAILURE" because directory already created)
$ sudo tail -f /var/log/clamav/clamav.log (see running progress, Ctrl-Z to exit)
(typo corrected, 8/5/2020)
(use sudo, 11/2/2023)
(install clamav also, 13/4/2025)
Filter spam mails
(section added, 30/5/2019)
Execute to install various software:
$ sudo apt update
$ sudo apt install amavisd-new spamassassin
$ sudo apt install pyzor razor            (optional extras)
$ sudo apt install arj cabextract cpio lhasa nomarch pax rar unrar unzip zip  ("lhasa", not "lha")
$ sudo razor-admin -create                (added 19/9/2024)
$ sudo razor-admin -register              (added 19/9/2024)
Configure to integrate with ClamAV:
$ sudo adduser clamav amavis
$ sudo adduser amavis clamav
Configure SpamAssassin:
$ sudo micro /etc/default/spamassassin
Change "ENABLED=0" to:
(no need to configure because amavisd-new handles it, 19/9/2024)
ENABLED=1
(no longer set here, 8/5/2020)
Start the service:
$ sudo systemctl start spamassassin.service
(no need to configure because amavisd-new handles it, 19/9/2024)
Configure Amavisd-new:
dded, 14/4/2025)
Specify to enable both antivirus and spam checking modes:
$ sudo micro /etc/amavis/conf.d/15-content_filter_modeSpecify to enable both antivirus and spam checking modes:
use strict;
# Uncomment the two lines below to enable antivirus checking mode
@bypass_virus_checks_maps = (\%bypass_virus_checks, \@bypass_virus_checks_acl, \$bypass_virus_checks_re);
# Uncomment the two lines below to enable SPAM checking mode
@bypass_spam_checks_maps = (\%bypass_spam_checks, \@bypass_spam_checks_acl, \$bypass_spam_checks_re);
1;  # insure a defined return
Execute:
$ sudo micro /etc/amavis/conf.d/20-debian_defaultsAdjust the following values only if desired to flag more messages as spam:
$sa_tag_level_deflt = 2.0; # add spam info headers if at, or above that level
$sa_tag2_level_deflt = 6.31; # add 'spam detected' headers at that level
$sa_kill_level_deflt = 6.31; # triggers spam evasive actions
$sa_dsn_cutoff_level = 10; # spam level beyond which a DSN is not sent
Execute:
$ sudo micro /etc/amavis/conf.d/50-userSpecify all other user settings under this file:
$myhostname = 'kctang.com.hk';
$mydomain = 'kctang.com.hk';
$unrar = ['rar', 'unrar'];
$final_spam_destiny = D_DISCARD;    (deleted, 8/5/2020, reinstated, 26/7/2021)
$enable_dkim_verification = 0;      (added, 14/4/2025, amavis would not check dkim but leave it to OpenDKIM)
(combine all settings here, 14/4/2025)
Edit the following file to specify domains to be whitelisted if necessary:
$ sudo micro /etc/amavis/conf.d/40-policy_banksQuote the names as the examples given there.
Re-start the service (note not "amavis-new"):
$ sudo systemctl restart amavis
$ sudo systemctl status amavis
If, when executing "sudo apt remove spamassassin" for any reason, it is reported that sa-compile cannot also be removed, execute:
$ sudo apt install spamd
$ sudo apt remove sa-compile
$ sudo apt remove spamd
(added, 14/4/2025)
Configure Postfix for amavis content filter
(split from the last section, 13/4/2025)
Edit "master.cf" settings:
$ sudo micro /etc/postfix/master.cfAdd the following immediately below the "pickup" transport service (already done above):
     -o content_filter=
     -o receive_override_options=no_header_body_checks
Add the following to the end of the file (already done above):
smtp-amavis     unix    -       -       -       -       2       smtp
    -o smtp_data_done_timeout=1200
    -o smtp_send_xforward_command=yes
    -o disable_dns_lookups=yes
    -o max_use=20
127.0.0.1:10025 inet    n       -       -       -       -       smtpd
    -o content_filter=
    -o local_recipient_maps=
    -o relay_recipient_maps=
    -o smtpd_restriction_classes=
    -o smtpd_delay_reject=no
    -o smtpd_client_restrictions=permit_mynetworks,reject
    -o smtpd_helo_restrictions=
    -o smtpd_sender_restrictions=
    -o smtpd_recipient_restrictions=permit_mynetworks,reject
    -o smtpd_data_restrictions=reject_unauth_pipelining
    -o smtpd_end_of_data_restrictions=
    -o mynetworks=127.0.0.0/8
    -o smtpd_error_sleep_time=0
    -o smtpd_soft_error_limit=1001
    -o smtpd_hard_error_limit=1000
    -o smtpd_client_connection_count_limit=0
    -o smtpd_client_connection_rate_limit=0
    -o receive_override_options=no_header_body_checks,no_unknown_recipient_checks,no_milters
Edit "main.cf" settings:
$ sudo micro /etc/postfix/main.cfAdd the following to the end of the file (already done above):
content_filter = smtp-amavis:[127.0.0.1]:10024Comment it with "#" at the start of the line if desired to stop using amavis.
Restart service:
$ sudo systemctl restart postfixTest that the Amavisd-new SMTP is listening:
telnet localhost 10024
Trying 127.0.0.1...
Connected to kctang.com.hk.
Escape character is '^]'.
220 [127.0.0.1] ESMTP amavisd-new service ready
Press Ctrl-] and enter "quit" to exit.
Check the hidden header of email received after the above to see the presence of one or more of the following:
X-Spam-Level:
X-Virus-Scanned: Debian amavisd-new at kctang.com.hk
X-Spam-Status:
X-Spam-Level:
If present, the spam filter is working.
See https://help.ubuntu.com/lts/serverguide/mail-filtering.html.en for a full explanation of the above.
(outdated, 19/9/2024)
Delete filtered mails
(section added, 9/12/2020)
Filtered files are stored in /var/lib/amavis/virusmails and should be deleted regularly.
Edit to define a scheduled job to delete filtered files:
$ sudo crontab -e -u amaviswhere:
-e = edit
-u amavis = user amavis
Define as follows:
0 0 * * * find /var/lib/amavis/virusmails/ -type f -mtime +15 -deletewhich means at
0 = 0 minute
0 = 0 hour
* = every day of month
* = every month
* = every day of week
find /var/lib/amavis/virusmails = find in that directory
-type f = regular files
-mtime +15 = file modified more than 15 days ago
-delete = delete the file
Set up DKIM
(implemented, 19/2/2022
section added, 10/10/2022)
Set up DomainKeys Identified Mail (DKIM) to prevent email phishing by others by putting a digital key in the outgoing email headers so that the receiving email server can verify the digital key by looking up the public key in the DNS record of the sender domain.
Install OpenDKIM:
$ sudo apt install opendkim opendkim-toolsAdd postfix user to opendkim group:
$ sudo gpasswd -a postfix opendkimConfigure:
$ sudo micro /etc/opendkim.confSpecify:
# keep to log in /var/log/mail.log
Syslog              yes
SyslogSuccess       yes
# change to "yes" if desired to log more details
Logwhy              no
# keep
Canonicalization    relaxed/simple
# uncomment
Mode                sv
SubDomains          no
# keep
OversignHeaders     from
# add
AutoRestart         yes
AutoRestartRate     10/1M
Background          yes
DNSTimeout          5
SignatureAlgorithm  rsa-sha256
# keep
UserID              opendkim
UMask               007
# comment
#Socket             local:/run/opendkim/opendkim.sock
# add
Socket              local:/var/spool/postfix/opendkim/opendkim.sock
# keep
PidFile             /run/opendkim/opendkim.pid
TrustAnchorFile     /usr/share/dns/root.key
# keep
KeyTable            refile:/etc/opendkim/key.table
SigningTable        refile:/etc/opendkim/signing.table
ExternalIgnoreList  /etc/opendkim/trusted.hosts
InternalHosts       /etc/opendkim/trusted.hosts
Create a directory structure:
$ sudo mkdir /etc/opendkim
$ sudo mkdir /etc/opendkim/keys
$ sudo chown -R opendkim:opendkim /etc/opendkim
$ sudo chmod go-rw /etc/opendkim/keys
Create the signing table:
$ sudo micro /etc/opendkim/signing.tableSpecify:
*@kctang.com.hk        default._domainkey.kctang.com.hk
# if sub-domain used
*@*.kctang.com.hk      default._domainkey.kctang.com.hk
Create the key table:
$ sudo micro /etc/opendkim/key.tableSpecify:
default._domainkey.kctang.com.hk kctang.com.hk:default:/etc/opendkim/keys/kctang.com.hk/default.privateCreate the trusted hosts file:
$ sudo micro /etc/opendkim/trusted.hostsSpecify to sign but not to verify emails from localhost or the following domain:
127.0.0.1
localhost
*.kctang.com.hk
("*" added, 1/2/2023)
Create separate folder for the domain and generate Private/Public Keypair:
$ sudo mkdir /etc/opendkim/keys/kctang.com.hk
$ sudo opendkim-genkey -b 1024 -d kctang.com.hk -D /etc/opendkim/keys/kctang.com.hk -s default -v
Use -b 2048 instead of -b 1024 for bits of key if the domain name server permits.
-d for domain name
-D for directory to store the keys
-s for selector
The private key will be written to default.private file and the public key will be written to default.txt file.
Change owner and permission:
$ sudo chown opendkim:opendkim /etc/opendkim/keys/kctang.com.hk/default.private
$ sudo chmod 600 /etc/opendkim/keys/kctang.com.hk/default.private
Display the public key:
$ sudo cat /etc/opendkim/keys/kctang.com.hk/default.txtThe string after the p parameter is the public key:
default._domainkey      IN      TXT     ( "v=DKIM1; h=sha256; k=rsa; "
          "p=..." )  ; ----- DKIM key default for kctang.com.hk
Define in the Domain Name Record on the domain name host:
Name = default._domainkey
Address or value = the text in ( ) above, but deleting double quotes and spaces
Type = SPF (txt)
Test DKIM Key:
$ sudo opendkim-testkey -d kctang.com.hk -s default -vvvSuccessful if an opendkim-testkey output is key OK.
No problem if an opendkim-testkey output is key not secure because DNSSEC may not have been enabled on the domain name.
The DKIM record may take up to 24 hours to propagate to the Internet.
Can also go to https://www.dmarcanalyzer.com/dkim/dkim-check/, enter "kctang.com.hk" as the domain name and "default" as the selector to check DKIM record propagation.
In case of the query timed out error, comment out the following line in /etc/opendkim.conf file and restart opendkim.service.
TrustAnchorFile /usr/share/dns/root.keyCreate a directory to hold the OpenDKIM socket file, and allow only opendkim user and postfix group to access it:
$ sudo mkdir /var/spool/postfix/opendkim
$ sudo chown opendkim:postfix /var/spool/postfix/opendkim
Edit:
$ sudo micro /etc/default/opendkimComment out:
# SOCKET=local:$RUNDIR/opendkim.sockAdd to suit Ubuntu:
SOCKET=local:/var/spool/postfix/opendkim/opendkim.sockCreate the file
$ sudo mkdir /var/spool/postfix/opendkim
$ sudo chown -R opendkim:opendkim /var/spool/postfix/opendkim
(file creation added, 11/2/2023)
Edit Postfix main.cf to configure Milter as shown above.
Restart opendkim and postfix service and check status to see any errors:
$ sudo systemctl restart opendkim postfix
$ sudo systemctl status opendkim postfix
(status check added, 11/2/2023)
Set up SPF record
(implemented, 19/2/2022
section added, 14/4/2025)
A Sender Policy Framework (SPF) record is to enable verification that an email comes from its authorized email server bearing the proper domain name.
Execute to install spf app:
$ sudo apt install postfix-policyd-spf-pythonEdit "master.cf" settings:
$ sudo micro /etc/postfix/master.cfSpecify as follows (already done above):
# the following added for spf, KCTang 1/6/2019
policyd-spf   unix  -       n       n       -       0       spawn
  user=policyd-spf argv=/usr/bin/policyd-spf
Edit "main.cf" settings:
$ sudo micro /etc/postfix/main.cfSpecify as follows (already done above):
smtpd_recipient_restrictions =
   reject_unknown_sender_domain
   reject_unknown_recipient_domain
   reject_unauth_pipelining
   permit_mynetworks
   permit_sasl_authenticated
   reject_unauth_destination
   check_policy_service unix:private/policyd-spf
# last line added to enable spf, KCTang 19/2/2022

# the following line added to enable spf, KCTang 19/2/2022
policyd-spf_time_limit = 3600
Set up the SPF record with the domain hosting company as shown in the next section.
Set up Domain Name record
Set up the Domain Name record at the domain hosting company as follows:
v=DMARC1; p=quarantine; pct=10
v=spf1 ip4::61.238.249.58 include:hku.hk include:_spf.google.com include:spf.protection.outlook.com ~all
The first one is a DMARC record.
The second one is a spf record.
The ip4 is our company's IP address. This is not a secret.
(added, 21/2/2023)
(ip address changed, 7/1/2025)
Increase Dovecot connection limit
(section added, 25/6/2026)
(updated, 17/7/2026)
Edit config file:
$ sudo micro /etc/dovecot/conf.d/99-mail-stack-delivery.confSpecify the following which controls the maximum number of all connections to Dovecot:
service imap-login {
  process_limit = 500
}
Save and exit.
Activate the change:
$ sudo systemctl reload dovecotCheck limit of number of files:
$ systemctl show dovecot | grep LimitNOFILEIt should show:
LimitNOFILE=65535
LimitNOFILESoft=65535
No need to adjust limit of number of files which is big enough based on Dovecot 2.4.
Monitor live usage:
Active sessions:
$ sudo doveadm whoMemory per process:
$ ps -o pid,rss,comm -u dovecotFile descriptors in use:
$ lsof -u dovecot | wc -lSystem load:
$ sudo apt install htop
(if not already installed)

$ htop
Security hardening:
Enable **fail2ban** or similar to block brute‑force login attempts.
Check kernel parameters (optional but good practice):
$ sysctl fs.file-maxThis should give a very big number like: fs.file-max = 9223372036854775807, which represents the maximum number of file descriptors.
Install Apache2 web server
Install Apache2 web server KCTangNote
29/1/2026: ssl configuration updated. "gedit" changed to "micro".
20/9/2024: Certbot updated.
30/7/2020: Updated to use Python3.
6/1/2020: Updated.
8/5/2019: More explanation on default configuration given. "gksudo gedit" changed to "sudo gedit" as Ubuntu 18.04 dropped "gksudo".
11/4/2018: "apache2" changed to "apache2.service" when used in conjunction with systemctl.
25/12/2014: First created.
Intro
Apache2 web server provides web page services.
Prepare
Define hosts:
$ sudo micro /etc/hostsSpecify:
127.0.0.1 kctang.com.hk <computer name> localhost
127.0.1.1 <computer name>
Define hostname:
$ sudo micro /etc/hostnameSpecify a line to contain:
<computer name>Install
Install:
$ sudo apt install apache2or before Ubuntu 16.04:
$ sudo apt-get install apache2Start service:
$ sudo systemctl start apache2.serviceor:
$ sudo service apache2 startSet the internet router to re-direct http connections to server port 80.
(The following added, 8/5/2019)
Edit the enabled configuration file:
$ sudo micro /etc/apache2/sites-enabled/000-default.conf("ls -ls" changed to "gedit", 6/1/2020)
("gedit" changed to "micro", 29/1/2026)
The file is symbolic linked to the actual location at /etc/apache2/sites-available/000-default.conf.
The file includes the following:
#ServerName www.example.com
ServerAdmin webmaster@localhost
DocumentRoot /var/www/html
Leave the ServerName to the HTTPS setting below.
Change the ServerAdmin email address to the correct address, or add that address when setting up the email server.
The DocumentRoot tells that the website directories and files will be stored under /var/www/html.
Note that previously the DocumentRoot was at /var/www. The change from /var/www/html would affect the installation of Drupal as explaned on that web page.
Serf to https://www.kctang.com.hk or https://kctang.com.hk on web browser, the following page (var/www/html/index.html) will be displayed to indicate successful installation:
(end of add)
Configure to use HTTPS
This is optional. Starting to use on 6 April 2018.
When the Apache2 server is configured to use HTTPS, and when "https://" is used as the prefix to the website address URL (Uniform Resource Locator) in the web browser navigation bar, encrypted communications will be used with the Apache2 server. This will enhance security.
To do this, enable the mod_ssl module:
$ sudo a2enmod sslIn order for Apache2 to use HTTPS service, a certificate and a key file are needed. Use EFF's Certbot to automatically deploy Let's Encrypt certificates and enable HTTPS.
Certbot is downloadable at:
https://certbot.eff.org/No need to download from there.
(revised 8/5/2019)
Install certbot and configure Apache2:
$ sudo apt update
$ sudo apt install software-properties-common
$ sudo add-apt-repository ppa:certbot/certbot          (outdated and not necessary)
$ sudo apt update
$ sudo apt install python3-certbot-apache
$ sudo certbot --apache -d kctang.com.hk -d www.kctang.com.hk    (enable both addresses)
$ sudo certbot renew                                   (for renewal only)
(python changed to python3, 30/7/2020)
(revised to permit two addresses, 24/1/2026)
When answering questions
- decide whether to re-install certificate or renew and replace
- select to redirect HTTP traffic to HTTPS.
(added, 8/5/2019)
The following will happen:
- /etc/letsencrypt directory created to contain certificate and key obtained from Let's Encrypt:
- /etc/letsencrypt/live/kctang.com.hk/fullchain.pem
- /etc/letsencrypt/live/kctang.com.hk/privkey.pem
- (these two files can also be used by the email server)
- A file /etc/apache2/sites-available/000-default-le-ssl.conf added and enabled.
- It contains (original comment rows deleted):
<IfModule mod_ssl.c>
<VirtualHost *:443>
       ServerAdmin webmaster@localhost
       DocumentRoot /var/www/html
       ErrorLog ${APACHE_LOG_DIR}/error.log
       CustomLog ${APACHE_LOG_DIR}/access.log combined

# the following added manually
RewriteEngine On
RewriteCond %{HTTP_HOST} ^www\.kctang\.com\.hk$ [NC]
RewriteRule ^ https://kctang.com.hk%{REQUEST_URI} [L,R=301]

# the following inserted by Let's Encrypt
ServerName kctang.com.hk
Include /etc/letsencrypt/options-ssl-apache.conf
ServerAlias www.kctang.com.hk
SSLCertificateFile /etc/letsencrypt/live/kctang.com.hk/fullchain.pem
SSLCertificateKeyFile /etc/letsencrypt/live/kctang.com.hk/privkey.pem
</VirtualHost>
</IfModule>

# the following added manually

<IfModule mod_ssl.c>
<VirtualHost *:80>
       ServerAdmin webmaster@localhost
       DocumentRoot /var/www/html
       ErrorLog ${APACHE_LOG_DIR}/error.log
       CustomLog ${APACHE_LOG_DIR}/access.log combined

RewriteEngine on
RewriteRule ^ https://kctang.com.hk%{REQUEST_URI} [L,R=301]
ServerName kctang.com.hk
ServerAlias www.kctang.com.hk
</VirtualHost>
</IfModule>- It provides two virtual hosts 443 and 80.
- "http://kctang.com.hk" and "http://www.kctang.com.hk" are processed by virtual host 80, which redirects both to "https://kctang.com.hk" to be processed by virtual host 443.
- "https://kctang.com.hk" and "https://www.kctang.com.hk" are processed by virtual host 443, which rewrites "www.kctang.com.hk" as "kctang.com.hk".
- The resultant path becomes "https://kctang.com.hk/...".
(revised, 8/5/2019)
(revised, 20/9/2024)
(full codes given, 24/1/2026)
- A cron job created to renew the certificate which lasts for 90 days before expiry.
Enable new module and disable default module if not already automatically done:
$ sudo a2ensite 000-default-le-ssl
$ sudo a2dissite 000-default
$ sudo a2dissite default-ssl
$ sudo systemctl restart apache2.service
(000-default also disabled, 24/1/2026)
Install MySQL server + PHP + phpMyAdmin
Install MySQL server + PHP + phpMyAdmin KCTangNote
- 17/7/2026: "Set transaction_isolation" updated.
- 26/12/2025: debian-sys-maint password error treatment added.
- 21/12/2025: Updated.
- 28/4/2024: Updated. "Manipulate whole database" section added.
- 7/11/2023: Changing transaction_isolation.
- 8/1/2020: Configuring MySQL-server updated. Removing completely MySQL added.
- 6/1/2020: Updated.
- 8/5/2019: References to PHP5 deleted. Secure installation added. Root user authentication added. automysqlbackup added.
- 25/12/2014: Created.
Intro
MySQL is a database server.
PHP (PHP5 before Ubuntu 16.04) is a web page programming language.
phpMyAdmin is a web interface to administer the MySQL server.
Replace "[text]" with "actual text without [ or ] and without spaces" in the following commands.
Install MySQL-server
Execute:
$ sudo apt update
$ sudo apt install mysql-server
$ sudo systemctl start mysql.service
$ sudo systemctl status mysql.service
Execute if without setting password:
$ sudo mysqlwill access mysql shell:
mssql> quitEnter "quit" to exit.
(last part addition, 21/12/2023)
Config MySQL-server
(section added, 8/5/2019)
Execute to secure:
$ sudo mysql_secure_installationEnter sudo user password, and new mysql root password for the first time or the existing mysql root password.
When answering the secure installation questions:
- validate password component - yes
- set password validation policy - 2 for HIGH
(corrected, "2" is for HIGH, 28/4/2023)
- set password strength - high
- change the password for root - yes or no as appropriate
- set new password - as appropriate
- re-enter new password -
- continue with the password - yes or no as appropriate
- remove anonymous users - yes
- disallow root login remotely - no
- remove test database - yes
- reload privilege table now - yes
(steps updated, 8/1/2022)
(suggested answers added, 6/1/2020)
Adjust authentication for use with phpMyAdmin
(section added, 8/5/2019)
If not done, the phpMyAdmin menu would not provide a choice to add users.
Execute
$ mysql -u root -penter the mysql root user's password when prompted.
(revised to remove unnecessary "sudo", 28/4/2024)
Execute:
mysql> SELECT user,plugin FROM mysql.user;It will show that the root user's authentication plugin is "auth_socket".
Execute:
mysql> ALTER USER 'root'@'localhost' IDENTIFIED WITH mysql_native_password BY '<mysql_root_password>';
mysql> FLUSH PRIVILEGES;
mysql> SELECT user,plugin FROM mysql.user;
mysql> quit
(semi colon added after "PRIVILEGES", 6/1/2020)
(password must be quoted, 21/12/2025)
It should show that the root user's authentication plugin has been changed to "mysql_native_password".
Install PHP and related apache2 module
Execute:
$ sudo apt install php libapache2-mod-phpInstall phpMyAdmin
Execute:
$ sudo apt install phpmyadminSet its own password.
Choose whether to keep the existing database whenever phpmyadmin is removed and re-installed.
Enable Apache2 config:
$ sudo ln -s /etc/phpmyadmin/apache.conf /etc/apache2/conf-available/phpmyadmin.conf
$ sudo a2enconf phpmyadmin.conf
Whenever Apache2 has been purged and re-installed, this enabling must be done again.
Restart Apache2 service:
Execute:
$ sudo systemctl restart apache2.serviceCreate a database user and a database
Execute:
 https://localhost/phpmyadmin
 (or)
 https://kctang.com.hk/phpmyadmin
Enter login name and password.
Create a user called <name, e.g. Drupal> together with a database also called <database_name>:
- click "Use accounts" at the top menu bar
- click "Add user account" at the page middle
-
enter <database_name> at the User name entry
(last two lines updated, 21/12/2025)
- select "Local" at the Host entry
- enter and re-type the password
- accept Authentication plugin: Caching shs2 authentication
(last line added, 21/12/2025)
- click "Create database with same name and grant all privileges"
- click "Go" at the bottom
Install automysqlbackup
(section added, 8/5/2019)
The software will backup mySQL databases daily, weekly and monthly.
Execute to install:
$ sudo apt install automysqlbackupEdit the configuration file:
$ sudo micro /etc/default/automysqlbackupSpecify:
BACKUPDIR="/var/lib/automysqlbackup" as the backup directory
MAILCONTENT="log" to send log email
MAILADDR="root" to send the email to root user, which has been set under Postfix Aliases to re-direct to the appropriate user.
Execute to run for the first time:
$ sudo automysqlbackupInspect daily backups:
$ sudo ls /var/lib/automysqlbackup/daily(the following added, 26/12/2025)
If ERROR 1045 (28000): Access denied for user 'debian-sys-maint'@'localhost' (using password: YES) is encountered, That it means the special maintenance account debian-sys-maint (created automatically by Debian/Ubuntu during MySQL/MariaDB installation) can no longer authenticate with the password stored in its config file. This mismatch usually happens after:
- A MySQL/MariaDB upgrade or reinstallation
- Restoring from backup
- Manual changes to users or privileges
- Regenerating configs without syncing the password
Check user entry:
$ mysql -u root -p               (enter mysql root user's password)
mysql> SELECT user, host FROM mysql.user WHERE user='debian-sys-maint';
mysql> exit
Test login:
$ sudo mysql --defaults-file=/etc/mysql/debian.cnf -e "SELECT 1;"If it fails with error message, inspect file and get password:
$ sudo cat /etc/mysql/debian.cnfResync password and re-test:
$ mysql -uroot -e "ALTER USER 'debian-sys-maint'@'localhost' IDENTIFIED BY '<password_from_debian.cnf>'; FLUSH PRIVILEGES;"
mysql> exit
$ sudo mysql --defaults-file=/etc/mysql/debian.cnf -e "SELECT 1;"
Run backup:
$ sudo automysqlbackupSet transaction_isolation to READ COMMITTED
(section added, 6/11/2023)
To suit Drupal 10, change the transaction_isolation from "REPEATABLE READ" to "READ COMMITTED".
Execute:
$ mysql -u root -p (enter mysql root user's password)(revised to remove "sudo", 284/2024)
Execute:
mysql> SET GLOBAL TRANSACTION ISOLATION LEVEL READ COMMITTED;
mysql> SELECT @@GLOBAL.transaction_isolation;
The first command is to set. The second command is to verify.
To make the setting persist after reboot:
mysql> SET PERSIST transaction_isolation = 'READ-COMMITTED';
mysql> quit
(added, 17/7/2026)
To confirm the setting:
$ mysql -u root -p
mysql> show variables WHERE Variable_name LIKE "%_isolation";
mysql> quit
(added, 17/7/2026)
Manipulate whole database
(section added, 28/4/2024)
Execute:
$ mysql -u root -p               (enter mysql root password when prompted)
or
$ mysql -u [database_username] -p[database_user_password]   (no space after "-p")
Show existing databases:
mysql> SHOW DATABASES;Create database:
mysql> CREATE DATABASE [new_database_name];
(or)
$ mysqladmin -u [database_username] -p[database_user_password] create [new_.database_name]
Delete database:
mysql> DROP DATABASE [database_name];
(or)
$ mysqladmin -u [database_username] -p[database_user_password] drop [database_name]
Export database:
$ mysqldump -u [database_username] -p[database_user_password] -R [database_name] > [filename].sqlNo space right after "-p".
"-R" to include stored procedures and functions.
Import exported database:
$ mysql -u [database_username] -p[database_user_password] [empty_database_name] < [filename].sqlRename database:
- Export as above.
- Create a blank empty database of a new name as above
- Import to the new empty database as above.
- Check if restored database useable as intended.
Restore backup database:
- Find a backup .sql or .sql.gz file, copy to the current directory, and, if gz file, unzip to sql file:
$ sudo ls -ls /var/lib/automysqlbackup/daily/
(or)
$ sudo ls -ls /var/lib/automysqlbackup/weekly/
(or)
$ sudo ls -ls /var/lib/automysqlbackup/monthly/
$ sudo cp [path_to_backup_file]/[backup_filename] [temp_filename].sql.gz
$ sudo gunzip [temp_filename].sql.gz
$ sudo chmod 777 [temp_filename].sql- Backup the existing database as above.
- Delete the existing database as above.
- Create a blank empty database of the same name or a new name as above.
- Import to the new empty database of the desired name as above.
- Check if restored database useable as intended.
- Delete the temporary file if no longer to be used:
$ rm [temp_filename].sqlRemove mySQL completely
(section added, 8/1/2022)
sudo systemctl stop mysql.service
sudo apt purge mysql*
sudo apt autoremove                    (optional)
sudo apt autoclean                     (optional)
sudo apt remove dbconfig-mysql
sudo rm -r /var/lib/mysql
sudo rm -r /log/mysql
sudo rm -r /etc/mysql
sudo deluser mysqlInstall Drupal 10 content management system
Install Drupal 10 content management system KCTangNote
- 17/7/2026: php 8.5 used.
- 25/2/2026: "layout.css" revised.
- 22/2/2026: "Add custom styles to Bartik theme" re-written.
- 29/1/2026: "nano" changed to "micro".
- 24/1/2026: ".htaccess" revised.
- 25/12/2025: "Modify Drush command" section added. GUI editor gedit changed to text editor nano.
- 21/12/2025: Updated.
- 15/12/2025: blockquote in "append-to-elements.css" and "print.css" files revised. Commenting methods in css files corrected from "#" to "/* comment */".
- 22/11/2024: "print.css" added to the list in append-to-bartik-css.sh
- 21/9/2024: Highlight mark settings added to layout.css.
- 11/9/2024: php uploading capacity increased.
- 26/6/2024: Setting of "state_cache" in settings.php added.
- 28/4/2024: Sections on restoring and relocating Drupal revised.
- 24/4/2024: Sections re-arranged to describe fresh installation procedures followed by upgrading procedures, instead of upgrading procedures followed by fresh installation procedures. "print.css" for printer-friendly version added. List of modules added.
- 24/1/2024: "php/8.3" used.
- 8/11/2023: TOP API and Convert Bundles installations added. Adding buttons to CKEditor revised.
- 5/11/2023: Upgrading to Drupal 10 added. Drupal 9 and before deleted.
- 21/12/2021: Bartik theme used instead of Mayo.
- 11/11/2021: Errors in updating core manually corrected.
- 5/1/2020: Problems when updating to Drupal 8.8 under php7.4 described. Some text updating.
- 9/9/2019: Composer files also copied when relocating system.ttp
- 18/7/2019: Composer configuration actions added.
- 7/7/2019: Original user-defined files and attributes kept when updating manually.
- 26/5/2019: Composer and Drush installations added. Manual core installation added. Deleting configuration file added.
- 16/5/2019: Simplified installation step added. Using new shell to restore added.
- 8/5/2019: Page on Drupal 8 withdrawn. All "/var/www/web" changed to "/var/www/html/web" because Apache2 prefers to put website files underneath "/www/web/html", and it is easier that way. Relocating Drupal 8 added. Print page stylesheet re-written.
- 18/1/2019: Updating Drupal 8 core using composer added.
- 30/9/2018: Setting CKEditor to use Mayo theme stylesheet added. Setting print page to also use Mayo theme stylesheet added. Adding custom styles added.
- 23/9/2018: "php/7.0" changed to "php/7.2".
- 3/9/2018: First created from the page on Drupal 7 after major upgrading to Drupal 8. Resolution of CKEditor table border added.
Intro
(section revised, 5/11/2023)
Drupal is a web site content management system serving web pages to the internet.
Upgrading from Drupal 9 to 10 has been deferred because Drupal 10 has changed the default theme Bartik to Olivero front-end theme and Claro administration theme and some of the modules do not have compatible upgrades. We have been using Bartik and prefer it over those new themes.
However, Drupal 9 reached end of life on 1 Nov 2023. Our Drupal 9.5.11 was therefore upgraded to Drupal 10.1.6 on 4 November 2023.
This page documents the procedures for a fresh Drupal 10 installation while upgrading procedures are described later. Most of the previous text about installing Drupal 8 and upgrading to Drupal 9 has been deleted because they are not useful anymore. Some old bits and pieces have been retained in case they may be useful.
Prepare
(section revised, 5/11/2023)
(section moved to the front, 22/4/2024)
Install Apache2 web server if not already installed.
Enable Apache2 rewrite module (should have been automatically installed when installing HTTPS):
$ sudo a2enmod rewriteConfigure Apache2:
$ sudo micro /etc/apache2/apache2.confSpecify, keeping "<" and ">":
<Directory /var/www/>
    Options Indexes FollowSymLinks
    # AllowOverride None # replaced with next line
    AllowOverride All
    Require all granted
</Directory>
Restart Apache2 service:
$ sudo systemctl restart apache2
(or)
$ sudo service apache2 restart
Install MySQL server + PHP + phpMyAdmin, and create a user with database both called "drupal".
("drupal8" changed to "drupal, 17/7/2026)
Install Composer
(updated, 22/4/2024)
Install Composer from any where, and go to the directory under which all Drupal files will be installed. "/var/www/html" is the top one possible
$ sudo apt install composerInstall Drupal 10
(section added, 5/11/2023)
(updated merging others, 22/4/2024)
Go to Drupal's website https://www.drupal.org/ for general reference.
Go to https://www.drupal.org/project/drupal/releases to find the latest release.
Assuming the latest is "x.y.z", execute
$ cd /var/www/html
$ composer create-project drupal/recommended-project:x.y.z "install-dir"
Change "install-dir" to a new name such as "drupal".
The folder structure will be:
/var/www/html/drupal/web
/var/www/html/drupal/web/core
(etc.)
/var/www/html/drupal/vendor
Because our website was upgraded from Drupal 9 to 10, our website used "drupal/legacy-project" structure instead of "drupal/recommended-project" structure. "drupal/legacy-project" has now been removed as an installation choice, but we keep it.
The folder structure is:
/var/www/html/web
/var/www/html/web/core
(etc.)
/var/www/html/web/vendor
"/web" in the drupal/legacy_project" structure would mean "/drupal/web" in the "drupal/recommended-project" structure.
Here we use "/web", and work from there.
Create a location for site specific files:
$ cd /var/www/html/web
$ chmod a+w sites/default
$ mkdir sites/default/files
$ sudo chown -R www-data:www-data sites/default/files
("a+W" corrected as "a+w", 21/12/2025)
Create the initial configuration file:
$ sudo cp sites/default/default.settings.php sites/default/settings.phpChange ownership:
$ chmod a+w sites/default/settings.php("a+W" corrected as "a+w", 21/12/2025)
Disable a hidden file to disable re-direction of webpages:
$ cd /var/www/html/
$ mv .htaccess .htaccessx
Restart Apache2 service:
$ sudo systemctl restart apache2
(or)
$ sudo service apache2 restart
Open the web browser.
Go to https://localhost/web/core/install.php.
Follow the steps there:
- Choose language: English language
- Choose profile: Standard
- Setup database: MySQL
- MySQL database name, user name and password as defined above
- Advanced options
- Host: localhost
- Port number: 3306
- Transaction isolation level: READ COMMITTED
- Site name: www.kctang.com.hk
- Site e-mail address: <>@kctang.com.hk
- Site maintenance username: <name of the administrator>
- Site maintenance user e-mail address: <>@kctang.com.hk
- Default country: Hong Kong S.A.R., China
- Default time zone: Asia/Hong Kong
- Check for updates automatically: Checked
- Receive e-mail notifications: Checked
- Save and continue and the website will be up and running.
Enable the hidden file:
$ mv .htaccessx .htaccess
$ cd web
Change directory and file permissions to restrict:
$ cd web
$ chmod go-w sites/default/settings.php
$ chmod go-w sites/default
Increase upload file size limit:
$ sudo micro /etc/php/8.5/apache2/php.ini(php 8.3 used, 22/1/2024)
(php 8.5 used, 17/7/2026)
Change existing capacity to:
; increased from 8M to 200M to 1000M
post_max_size = 1000M
; increased from 2M to 50M to 1000M
upload_max_filesize = 1000M
; increased from 20
max_file_uploads = 100
(capacity increased, 11/9/2024)
Restart Apache2 service after every change:
$ sudo systemctl restart apache2
(or)
$ sudo service apache2 restart
Edit "settings.php" file:
$ sudo micro sites/default/settings.phpSpecify trusted hosts:
$settings['trusted_host_patterns'] = array(
   '^www\.kctang\.com\.hk$',
   '^kctang\.com\.hk$',
   '^localhost$',
);
Set state_cache:
$settings['state_cache'] = True;(added, 20/6/2024)
Disable "install.php" file:
$ sudo mv core/install.php core/<some new name>Re-direct http path to sub-directory "web"
The default DocumentRoot in the default enabled Apache2 configuration file /etc/apache2/sites-enabled/000-default.conf or 000-default-le-ssl.conf is "/var/www/html/".
(revised to include 000-default-le-ssl.conf, 24/1/2026)
Web browers can access any permissible directories or files underneath the DocumentRoot. Access outside the Document Root will not be possible.
When the Drupal root directory /web is placed underneath /var/www/html such as /var/www/html/web, then https://kctang.com.hk will access the default index.html file underneath /var/www/html, but in the case of https://kctang.com.hk/web, access to those underneath /web is possible.
To re-direct https://kctang.com.hk to access /var/www/html/web directly, create a new ".htaccess" file under "/var/www/html":
$ sudo micro /var/www/html/.htaccessSpecify:
<IfModule mod_rewrite.c>
  RewriteEngine on
  # If the uri part after the domain name does not start with "/web" or "/roundcube" or "/config"
  RewriteCond %{REQUEST_URI} !^/web(/.*)?$ [NC]
  RewriteCond %{REQUEST_URI} !^/roundcube(/.*)?$ [NC]
  RewriteCond %{REQUEST_URI} !^/config(/.*)?$
  # Insert to start with "/web"
  RewriteRule ^(.*)$ /web/$1 [L,R=301]
</IfModule>
RewriteCond
[NC] = case insensitive, [OR] = or next condition
RewirteRule
[R] = force redirect
[F] = force URL to be forbidden
[G] = force
[L] = last rule
[P] = force proxy
Regular expressions
! = not
. = any single char
[chars] = one of chars
[^chars] = none of chars
text1 | text2 = text1 or text2
? = 0 or 1 of the preceding text
* = 0 or N of the preceding text (N > 0)
+ = 1 or N of the preceding text (N > 1)
(text) = grouping of text
^ = starting
$ = ending
\char = escape that char
-d = is directory
-f = is regular file
-s = is regular file with size > 0
-l = is symbolic link
-F = is existing file via sub request
-U = is existing URL via sub request
Actual use
(/.*) = group of "/" followed by any number of single char
/web(/.*) = "/web" followed by the above
^/web(/.*)?$ [NC] = the full text after the domain name, containing only any number of the above, case insensitive
!^/web(/.*)?$ [NC] = not the above
"^(.*)$" = the full text from start to end after the domain name and "/", e.g. "abc/def" in "kctang.com.hk/abc/def"
"$1" = the above "(.*)" = "abc/def"
"/web/$1" = "/web/" inserted before the above = "/web/abc/def"
"[L]" = last rule to apply
"[R]" is to redirect the path to "kctang.com.hk/web/abc/def"
(revised, 24/1/2026)
Install Drush
(updated, 22/4/2024)
Drush is a tool to handle installation and removal of modules and themes.
Install Drush:
$ cd var/www/html/web
$ composer require drush/drush
Drush is installed under /var/www/html/web/vendor/drush/drush, and is called by:
$ cd var/www/html/web
$ vendor/bin/drush
(or)
$ vendor/drush/drush/drush
Install drupal/bartik as a contributed theme:
$ composer require drupal/bartikLog in as an administrator if not already in.
Select Manage > Appearance to make it the default theme.
Define Bartik theme color scheme
(section revised, 5/11/2023)
Log in as an administrator if not already in.
Select Manage > Appearance > Settings, and define Bartik color scheme as follows:
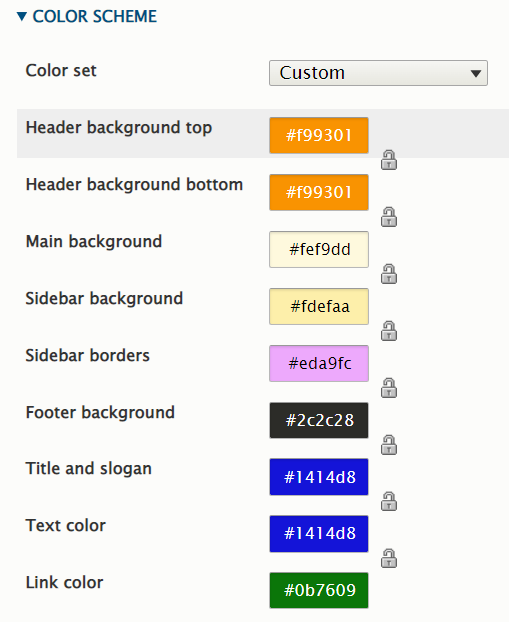
Configure Bartik's css files as described below to match the preferences of this website.
Add custom styles to Bartik theme
(section added, 21/12/2021)
(section revised, 6/11/2023)
(section re-written, 22/2/2026)
Log in the server.
Edit elements.css file which controls the style of screen display and normal print:
$ cd /var/www/html/web
$ micro themes/contrib/bartik/css/base/elements.css
Input the following and save:
/* Base layout */
html {
  height: 100%;
}

body {
  min-height: 100%;
  margin: 0;
  word-wrap: break-word;
  color: blue;
  font-family: Arial, sans-serif;
  font-size: 87.5%;
  line-height: 1.5;
}

p { margin: 0; }

pre { border: 1px solid green;
  font-family: math;
  margin: 0;
  padding: 0.2em;
  background-color: #f8f9fa;
  white-space: pre-wrap;
}

del {
  text-decoration: line-through;
}

/* Links */
a,
a.link {
  text-decoration: none;
  word-wrap: anywhere;
  border-bottom: none;
}

a:hover,
a:active,
a:focus,
.link:hover,
.link:active,
.link:focus {
  text-decoration: none;
  border-bottom-style: solid;
}

.link {
  font-family: "Helvetica Neue", Helvetica, Arial, sans-serif;
}

/* Headings */
h1, .heading-a { color: blue; font-size: 2em; font-weight: inherit; line-height: 1em; margin: 1em 0 0.5em; }
h2, .heading-b { color: red; text-align: center; font-size: 1.143em; font-weight: inherit; margin: 1em 0 0.5em; border: 1px solid; }
h3, .heading-c { color: magenta; font-size: 1.092em; font-weight: inherit; margin: 1em 0 0.5em; border-bottom: 1px solid; }
h4, .heading-d { font-size: 1.05em; font-weight: inherit; margin: 1em 0 0.5em; }
h5, .heading-e { font-size: 0.889em; font-weight: inherit; text-transform: uppercase; letter-spacing: 0.1em; margin: 1em 0 0.5em; }
h6, .heading-f { font-size: 0.67em; font-weight: inherit; text-transform: uppercase; letter-spacing: 0.1em; margin: 1em 0 0.5em; }

h1 a, h2 a { border-bottom: none; }
h2.hang { margin-left: 20px; text-indent: -20px; }
h3.hang { margin-left: 20px; text-indent: -20px; }
h4.hang { margin-left: 20px; text-indent: -20px; }

/* Blockquotes */
blockquote {
  background: #F7F84D;
  border-left: 1px solid #bbb; /* LTR */
  padding: 0.5em 1.5em;
  margin: 0;
  quotes: none;
}

[dir="rtl"] blockquote {
  border-right: 1px solid #bbb;
  border-left: none;
}

blockquote::before,
blockquote::after {
  content: none !important;
}

blockquote p::before {
  content: "#";
  position: relative;
  left: -0.75em; /* space for bullet */
}

blockquote > p:first-child {
  display: block;
}

blockquote, pre, .widget-toc {
  -webkit-print-color-adjust: exact;
  print-color-adjust: exact;
}

/* Lists */
ul, ol { margin: 0; padding: 0; } /* LTR */
ol ol, ul ul { margin: 0; padding: 0; } /* LTR */

[dir="rtl"] ul, [dir="rtl"] ol { padding: 0; }
[dir="rtl"] ol ol,[dir="rtl"] ul ul { padding: 0; }

/* Media */
img { max-width: 100%; height: auto; margin: 0; }

.feed-icon { display: block; margin: 25px 0 0 0; }

/* Tables */
table { border-collapse: collapse; width: 100%; }
table th { background-color: #ddd; font-weight: bold; }
table td, table th { border: 1px solid #0094f0; vertical-align: top; }
.table-striped tr:nth-child(even) { background-color: #f2f2f2; }

/* Dictionary mappings */
.text-align-center, .rtecenter, .align-center { text-align: center; }
.text-align-left, .rteleft, .align-left { text-align: left; }
.text-align-right, .rteright, .align-right { text-align: right; }
.text-align-justify, .rtejustify { text-align: justify; }

.bold, .rtebold, .strong, .text-bold { font-weight: bold; }
.italic, .rteitalic, .emphasis, .text-italic { font-style: italic; }
.underline, .rteunderline, .text-underline { text-decoration: underline; }

.red-text, .rtered, .text-red { color: red; }
.blue-text, .rteblue, .text-blue { color: blue; }
.green-text, .rtegreen, .text-green { color: green; }
.yellow-text, .rteyellow, .text-yellow { color: #FFD700; }

.bg-red, .rtebgred, .background-red { background-color: red; }
.bg-blue, .rtebgblue, .background-blue { background-color: blue; }
.bg-green, .rtebggreen, .background-green { background-color: green; }
.bg-yellow, .rtebgyellow, .background-yellow { background-color: #FFD700; }
.bg-highlight, .rtebghighlight, .background-highlight { background-color: yellow; }

.list-disc, .rtelistdisc, .ul-disc { list-style-type: disc; }
.list-decimal, .rtelistdecimal, .ol-decimal { list-style-type: decimal; }

/* Colors */
mark.marker-blue {
  background-color: hsl(201, 97%, 72%);
}
mark.marker-green {
  background-color: hsl(120, 93%, 68%);
}
mark.marker-pink {
  background-color: hsl(345, 96%, 73%);
}
mark.marker-yellow {
  background-color: hsl(60, 97%, 73%);
}
mark.pen-blue {
  background-color: inherit;
  color: hsl(201, 97%, 72%);
}
mark.pen-green {
  background-color: inherit;
  color: hsl(112, 100%, 27%);
}
mark.pen-red {
  background-color: inherit;
  color: hsl(0, 85%, 49%);
}

/* Indents & Hanging Styles */
.hangtwice { margin-left: 40px; text-indent: -40px; }
.hang1 { margin-left: 20px; text-indent: -20px; }
.hang2 { margin-left: 40px; text-indent: -20px; }
.hang3 { margin-left: 60px; text-indent: -20px; }
.hang4 { margin-left: 80px; text-indent: -20px; }
.hang5 { margin-left: 100px; text-indent: -20px; }

.indent1 { margin-left: 20px; }
.indent2 { margin-left: 40px; }
.indent3 { margin-left: 60px; }
.indent4 { margin-left: 80px; }

/* Branding */
.site-branding__name { font-family: "Times New Roman"; }

/* === Printer specific rules different from Printer Friendly mode ===*/
@media print {
    h1.page-title { string-set: page-title content(); }
    .video-container {
        position: relative;
        padding-bottom: 56.25%; /* 16:9 ratio */
        height: 0;
        overflow: hidden;
        max-width: 100%;
    }
    .video-container iframe {
        position: absolute;
        top: 0; left: 0;
        width: 100%; height: 100%;
        border: none;
    }
    table {
        -webkit-print-color-adjust: exact; /* Chrome/Edge */
        print-color-adjust: exact;         /* Firefox */
     }
}
Create print.css file which controls the style of Printer-friendly screen display and print:
$ cd /var/www/html/web
$ mkdir misc
$ micro misc/print.css
Input the following and save:
/* Base layout */
html {
  height: 100%;
}

body {
  min-height: 100%;
  margin: 0;
  word-wrap: break-word;
  color: blue;
  font-family: Arial, sans-serif;
  font-size: 87.5%;
  line-height: 1.5;
}
p { margin: 0; }

pre { border: 1px solid green;
  font-family: math;
  margin: 0;
  padding: 0.2em;
  background-color: #f8f9fa;
  white-space: pre-wrap;
}

del {
  text-decoration: line-through;
}

/* Links */
a,
a.link {
  text-decoration: none;
  word-wrap: anywhere;
  border-bottom: none;
}

a:hover,
a:active,
a:focus,
.link:hover,
.link:active,
.link:focus {
  text-decoration: none;
  border-bottom-style: solid;
}

.link {
  font-family: "Helvetica Neue", Helvetica, Arial, sans-serif;
}

/* Headings */
h1, .heading-a { color: blue; font-size: 2em; font-weight: inherit; line-height: 1em; margin: 1em 0 0.5em; }
h2, .heading-b { color: red; text-align: center; font-size: 1.143em; font-weight: inherit; margin: 1em 0 0.5em; border: 1px solid; }
h3, .heading-c { color: magenta; font-size: 1.092em; font-weight: inherit; margin: 1em 0 0.5em; border-bottom: 1px solid; }
h4, .heading-d { font-size: 1.05em; font-weight: inherit; margin: 1em 0 0.5em; }
h5, .heading-e { font-size: 0.889em; font-weight: inherit; text-transform: uppercase; letter-spacing: 0.1em; margin: 1em 0 0.5em; }
h6, .heading-f { font-size: 0.67em; font-weight: inherit; text-transform: uppercase; letter-spacing: 0.1em; margin: 1em 0 0.5em; }

h1 a, h2 a { border-bottom: none; }
h2.hang { margin-left: 20px; text-indent: -20px; }
h3.hang { margin-left: 20px; text-indent: -20px; }
h4.hang { margin-left: 20px; text-indent: -20px; }

/* Blockquotes */
blockquote {
  background: #F7F84D;
  border-left: 1px solid #bbb; /* LTR */
  padding: 0.5em 1.5em;
  margin: 0;
  quotes: none;
}

[dir="rtl"] blockquote {
  border-right: 1px solid #bbb;
  border-left: none;
}

blockquote::before,
blockquote::after {
  content: none !important;
}

blockquote p::before {
  content: "#";
  position: relative;
  left: -0.75em; /* space for bullet */
}

blockquote > p:first-child {
  display: block;
}

blockquote, pre, .widget-toc {
  -webkit-print-color-adjust: exact;
  print-color-adjust: exact;
}

/* Lists */
ul, ol { margin: 0; padding: 0 0 0 20px; } /* LTR */
ol ol, ul ul { margin: 0; padding: 0 0 0 20px; } /* LTR */

[dir="rtl"] ul, [dir="rtl"] ol { margin: 0, padding: 0 20px 0 0; }
[dir="rtl"] ol ol,[dir="rtl"] ul ul { margin: 0, padding: 0 20px 0 0; }

/* Media */
img { max-width: 100%; height: auto; margin: 0; }

.feed-icon { display: block; margin: 25px 0 0 0; }

/* Tables */
table { border-collapse: collapse; width: 100%; }
table th { background-color: #ddd; font-weight: bold; }
table td, table th { border: 1px solid #0094f0; vertical-align: top; }
.table-striped tr:nth-child(even) { background-color: #f2f2f2; }

/* Dictionary mappings */
.text-align-center, .rtecenter, .align-center { text-align: center; }
.text-align-left, .rteleft, .align-left { text-align: left; }
.text-align-right, .rteright, .align-right { text-align: right; }
.text-align-justify, .rtejustify { text-align: justify; }

.bold, .rtebold, .strong, .text-bold { font-weight: bold; }
.italic, .rteitalic, .emphasis, .text-italic { font-style: italic; }
.underline, .rteunderline, .text-underline { text-decoration: underline; }

.red-text, .rtered, .text-red { color: red; }
.blue-text, .rteblue, .text-blue { color: blue; }
.green-text, .rtegreen, .text-green { color: green; }
.yellow-text, .rteyellow, .text-yellow { color: #FFD700; }

.bg-red, .rtebgred, .background-red { background-color: red; }
.bg-blue, .rtebgblue, .background-blue { background-color: blue; }
.bg-green, .rtebggreen, .background-green { background-color: green; }
.bg-yellow, .rtebgyellow, .background-yellow { background-color: #FFD700; }
.bg-highlight, .rtebghighlight, .background-highlight { background-color: yellow; }

.list-disc, .rtelistdisc, .ul-disc { list-style-type: disc; }
.list-decimal, .rtelistdecimal, .ol-decimal { list-style-type: decimal; }

/* Colors */
mark.marker-blue {
  background-color: hsl(201, 97%, 72%);
}
mark.marker-green {
  background-color: hsl(120, 93%, 68%);
}
mark.marker-pink {
  background-color: hsl(345, 96%, 73%);
}
mark.marker-yellow {
  background-color: hsl(60, 97%, 73%);
}
mark.pen-blue {
  background-color: inherit;
  color: hsl(201, 97%, 72%);
}
mark.pen-green {
  background-color: inherit;
  color: hsl(112, 100%, 27%);
}
mark.pen-red {
  background-color: inherit;
  color: hsl(0, 85%, 49%);
}

/* Indents & Hanging Styles */
.hangtwice { margin-left: 40px; text-indent: -40px; }
.hang1 { margin-left: 20px; text-indent: -20px; }
.hang2 { margin-left: 40px; text-indent: -20px; }
.hang3 { margin-left: 60px; text-indent: -20px; }
.hang4 { margin-left: 80px; text-indent: -20px; }
.hang5 { margin-left: 100px; text-indent: -20px; }

.indent1 { margin-left: 20px; }
.indent2 { margin-left: 40px; }
.indent3 { margin-left: 60px; }
.indent4 { margin-left: 80px; }

/* Branding */
.site-branding__name { font-family: "Times New Roman"; }

/* === Printer-specific rules for Printer Friendly mode === */

body {
  margin: 2em;
}

/* Hide metadata fields */
[class*="field--name-created"],
[class*="field--name-title"],
[class*="field--name-uid"] {
  display: none !important;
}

/* Hide navigation anchors */
a[href*="EndOfPage"], a[href*="GoToEnd"], a[href*="BackToTOC"],
a[href*="BackToTop"], a[href*="ReturnToTOC"], a[href*="TopOfPage"],
a[href*="ReturnToIndex"], a[href*="Contents"], a[href*="End"],
a#EndOfPage, a#GoToEnd, a#BackToTOC, a#BackToTop, a#ReturnToTOC,
a#TopOfPage, a#ReturnToIndex, a#Contents, a#End {
  display: none !important;
}

EndOfPage, GoToEnd, BackToTOC, BackToTop,
ReturnToTOC, TopOfPage, ReturnToIndex,
Contents, End {
  display: none !important;
}

h1.page-title { string-set: page-title content(); }
h1, .heading-a { page-break-before: always; text-align: right; }

.video-container {
  position: relative;
  padding-bottom: 56.25%; /* 16:9 ratio */
  height: 0;
  overflow: hidden;
  max-width: 100%;
}
.video-container iframe {
  position: absolute;
  top: 0; left: 0;
  width: 100%; height: 100%;
  border: none;
}

@media print {
  table {
	-webkit-print-color-adjust: exact; /* Chrome/Edge */
	print-color-adjust: exact;         /* Firefox */
  }
}
Edit layout.css to change the screen page width:
$ cd /var/www/html/web
$ micro themes/contrib/bartik/css/layout.css
Change max-width as follows and save:
@media all and (min-width: 851px) {
  .layout-container {
    max-width: 100%;
  }
}
Since elements.css is the base, its setting will be overriden by layout.css, therefore, layout.css should be changed to reflect the final requirement.
Edit text-formatted.css to change the list settings:
$ cd /var/www/html/web
$ micro themes/contrib/bartik/css/components/text-formatted.css
Change margins and paddings to the following:
.text-formatted ul,
.text-formatted ol {
  margin: 0 0 0 20px;
  padding: 0; /* LTR */
}
[dir="rtl"] .text-formatted ul,
[dir="rtl"] .text-formatted ol {
  margin: 0 20px 0 0;
  padding: 0;
}
(added, 25/2/2026)
Edit bartik.info.yml to specify ckeditor5-stylesheets:
$ cd /var/www/html/web
$ micro themes/contrib/bartik/bartik.info.yml
Copy the existing lines for ckeditor_stylesheets and paste as new lines for ckeditor5-stylesheets. Change "_" to "-":
ckeditor_stylesheets:
 - css/base/elements.css
 - css/components/captions.css
 - css/components/table.css
 - css/components/text-formatted.css
 - css/classy/components/media-embed-error.css
ckeditor5-stylesheets:
 - css/base/elements.css
 - css/components/captions.css
 - css/components/table.css
 - css/components/text-formatted.css
 - css/classy/components/media-embed-error.css
Clear cache to reveal the effects of the new settings:
$ vendor/drush/drush/drush crAdd buttons to CKEditor 5
(revised, 8/11/2023)
Log in the website as an administrator.
Select Manage > Configuration > Text formats and editors > Configure Full HTML.
Move the required buttons down to a suitable position in the active toolbar:
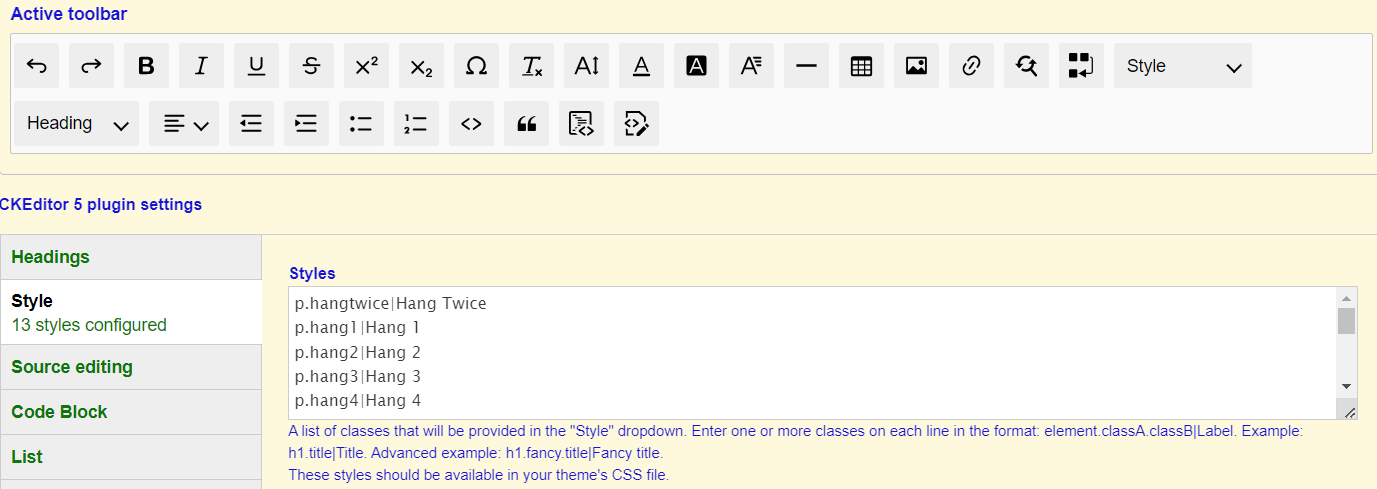
Move also the Style button.
An item for Style will appear under CKEditor 5 plugin settings.
Select Style and enter a list of classes and titles as follows:
p.hangtwice|Hang Twice
p.hang1|Hang 1
p.hang2|Hang 2
p.hang3|Hang 3
p.hang4|Hang 4
p.hang5|Hang 5
p.indent1|Indent 1
p.indent2|Indent 2
p.indent3|Indent 3
p.indent4|Indent 4
h2.hang|Head2Hang
h3.hang|Head3Hang
h4.hang|Head4Hang
"p" stands for paragraph.
".hangtwice" stands for the name of class as defined in the "css/base/elements.css" file.
(file used change, 22/2/2026)
"Hang Twice" stands for the title seen when the Styles button is pressed to give a drop down menu.
Enabled filters
There is a list of enabled filters.
Select them as appropriate by testing.
Do not select Limit allowed HTML tags and correct faulty HTML because it can exclude HTML tags necessary for displaying videos.
Modify Drush command
(section added, 26/12/2025)
Configure an alias:
This sub-section is not necessary if "Simplify the commands" described later is used.
Edit shell config:
$ micro ~/.bashrc
(or)
$ micro ~/.zshrc
Add the following line at the end of the file:
alias drush="./vendor/bin/drush"Reload the shell:
$ source ~/.bashrc				(activate the change)
$ command -v drush				(verify alias)
Now drush can be called by:
$ drushUsual commands
Update software regularly:
$ composer update					(update codes)
$ drush updatedb					(update database)
$ drush cr									(clear cache)
$ drush cex									(export config)
Import config set externally in file under .../config/sync
$ drush cimInstall modules:
$ composer require drupal/<machine name>			(download and install codes)
$ drush pm:install <machine name>								(enable/activate module)
Uninstall modules:
$ drush pm:uninstall <machine name>							(disable/deactivate module)
$ composer remove drupal/<machine name>				(uninstall codes)
$ drush cr																						(clear cache)
Simplify the commands
Create a file called "drupal.sh" to handle the above usual commands:
$ micro drupal.shInsert codes:
#!/bin/bash
# ============================================================
# Drupal Maintenance Helper Script
# Path assumptions:
#   Drupal root: /var/www/html/web
#   Config sync: /var/www/html
# ============================================================

DRUPAL_ROOT="/var/www/html/web"
DRUSH="$DRUPAL_ROOT/vendor/drush/drush/drush"

# --- Safety check ---
if [ ! -d "$DRUPAL_ROOT" ]; then
  echo "Error: Drupal root directory $DRUPAL_ROOT not found."
  exit 1
fi

# Run composer in the Drupal root where composer.json lives
run_composer() {
  (cd "$DRUPAL_ROOT" && composer "$@")
}

case "$1" in
  up)
    echo "=== Drupal Update Workflow ==="
    run_composer update
    $DRUSH updatedb        # no -y, so you can review prompts
    $DRUSH cr
    $DRUSH cex             # no -y, so you confirm export
    ;;

  cim)
    echo "=== Drupal Config Import ==="
    $DRUSH cim             # no -y, so you confirm import
    ;;

  in)
    if [ -z "$2" ]; then
      echo "Usage: $0 in modulename"
      exit 1
    fi
    echo "=== Install Drupal Module: $2 ==="
    run_composer require drupal/$2
    $DRUSH pm:install $2
    ;;

  un)
    if [ -z "$2" ]; then
      echo "Usage: $0 un modulename"
      exit 1
    fi
    echo "=== Uninstall Drupal Module: $2 ==="
    # Correct order: uninstall first, then remove code, then clear cache
    $DRUSH pm:uninstall $2
    run_composer remove drupal/$2
    $DRUSH cr
    ;;

  cr)
    echo "=== Clear Drupal Cache ==="
    $DRUSH cr
    ;;

  help|?|*)
    echo "Usage: $0 {up|cim|in modulename|un modulename|cr|help|?|*}"
    echo "  up        : composer update + drush updatedb + drush cr + drush cex"
    echo "  cim       : drush cim"
    echo "  in name   : composer require drupal/name + drush pm:install name"
    echo "  un name   : drush pm:uninstall name + composer remove drupal/name + drush cr"
    echo "  cr        : drush cr"
    echo "  help or ? : show this summary"
    echo "  *         : show this summary"
    exit 0
    ;;
esac
Press Ctrl-O to write out, and Ctrl-X to exit.
Make it executable:
$ chmod +x test.shRun commands like these any where:
$ ./drupal.sh												(show help)
$ ./drupal.sh ?											(show help)
$ ./drupal.sh *											(show help)
$ ./drupal.sh up										(update codes and database)
$ ./drupal.sh in <machine name>	(install module)
$ ./drupal.sh un <machine name>	(uninstall module)
$ ./drupal.sh cr										(clear cache)
$ ./drupal.sh cim										(import config)
<machine name> refers to the part in full names like "drupal/<machine name>". If it is not prefixed with "drupal", use drush commands in the long form.
To shorten the commands and run any where:
$ sudo cp drupal.sh /usr/local/bin/drupal
$ which drupal											(verify existence)
The following commands are available:
drupal													(show help)
drupal ?											(show help)
drupal *											(show help)
drupal up											(update codes and database)
drupal in <machine name>	(install module)
drupal un <machine name>	(uninstall module)
drupal cr											(clear cache)
drupal cim										(import config)
No need to have the alias.
Add Toc.js for table of contents
(section added, 25/12/2025)
TOC API suggested previously below may disable HTML tags used to display videos. Install Toc.js instead.
Execute:
$ drupal in toc_jsLog in as an administrator if not already in.
Select Structure > Block layout > (Content) Place Block > (Toc.js block) Place Block > Save Block.
Move the newly added row for Toc.js block to the just under the Page title row, and select Configure:
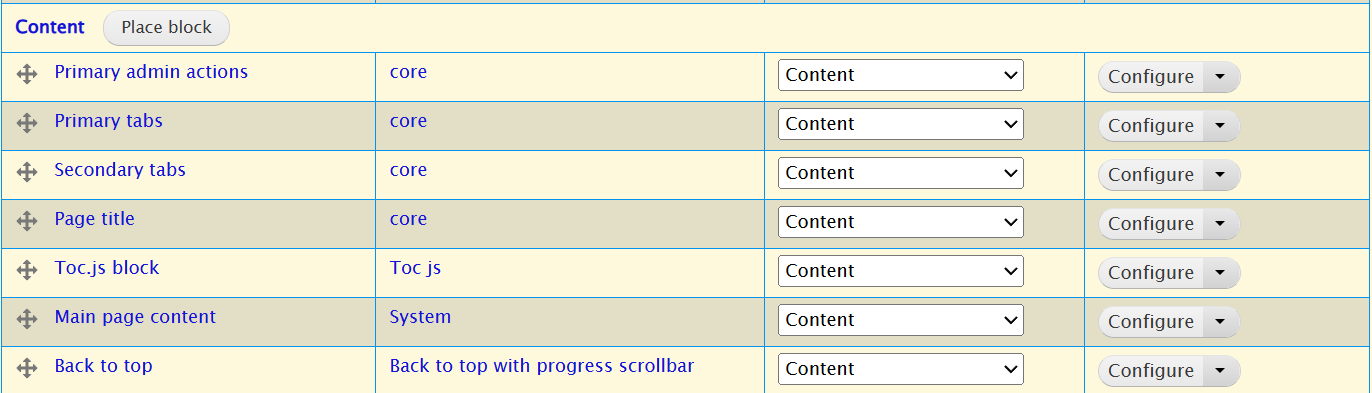
Uncheck Display title - to avoid displaying the title if there is no content items.
Set Minimum elements = 2 - to display the Table of content in if at least two items.
Check Enable collapsible toc items.
Check Show "back to toc" links.
Set Back to toc link label = Back to TOC.
Select Save Block.
Add TOC API for table of contents (disused)
(section added, 8/11/2023)
(updated, 25/12/2025)
Unlike CKEditor 4, CKEditor 5 does not have table of contents for free. The previous tables of contents have to be removed page by page.
Use TOC API instead.
Execute
$ drupal in toc_apiTOP API Example will automatically be installed also. TOP API is the back end. The Example actually adds the table of contents.
Enable the two modules at Manage > Extend > List (if not already enabled by the simple "drupal" command).
Select Manage > Structure > Table of contents types to see a list of example tables.
The default is the one that will be used. The other are examples.
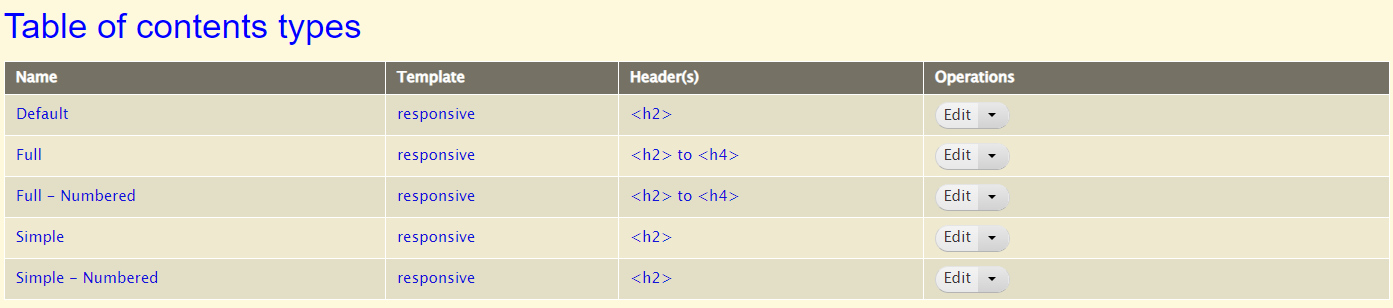
Edit the default. Use responsive to suit mobile phones, which will show on mobile phones the title only with a drop down menu.
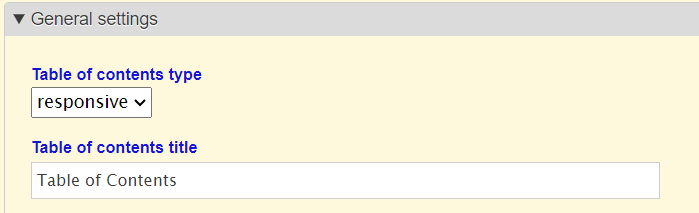
Change back to top maximum level to "h2". Change "Back to top" to "-> Top".
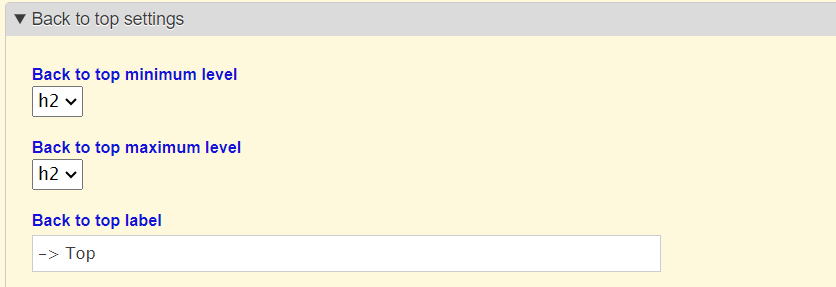
No change here.
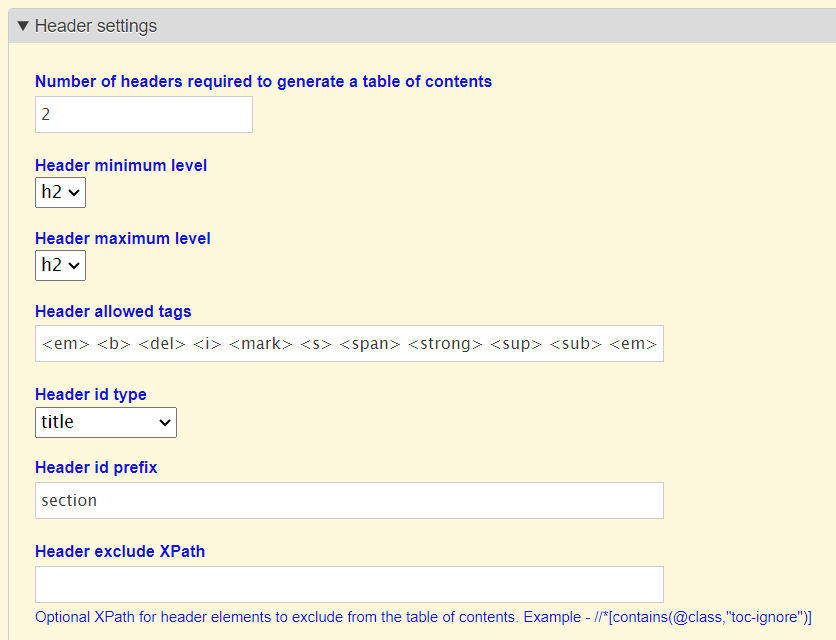
Change numbering suffix from ") " to ". " both ending with a space.
The numbering suffice follows the numbers to the headings in the body. The numbering separator follows the numbers in the table of contents.
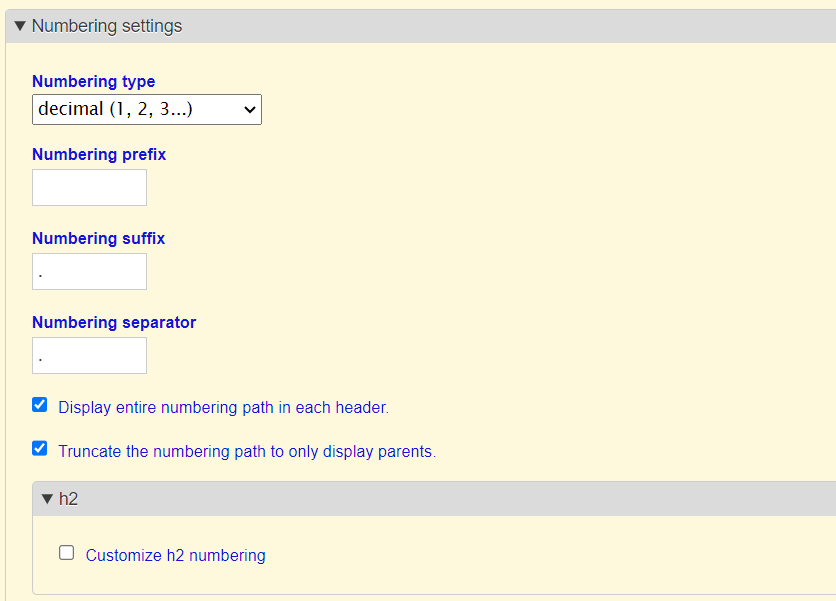
Other modules
(added, 22/4/2024)
(updated, 26/12/2025)
Install the following modules using "drupal in <machine name in brackets as below>":
- Back to top with progress (back_to_top)
- Book (book)
- Book Tree Menu (book_tree_menu)
- Chunker (chunker)
- CKEditor 5 Find And Replace (ckeditor5_plugin_pack_find_and_replace)
- CKEditor 5 Font Plugins (ckeditor5_plugin_pack_font)
- CKEditor 5 Fullscreen (ckeditor5_plugin_pack_fullscreen)
- CKEditor 5 Highlight (ckeditor5_plugin_pack_highlight)
- CKEditor 5 HTML embed (ckeditor5_plugin_pack_html_embed)
- CKEditor 5 Media Embed (ckeditor5_plugin_pack_media_embed)
- CKEditor 5 Page Break (ckeditor5_plugin_pack_page_break)
- CKEditor 5 Plugin Pack (ckeditor5_plugin_pack)
- CKEditor5 Show Block (ckeditor5_show_block)
- Colorbox (colorbox)
- Configuration Translation (config_translation)
- Content Translation (content_translation)
- Convert Bundles (convert_bundles)
- Datetime (datetime)
- Datetime Range (datetime_range)
- Embedded Google Documents Viewer (gdoc_field)
- Entity Mask (ctools_entity_mask)
- Entity Reference Revisions (entity_reference_revisions)
- File (file)
- Font Resixe (font_resize)
- HTTP Basic Authentication (basic_auth)
- Image (image)
- Imce File Manager (imce)
- Insert (insert)
- Interface Translation (locale)
- jQuery UI (jquery_ui)
- jQuery UI Effects (jquery_ui_effects)
- JSON:API (jsonapi)
- Language (language)
- Link (link)
- Options (options)
- Pathauto (pathauto)
- PDF (pdf)
- PDF Reader (pdf_reader)
- Quick Node Clone (quick_node_clone)
- RESTful Web Services (rest)
- Serialization (serialization)
- Text (text)
- Toc.js (toc_js)
- Toc.js Filter (toc_js_filter)
- Token (token)
- View Unpublished (view_unpublished)
Go to Manage > Entend > relevant module, and click to enable if not already done, and click to configure as necessary.
Use "drupal un <machine name in brackets as above>" as necessary.
Install Convert Bundles
(section added, 8/11/2023)
When testing various table of contents modules, it was found that some would apply to the Basic Pages but not the Book Pages. This website previously used mainly Book Pages. The drupal/convert_bundles module can be used to convert a type of contents pages to another type. Generally, follow the default settings. After many trials, TOC API has been chosen for the table of contents. By that time all the Book Pages have been changed to Basic Pages. It has not been tested whether the conversion is really required in order to use TOC API.
Update Drupal using Composer
(section added, 18/1/2019)
(simplified, 5/11/2023)
(updated, 22/4/2024)
Put site into maintenance mode:
- Select Admin > Manage > Configuration: Maintenance mode > Put site into maintenance mode > Save configuration.
Go to the root directory of the website:
$ cd /var/www/html/webCheck for outdated modules:
$ composer show --outdated drupal/* -vvv"-vvv" is to display what is going on.
Update Drupal core:
$ cd /var/www/html/web
$ composer update "drupal/core-*" --with-all-dependencies
(or)
$ composer update "drupal/core-*" --W
Update all:
$ composer update drupal ---vvvUpdate database:
$ vendor/drush/drush/drush updatedb -vvvAnswer "yes" when asked to run specified post-update changes.
Clear cache:
$ vendor/drush/drush/drush cr -vvvBrowse the website to see that the webpages can show up successfully.
Set to release the website from maintenance mode:
- Select Admin > Manage > Configuration: Maintenance mode > unselect Put site into maintenance mode > Save configuration.
Restore Drupal site
(section added, 8/5/2019)
(revised, 16/5/2019)
(revised, 28/4/2024)
Follow Manipulate whole database to find an old database backup of the desired time.
From Back In Time backups, find the web files backed up at a slightly later time.
The restored webpages will be based on the database while newer web files may be ignored.
Follow Manipulate whole database to:
- Back up the existing database
- Delete the existing database.
Move existing web files to another location (e.g. "oldweb"):
$ cd /var/www/html
$ sudo mv web oldweb
Follow Manipulate whole database to:
- Create a new empty database of the same name
- Import the chosen database backup to the newly created empty database.
Restore the chosen web files using Back in Time to the original directory (e.g. /var/www/html/web).
Execute
$ sudo micro /var/www/new/web/sites/default/settings.phpFor
$database['default']['default'] = array (
    'database' = '<text>'
    'username' = '<text>'
    'password' = '<text>'
    ....
);
check the various <text> to match the existing, particularly the password.
Use web browser to see whether web pages are displayed properly.
If web pages are displayed properly, the pair of database and web files match.
Execute to update database and clear caches:
$ cd /var/www/html/web
$ composer update
$ vendor/drush/drush/drush updatedb
$ vendor/drush/drush/drush cr
Resolve problems arising.
Delete "oldweb" if not to be used.
$ cd /var/www/html
$ sudo rm -r oldweb
Relocate Drupal site
(section added, 28/4/2024)
Relocation can mean:
- Renaming the database and moving the web files.
- Keeping the database name but moving the web files.
Use phpMyAdmin to rename the database. This will be the simplest.
Alternatively:
Follow Manipulate whole database to:
- Back up the existing database
- Delete the existing database.
- Create an empty database of new name
- Import the existing database backup to the newly created empty database.
Move existing web files to another location, say "web2" under the same DocumentRoot directory "/var/www/html":
$ cd /var/www/html
$ sudo mv web web2
If a different DocumentRoot directory is used:
- Execute:
$ cd /var/www
$ sudo mkdir <new_DocumentRoot>
$ sudo mv html/web <new_DocumentRoot>            (if "web" name not changed)
(or)
$ sudo mv html/web <new_DocumentRoot>/web2       (if "web" name changed to "web2")
$ sudo cp html/.htaccess <new_DocumentRoot>- Edit config file to change "/var/www/html" to "var/www/<new_DocumentRoot>":
$ sudo micro /etc/apache2/sites-enabled/000-default.confChange the ".htaccess" file under "/var/www/html" or "var/www/<new_DocumentRoot>" as the case may be to re-direct web to access "web2" (if changed from web) directly:
$ sudo micro /var/www/html/.htaccess
(or)
$ sudo micro /var/www/<new_DocumentRoot>/.htaccess
Specify "web2" instead of "web":
<IfModule mod_rewrite.c>
  RewriteEngine on
  # If the uri part after the domain name does not start with "/web" or "/roundcube" or "/config"
  RewriteCond %{REQUEST_URI} !^/web(/.*)?$ [NC]
  RewriteCond %{REQUEST_URI} !^/roundcube(/.*)?$ [NC]
  RewriteCond %{REQUEST_URI} !^/config(/.*)?$
  # Insert to start with "/web"
  RewriteRule ^(.*)$ /web2/$1 [L,R=301]
</IfModule>
(revised, 24/1/2026)
Execute:
$ sudo micro /var/www/new/web/sites/default/settings.phpFor:
$database['default']['default'] = array (
    'database' = '<text>'
    'username' = '<text>'
    'password' = '<text>'
    ....
);
check the various <text> to match the new, particularly the database name and password.
Use web browser to see whether web pages are displayed properly.
If web pages are displayed properly, the relocation is successful.
Execute to update database and clear caches:
$ cd /var/www/html/web2
(or)
$ cd /var/www/<new_DocumentRoot>/<web or web2>
$ composer update
$ vendor/drush/drush/drush updatedb
$ vendor/drush/drush/drush cr
Resolve problems arising.
Delete left-over module configuration files
(section added, 26/5/2019)
If a left-over configuration setting file is reported when a module is re-installed, execute to delete it:
$ cd /var/www/html/web
$ vendor/drush/drush/drush config:delete '<name of configuration file to delete>'
Upgrade Drupal 9 to 10
(section added, 5/11/2023)
The upgrading command as given above is very simple, but the reality is not that simple because there can be many errors due to incompatible modules and themes as well as locking to some previous releases, resulting in the inability to upgrade. There are many other websites describing how to solve the upgrading problems, but the solutions mostly cannot work. After about 12 hours of trials and errors over two days, the upgrading was finally successful. The following records the procedures used (based on memory).
Go to Drupal's top folder and install drupal/upgrade_status:
$ cd /var/www/html/web
$ composer require drupal/upgrade_status
Go to Manage > Reports > Upgrade status.
Get the list of modules and themes which should be updated for Drupal 10.
Get the list of modules and themes which are incompatible with Drupal 10 or no longer used.
Go to Manage > Extend or > Appearance to update or remove modules and themes.
Alternatively, use composer to update or remove:
$ composer require <group name>/<name>
(or)
$ composer require <group name>/<name>:<add version number as necessary>
(or)
$ composer remove <group name>/<name>
Go to Manage > Configuration > Text formats and editors to change the text editor from CKEditor to CKEditor 5.
Change back to CKEditor if errors occur when saving the change. Remove those not acceptable menu icons. Change back to CKEditor 5 until the change is successfully saved.
Remove drupal/upgrade_status because the installed version is not compatible with Drupal 10.
$ composer remove drupal/upgrade_statusUpdate all files and settings to the current version:
$ composer update --with-all-dependencies
$ vendor/drush/drush/drush updatedb
"--with-all-dependencies" can be abbreviated as "-W".
Enable write access (not tested whether this is really necessary):
chmod 777 web/sites/default
chmod 666 web/sites/default/*settings.php
chmod 666 web/sites/default/*services.yml
Install Drupal 10 but without updating, and edit composer.json (see alternative below):
$ composer require drupal/core-recommended:10.1.6 drupal/core-composer-scaffold:10.1.6 drupal/core-project-message:10.1.6 --no-update
$ micro composer.json
Change the following line to state the new release number (it is an important step in this order, otherwise, upgrading will report incompatible new release or locked old releases):
"drupal/core": "10.1.6",Upgrade now based on the newly specified release:
$ composer update --with-all-dependenciesAlternatively, the following command may work instead of the above command with "--no-update" option and the update command:
$ composer require "drupal/core:9.5.11 as 10.1.16" --no-update && composer updateHowever, the following line in composer.json still needs to be changed as such afterward.
"drupal/core": "10.1.6",Update drush and update the database
$ composer require drush/drush
$ vendor/drush/drush/drush updatedb
The updatedb command may report post-update changes. Generally answer "Yes" to accept the changes.
The upgrading should be successful.
Restore read-only access:
$ chmod 755 web/sites/default
$ chmod 644 web/sites/default/*settings.php
$ chmod 644 web/sites/default/*services.yml
Install drupal/bartik as a contributed theme:
$ composer require drupal/bartikGo to Manage > Appearance to make it the default theme.
Add back any compatible modules previously deleted due to incompatibility.
Go to Manage > Reports > Status report to see what errors arise.
It may remind to download colorbox-master. Download and extract it to a different name as /var/www/html/web/libraries/colorbox.
It may also remind to download DOMPurify-main. Download and extract it. Move its "dist" directory to become /var/www/html/web/libraries/dompurify/dist.
Some modules are related to CKEditor, they have to be removed before CKEditor can be removed. Some of them can be re-installed after the removal of CKEditor and automatically linked to CKEditor 5.
Install Roundcube webmail client
Install Roundcube webmail client KCTangNote
19/7/2026: Generally updated.
29/1/2026: "gedit" changed to "micro".
11/10/2024: smtp setting revised.
23/1/2024: Minor changes.
26/3/2023: smtp setting revised.
16/12/2021: Updated installation command.
27/5/2019: Changed to use extracting directly to web directory. Protection measures added.
8/5/2019: All "/var/www/web" changed to "/var/www/html/web". "<version number>" used instead of a specific number. More descriptions on settings added.
25/12/2014: Created.
Intro
Roundcube is a webmail client.
Install Roundcube using apt
Execute:
$ sudo apt install roundcube
(Deleted, not working, 11/10/2024)
Install Roundcube from roundcube.net
If the apt installation does not work, execute to remove:
$ sudo apt remove roundcubeThen download roundcubemail-<version number>-complete.tar.gz by selecting "Complete: <version number>" at https://roundcube.net/download/, usually to own "Downloads" directory.
Extract the compressed file, move the extracted directory and files to underneath "/var/www/html", and rename the directory as "roundcube".
Ensure that the hidden ".htaccess" file is also moved.
A quicker way is to extract directly to "/var/www/html" and rename the directory there.
Install Roundcube under "/var/www/html":
$ cd /var/www/html$ sudo tar -xzfv /home/<own account name>/Downloads/roundcubemail-<version number>-complete.tar.gz (extract to current directory)$ tar -xzf /home/<own account name>/Downloads/roundcubemail-<version number>-complete.tar.gz (extract to current directory) $ ls (see the existence of the extracted directory) $sudomv roundcubemail-<version number> roundcube (change directory name) $ cd roundcube $ sudo chown www-data:www-data logs $ sudo chown www-data:www-data temp
"-xzfv" can be remembered as extract zipped file verbose. Use "-xzf" if "v" not working.
(changed to use "-xzf", added cd roundcube, 16/12/2021)
(changed to use "tar" directly to web directory, 27/5/2019)
Set up Roundcube
Install MySQL database + PHP + phpMyAdmin, if not already installed.
Login phpmyadmin at web browser:
https://localhost/phpmyadminCreate a database user "roundcube" with database "roundcube":
- click "Users" at the top menu bar
- click "Add user" at the page middle
- enter "roundcube" at the User name entry
- select "Local" for "localhost" at the Host entry
(Select "Local", not enter "local", 11/10/2024)
- enter and re-type the password
- click "Create database with same name and grant all privileges"
- click "Go" at the bottom
Enter at web browser:
https://localhost/roundcube/installerConfigure Roundcube:
- accept all of the defaults
- enter "localhost" as host
- enter database user "roundcube", database "roundcube" and password under Database setup
-
select spellcheck
(added, 19/7/2026)
- click: "CREATE CONFIG"
- download the configuration file generated and save it as config.inc.php
- move the downloaded file:
$ mv /home/<own account name>/Downloads/config.inc.php /var/www/html/roundcube/config- click: "CONTINUE" on the webpage
- check and test all items until they have all got "OK"
-
if the config is not correct to get "OK", adjust config.inc.php as necessary
(2 lines added, 19/7/2026)
-
click: "Initialize database" (this button will appear only if the database information is correct)
(revised, 19/7/2026)
-
set to use secure SMTP port 465 (i.e. set "localhost:465" as SMTP Host)(last line not working, changed to next line, 26/3/2023)
-
set "ssl://kctang.com.hk" as SMTP Host
(revised again, 11/10/2024)
- enter username and password, and sender and recipient full email addresses to test SMTP config
-
set "ssl://kctang.com.hk" as IMAP Host
(revised, 19/7/2026)
- enter username and password to test IMAP config
-
leave the page if all items have got "OK"
(added, 19/7/2026)
If installed from roundcube.net, remove or rename installer directory, and protect logs and temp directories:
$ sudo cd /var/www/html/roundcube
$ sudo rm -R installer                   (remove)
$ sudo mv installer installer.original   (or rename)
$ sudo chown -R $USER:$USER logs
$ sudo chown -R $USER:$USER temp
(revised to add protection, 27/5/2019)
Configure PHP5 only (not necessary for PHP7 and later):
$ sudo micro /etc/php5/apache2/php.ini- define:
date.timezone = Asia/Hong_Kongotherwise the date column of the web mail would be blank.
Edit Apache2 config:
$ sudo micro /etc/apache2/sites-available/000-default-le-ssl.confAdd lines to become the following:
ServerAdmin webmaster@localhost
DocumentRoot /var/www/html

<Directory /var/www/html/web>
    Options +FollowSymLinks
    AllowOverride All
    Require all granted
</Directory>

# Roundcube alias to handle entry point now at public_html, KCTang 19/7/2026
Alias /roundcube /var/www/html/roundcube/public_html
<Directory /var/www/html/roundcube/public_html>
    Options +FollowSymLinks
    AllowOverride All
    Require all granted
</Directory>
(added, 19/7/2026)
Restart Apache2 service:
$ sudo systemctl reload apache2
or
$ sudo service apache2 reload
Log in at web browser:
https://localhost/roundcubeor
https://kctang.com.hk/roundcubeClick Settings > Identity to define some settings:
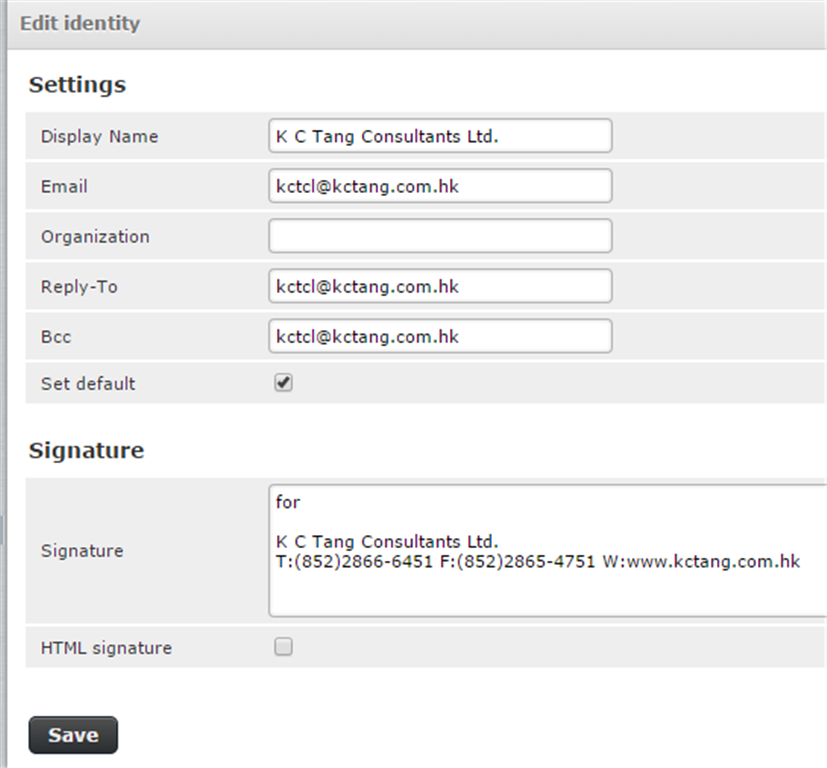
Click Settings > Preferences > User Interface
- Main Options
- Language: English (US)
- Time zone : Asia/Hong Kong
- Time format : 07:30
- Date format : 24/7/2023
- Save.
Click Settings > Preferences > Composing Messages
- Main Options
- Compose HTML messages : always
- When replying : start new message above the quote
- Signature Options
- Force standard separator in signatures : turn off
- Spellcheck Options
- Check spelling before sending a message : turn on
- Ignore words with symbols : turn on
- Ignore words with numbers : turn on
- Ignore words with all letters capitalised : turn on
- Advanced options
- Attachment names : Full RFC 2231 (Thunderbird)
- Save.
Click Settings > Contacts > Import to import contacts files, e.g. previously exported from Google.
(more descriptions on settings added, 8/5/2019)
(further added, 26/3/2023)
(further added, 19/7/2026)
Upgrade if installed from roundcube.net
Download and extract the subdirectory of the new version to "Downloads" directory as "roundcubemail-<new version number>".
Upgrade existing directory using the installto.sh script:
$ cd /home/<own account name>/Downloads/roundcubemail-<new version number>/bin
$ ./installto.sh /var/www/html/roundcubeIn case of big trouble
Uninstall Roundcube:
$ sudo apt-get remove roundcubeRemove "/var/www/html/roundcube":
$ cd /var/www/html
$ sudo rm -r roundcubeDelete mySQL user "roundcube" and database "roundcube" using phpMyAdmin.
Intall Roundcube as new.
Install ArangoDB
Install ArangoDB KCTangNote
23/4/2026: ssl configured.
9/4/2026: Created.
Intro
ArangoDB is a multi-model data foundation supporting graph, document, key-value, vector, and search models.
See its Features and Capabilities at https://docs.arango.ai/arangodb/stable/features/.
Install ArangoDB
Install its Community Edition from https://arango.ai/downloads/.
Choose Ubuntu / Debian Distribution.
Install via Package Manager by copying the commands to Ubuntu's terminal screen.
Enter a password for "root" during installation.
After installation, normally, ArangoDB login page can be accessed from a browser on the server by entering the address "localhost:8529" or "http://kctang.com.hk:8529".
ArangoDB stores its data here:
- Data directory: /var/lib/arangodb3 - where the actual collections, indexes, and graph data live.
- Log files: /var/log/arangodb3/arangod.log - which logs the startup messages, errors, or query issues.
- Configuration files: /etc/arangodb3/arangod.conf - which defines where the data directory is located, along with ports, authentication, and other server settings.
However, since our web site uses "https://", the address for local or remote browser should be "https://kctang.com.hk:8529".
To enable the use of "https://", execute the following commands:
> sudo -i (switch to root)
> cd /etc/letsencrypt/live/kctang.com.hk (we are using letsencrypt)
> cat fullchain.pem privkey.pem > server.pem (merge the two files to one)
> exit
> micro /etc/arangodb3/arangod.conf (edit conf file, as shown below)
> systemctl restart arangodb3 (restart after editing)
> systemctl status arangodb3 (see status)
> exit (exit root)Edit arangod.conf as follows:
[server]
endpoint = https://0.0.0.0:8529 (replace: endpoint = tcp://127.0.01:8529)
[ssl]
keyfile = /etc/letsencrypt/live/kctang.com.hk/server.pem(ssl configured, 23/4/2026)
Install Python-Arango
Install Python-Arango which is the official ArangoDB driver for use with Python.
Open a Windows Command Prompt terminal or a Windows Powershell terminal.
Execute the following command:
> python3 -m pip install python-arango --upgradeGo to: https://docs.arango.ai/ecosystem/drivers/python/ .
Follow the rest of the page to use Python-Arango.
Install MoinMoin wiki engine
Install MoinMoin wiki engine KCTangNote
MoinMoin wiki engine serves wiki web pages.
The following installation instructions are outdated. Check https://help.ubuntu.com/lts/serverguide/moinmoin.html for updated instructions.
Prepare
Install Apache2 web server if not already installed.
Download MoinMoin (filename moin-1.9.7.tar.gz) from https://moinmo.in/MoinMoinDownload, usually to own "Downloads" directory.
Use the file manager to extract the contents of the compressed file under the "Downloads" directory as "moin-1.9.7".
Install
Install MoinMoin:
$ cd /home/< own account name >/Downloads/moin-1.9.7 $ sudo python setup.py install --force --prefix /usr/local --record=install.log
Install "wsgi" module and test:
$ sudo apt-get install libapache2-mod-wsgi $ cd /usr/local/share/moin/server $ sudo python test.wsgi
Point the web browser to the address shown on the terminal, such as, https://localhost:8000/.
Setup wiki sites
Setup files for a wiki called "qswiki":
$ cd /usr/local/share/moin $ sudo mkdir qswiki $ sudo cp -R data qswiki $ sudo cp -R underlay qswiki $ sudo cp server/moin.wsgi qswiki $ sudo cp config/wikiconfig.py qswiki
Do similar for "dscwiki".
Configure Apache2 for MoinMoin site:
$ sudo gedit /etc/apache2/sites-available/moinmoin.conf
Specify, keeping "<" and ">" in the following codes:
# MoinMoin WSGI configuration
# invoke moin wiki at the root url, like https://servername/mywiki/FrontPage:
# servername can be www.kctang.com.hk or localhost
# qswiki and dscwiki use FrontScreen instead of FrontPage to avoid changes from being overridden when a new FrontPage is installed with new software
WSGIScriptAlias /qswiki /usr/local/share/moin/qswiki/moin.wsgi
WSGIScriptAlias /dscwiki /usr/local/share/moin/dscwiki/moin.wsgi
<Directory /usr/local/share/moin/qswiki>
AllowOverride None
Require all granted
</Directory>
<Directory /usr/local/share/moin/dscwiki>
AllowOverride None
Require all granted
</Directory>
# create some wsgi daemons - use these parameters for a simple setup
WSGIDaemonProcess moin user=www-data group=www-data processes=5 threads=10 maximum-requests=1000 umask=0007
# use the daemons we defined above to process requests!
WSGIProcessGroup moinEnable the site:
$ sudo a2ensite moinmoin
which will create a linked file in "/etc/apache2/sites-enabled"
If required to disable:
$ sudo a2dissite moinmoin
Configure wsgi:
$ sudo gedit /usr/local/share/moin/qswiki/moin.wsgi
Add at the end of the a2) paragraph:
sys.path.insert(0, '/usr/local/share/moin/qswiki')
Do the same for "dscwiki".
Enable web access, specify access rights and restart Apache2 service:
$ cd /usr/local/share $ sudo chown -R www-data:www-data moin $ sudo chmod -R ug+rwX moin $ sudo chmod -R o-rwx moin $ sudo systemctl restart apache2 or $ sudo service apache2 restart
Configure wiki:
$ sudo gedit /usr/local/share/moin/qswiki/wikiconfig.py
Specify:
# -*- coding: utf-8 -*-
## -*- coding: iso-8859-1 -*-
#url_prefix_static = '/mywiki' + url_prefix_static
url_prefix_static = '/qswiki' + url_prefix_static
# sitename = u'Untitled Wiki'
sitename = u'QS Wiki'
#page_front_page = u"FrontPage"
page_front_page = u"FrontScreen"
# superuser = [u"YourName", ]
# (note: remove "#" at the front, and replace "YourName" with user id within quotation marks)
#acl_rights_before = u"YourName:read,write,delete,revert,admin"
# (note: remove "#" at the front, and replace "YourName" with user id within quotation marks)
# the following added at the end of the Security section
textchas = {
'en': {
u"Please enter antispam password (email to kctang@kctang.com.hk for password):": ur"[password]",
},
}
textchas_disabled_group = u"TrustedGroup"
# (note: replace [password] with actual password)
# end of addition
#mail_smarthost = ""
mail_smarthost = "kctang.com.hk"
# The return address, e.g u"Jgen Wiki <noreply@mywiki.org>" [Unicode]
#mail_from = u""
mail_from = u"K C Tang <kctang@kctang.com.hk>"
# "user pwd" if you need to use SMTP AUTH
#mail_login = ""
mail_login = u"kctang [email password]"
navi_bar = [
# If you want to show your page_front_page here:
#u'%(page_front_page)s',
u'RecentChanges',
u'FindPage',
u'HelpContents',
u'FrontScreen',
]
# The default theme anonymous or new users get
# theme_default = 'modernized'
theme_default = 'modernized_mobile'Note MoinMoin Config files are:
- /etc/apache2/sites-available/moinmoin.conf
- /etc/apache2/sites-enabled/moinmoin.conf
- /usr/local/share/moin/qswiki/moin.wsgi
- /usr/local/share/moin/qswiki/wikiconfig.py
- /usr/local/share/moin/dscwiki/moin.wsgi
- /usr/local/share/moin/dscwiki/wikiconfig.py
Install Thunderbird
Install Thunderbird KCTangkc
Note
- 16 Dec 2025: Reminded to use Extended Support Release. Native Address Book used to sync with Google Contacts. Stop using CardBook. Add-on list updated.
- 11 May 2023: More CardBook installation steps added.
- 10 May 2023: PrintingTools NG Options revised. Use CardBook instead of TbSync. Delivery Status Notification added.
- 2 Aug 2022: PrintingTools NG Options revised for version 2.1.4.
- 22 Mar 2022: Print page setup revised for version 91. Printing Tools NG Options revised.
- 9 Dec 2021: Exporting email procedures added.
- 29 Jun 2021: Advice against upgrading to version 78 removed because more add-ons become compatible. Some notes added.
- 16 Jan 2021: TbSync manual configuration for Google added.
- 15 Jan 2021: Google Calendar Plugin added. PrintingTools attachments per line option added. Header fixed font size revised. CardBook add-on removed because TbSync supports Google again. Lists of add-ons updated.
- 19 Nov 2020: Option set to show all folders without subscribing individually. CardBook add-on added because TbSync no longer supports Google. Lists of add-ons updated.
- 8 Sep 2020: 'Manually sort folders' add-on added.
- 12 Aug 2020: Revised to fix font for print headers only.
- 11 Aug 2020: Created.
Intro
Thunderbird is an email client.
Install Thunderbird
Thunderbird has in recent months started to have major updates rather frequently causing incompatibility with the add-ons. Therefore, it would be more stable to use its latest Extended Support Release instead of the latest release.
Download the latest Extended Support Release (ESR from here and install:
https://www.thunderbird.net/en-GB/download/esr
If necessary, download old releases from here and install:
https://archive.mozilla.org/pub/thunderbird/releases
(Paragraphs above updated, 16 Dec 2025)
Set up the first email account.
For Gmail account, enter the Gmail address and use automatic setup.
Use the following settings to manually set up email account accessing company's email server:
- Account Name: kctcl
- Your Name: K C Tang Consultants Ltd.
- Email Address: kctcl@kctang.com.hk
- Incoming Server Type: IMAP Mail Server
- Server Name: kctang.com.hk
- Port: 993
- Connection security: SSL/TLS
- Authentication method: Normal password
- Outgoing Server Name: kctang.com.hk
- Port: 465
- Connection security: SSL/TLS
- Authentication method: Normal password
Select Tools > Accounts Setting to further define or adjust the settings:
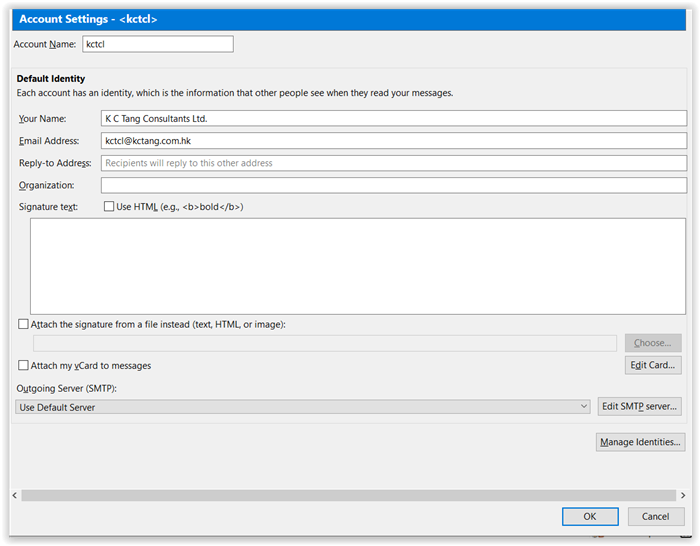
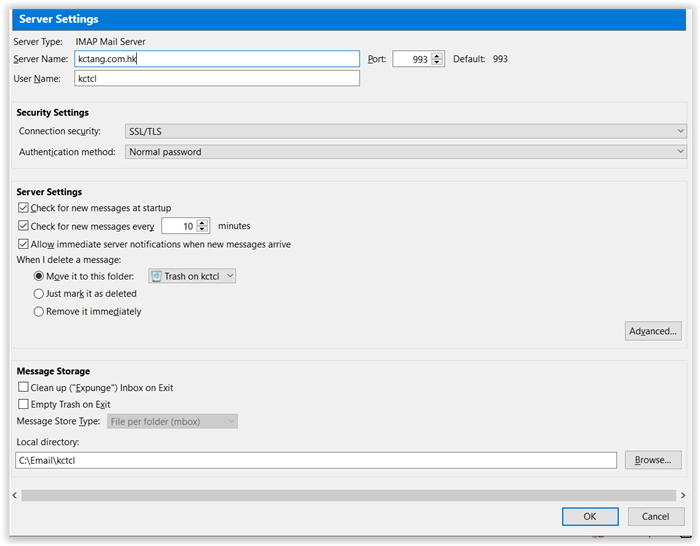
Uncheck "Show only subscribed folders" to show all folders instead of subscribing individually:
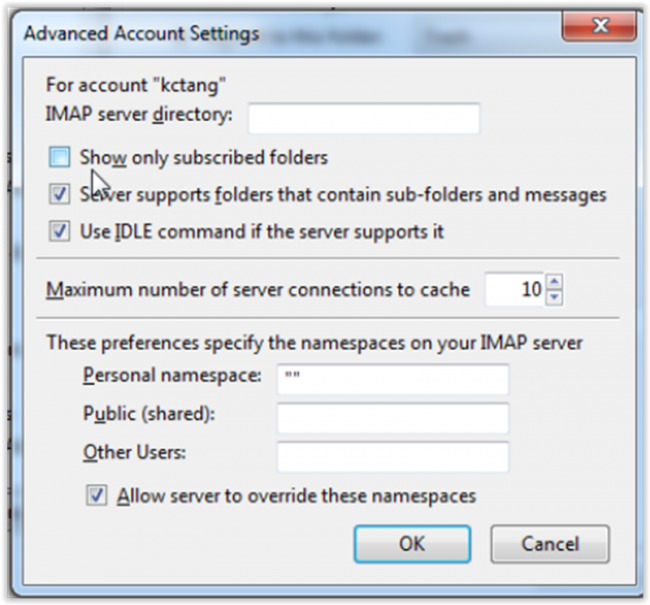
(Added, 11 Nov 2020)
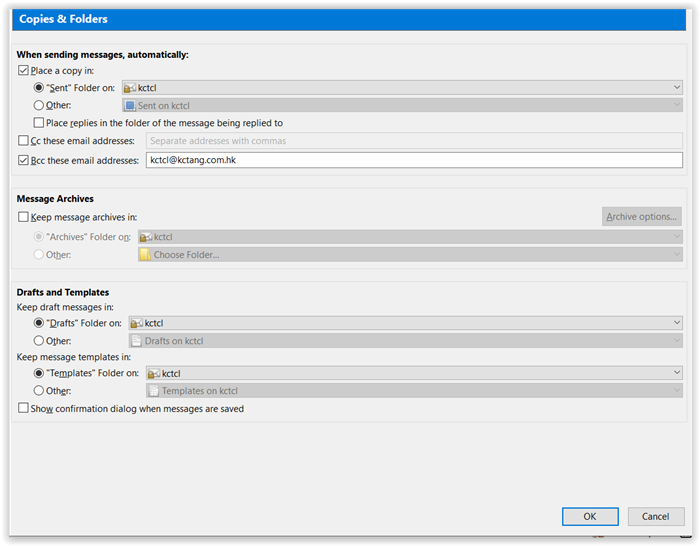

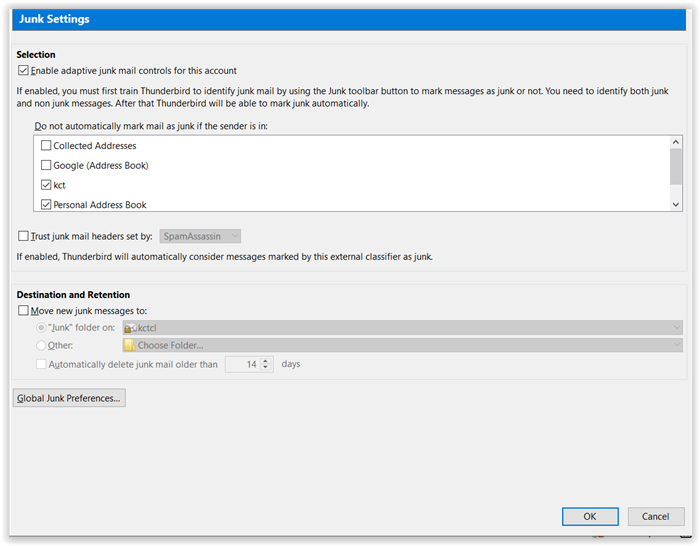
The default is to keep all messages on the local computer as shown below, but it is suggested not to do so to avoid using up local computer's storage space. Subject headings will always be downloaded. The email body and attachments will be downloaded only when being read, and may take a bit longer time, but this should be tolerable.
(Note added, 29 Jun 2021)
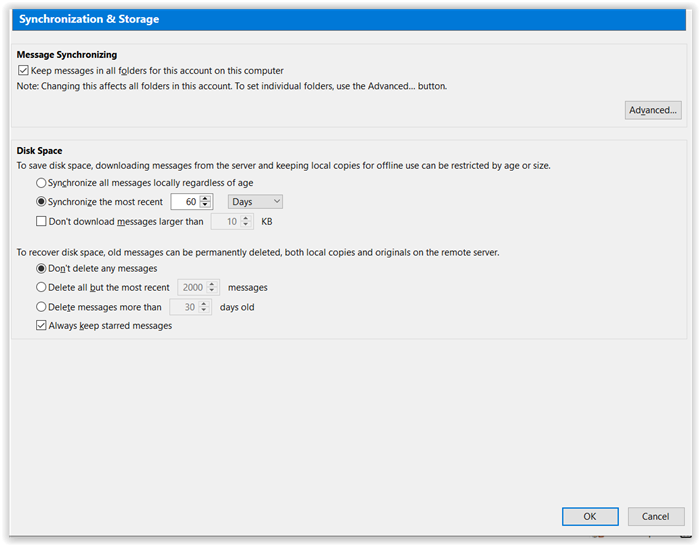


Select Tools > Accounts Setting > Account Actions > Add Mail Account to add other accounts.
Leave the options under Tools > Options as the default except in the following case (not required now as the Postfix configuration can be raised).
When the tls security level has to be lowered if the email server is not of the level expected by Thunderbird:
Select Tools > Options > General > Config Editor > I accept the risk > Search "security.tls" > security.tls.version.min
Change the default value "3" to "1" and select OK and exit.
(Note to adjust tls security level added, 29 Jun 2021)
Set Delivery Status Notification
Select Options > Delivery Status Notification if desired to have record of delivery:
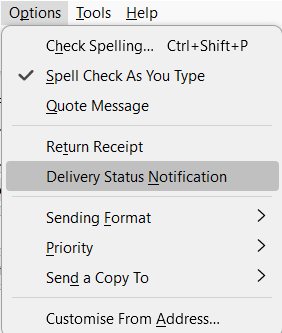
Selecting Return Receipt will require the recipient to confirm receipt. This is not quite useful.
(Session added, 10 May 2023)
Install Add-ons
Select Tools > Add-ons.
Search at "Find more extensions" for the following add-ons, install them and restart Thunderbird:
- Sync with Google Contacts (#) - using native Address Book
- Quick Folder Move (#) - to move or copy emails between folders
- Remove Duplicate Messages (#) - to remove duplicate emails
- PrintingTools NG (#) - to set print page layout
- SmartTemplate4 (#) - to set templates for composition, reply and forwarding
- ImportExport Tools NG (#) - to import or export emails or folders, good for exporting for archive
- Google Calendar Plugin - to open Google calendar
- Lightning - to use calendars (better use Google calendars directly)
- LookOut (fix version) - to open Outlook attachments
- Manually sort folders - to re-sequence order of accounts and folders
- Extract 'Em! - to extract attachments
- CardBook (#) - to sync Google contacts (not used - use native Address Book instead)
Further instructions are given below for add-ons with "(#)" above.
The following are no longer available or compatible with the latest Thunderbird:
- AttachmentExtractor Continued - to download attachments (emails must have been fully downloaded before the full attachments can be extracted)
- Provider for CalDAD & CardDAV - required for TbSync below (not used)
- TbSync - to synchronize contact, task and calendar information (not used because of log in problem).
(List updated, 15 Jan 2021)
(Note against AttachmentExtractor added, 29 Jun 2021)
(List updated, 10 May 2023)
(List updated, 16 Dec 2025)
Sync with Google Contacts
(Section added, 16 Dec /2025)
Use Thunderbird's native Address Book and create one to sync with Google Contacts.
Select Tools > Address Book:
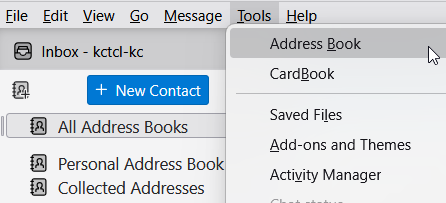
Select the icon on the left:
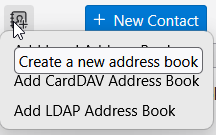
Select Add CardDAV Address Book:
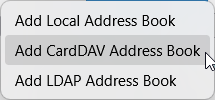
Enter simple name as Usename or leave it blank, and enter the following Google URL as Location:
https://www.googleapis.com/carddav/v1/principals/<your-email-address>/lists/default/
Replace <your-email-address> with a valid Google email address.
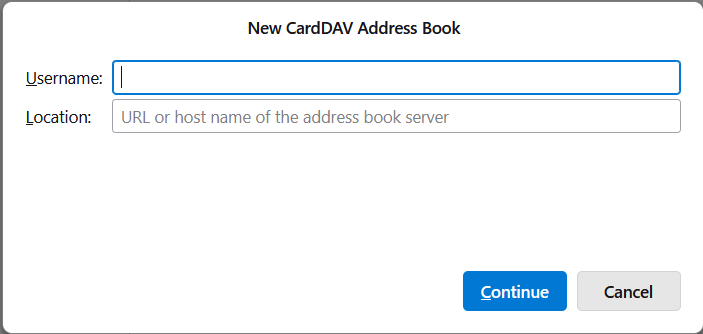
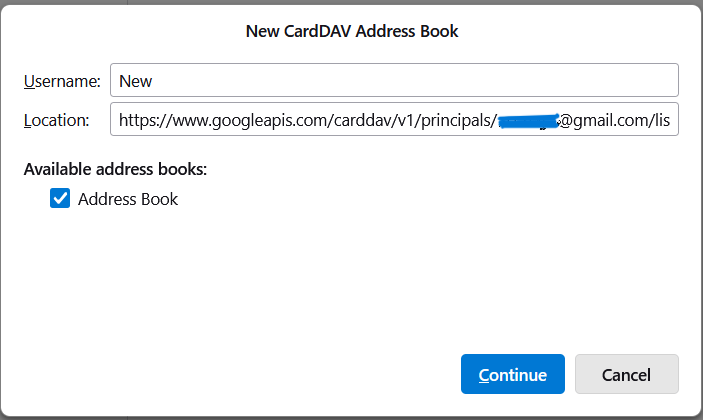
Select Continue.
This screen will stay until the connection to Google Contacts is successful.
The following screen will pop up. Choose the desired Google account from the list below this part of the screen:

Another screen will pop up. Select Allow to proceed:
Be patient, the process can be slow.
After successful authentication, an "Address Book" item will appear.
Select it, and click "..." on the right end to show the menu below.
Select Properties to inspect and change the name to a simple meaningful one.

After some time, the addresses should be listed on the right. It would take some time.
If not showing, restart Thunderbird to let it sync fully. Select Synchronize in the above menu if necessary.
Select View > Contacts Sidebar or press function key F9 to turn on the Contacts Sidebar when writing emails to select the email addresses.
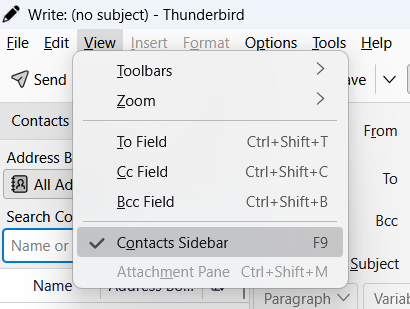
Create another address book to sync with a different Google account as necessary.
Use Quick Folder Move
Select some messages.
Press the following keys to open a context menu, enter a few characters for the name of the destination folder to display possible choices, move down to select the folder, and press Enter.
Press:
Shift+M to move the currently selected messages to the destination folder.
Ctrl+Shift+M to repeat moving to the previously selected folder.
Shift+Y to copy the currently selected messages to the destination folder.
Ctrl+Shift+Y to repeat copying to the previously selected folder.
Shift+G to jump to the destination folder (without the need to pre-select come messages).
Set up Remove Duplicate Messages
Select Tools > Add-on Options > Remove Duplicate Options:
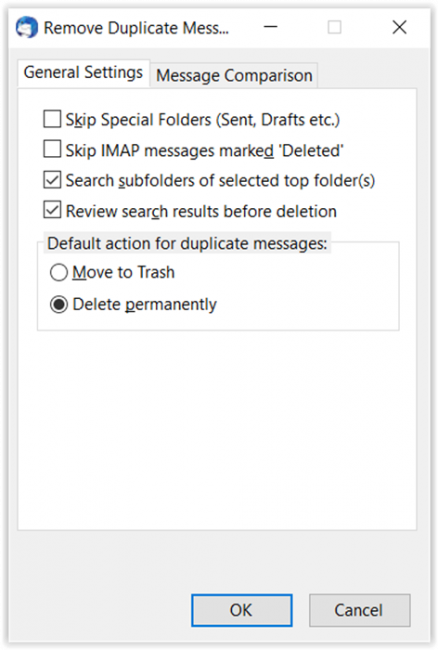
Select Move to Trash instead of Delete permanently if not sure.
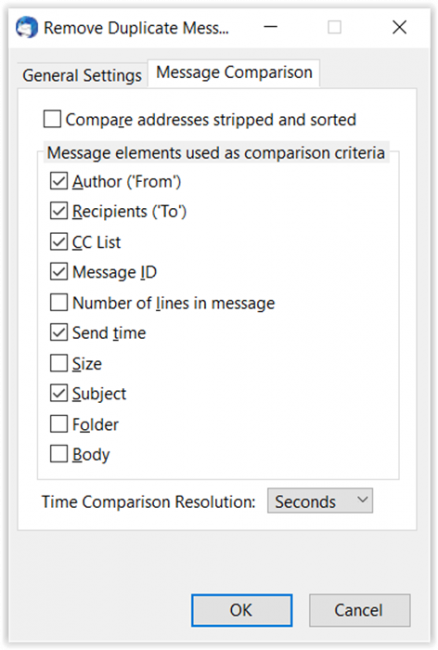
Select Folder if comparison is not across different folder.
Set up Print Page (Thunderbird version 91)
Select Tools > Preferences > General > Config Editor (at bottom of page).
Search "headerleft" and press the pencil icon to edit to enter "&T" to represent email subject.
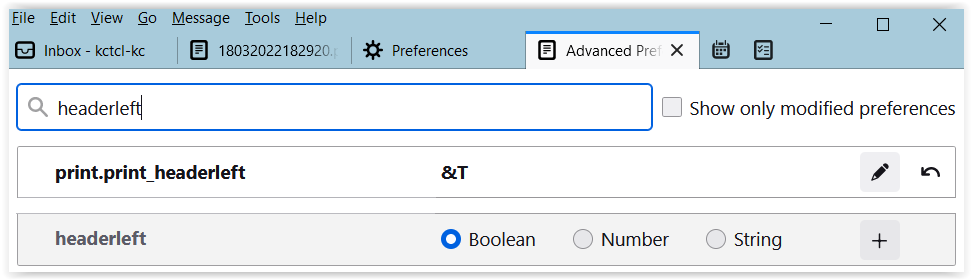
Press the refuse bin icon to remove similar but outdated setup for named printers (similarly for other settings described below.
Search "headercenter" and edit to remove the value.
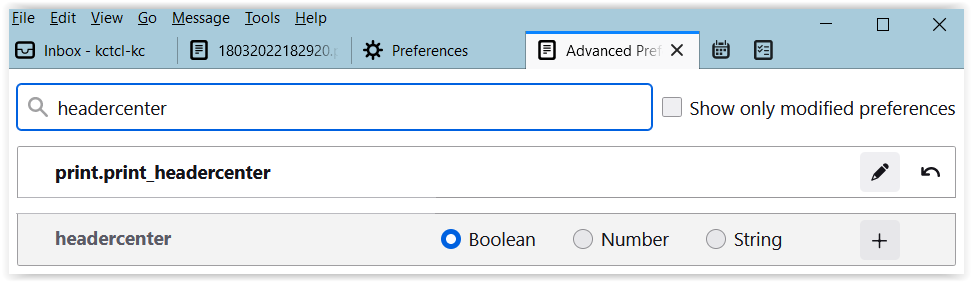
Search "headeright" and edit to remove the value.
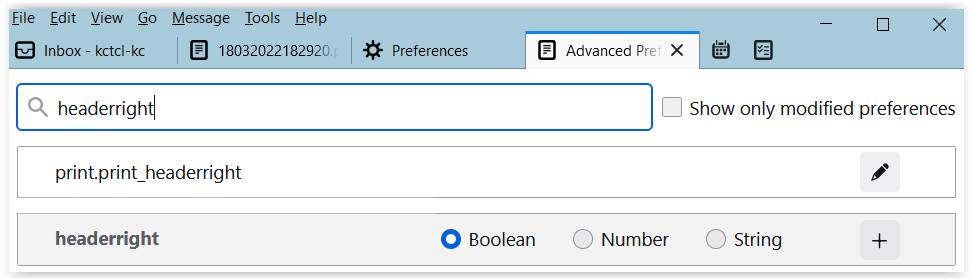
Search "footer" and edit to set "&PT" for page number for footerleft, and "&D" for date for footerright.
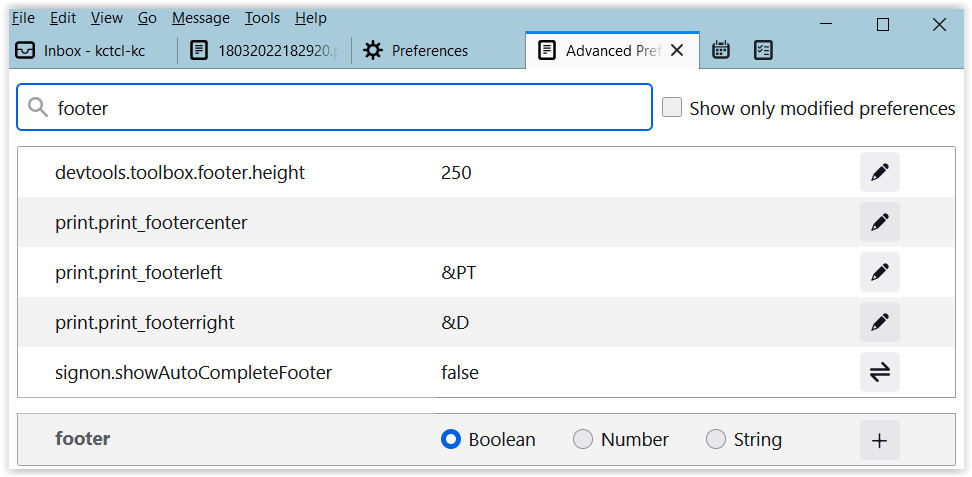
Press Ctrl-P to pop up the print menu to define the paper size, scale, margins, and options:
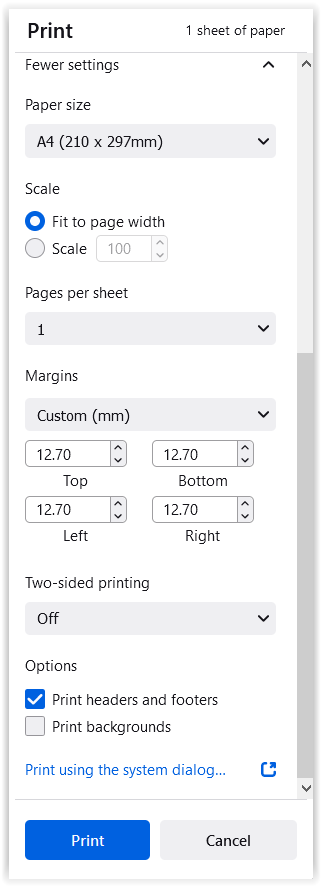
Set up Print Page (Thunderbird version 78)
Select File > Page Setup:

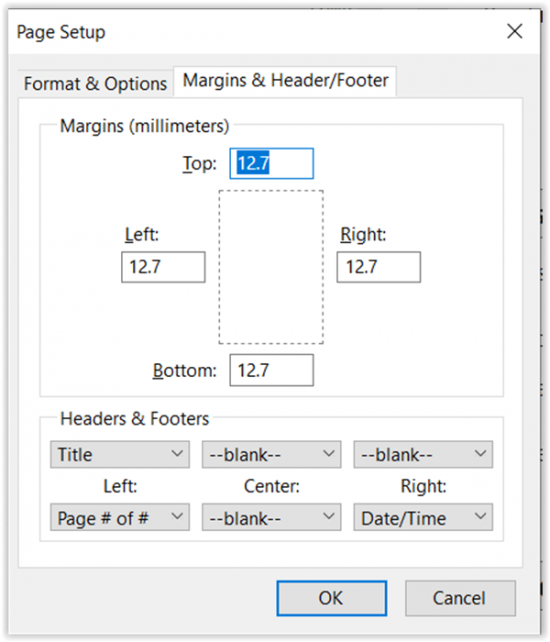
Set up PrintingTools NG Options
Select File > Printing Tools NG Options and set as follows:
Copy and paste this Custom date format: %a, %e %B %Y %t %H:%M:%S [GMT %z]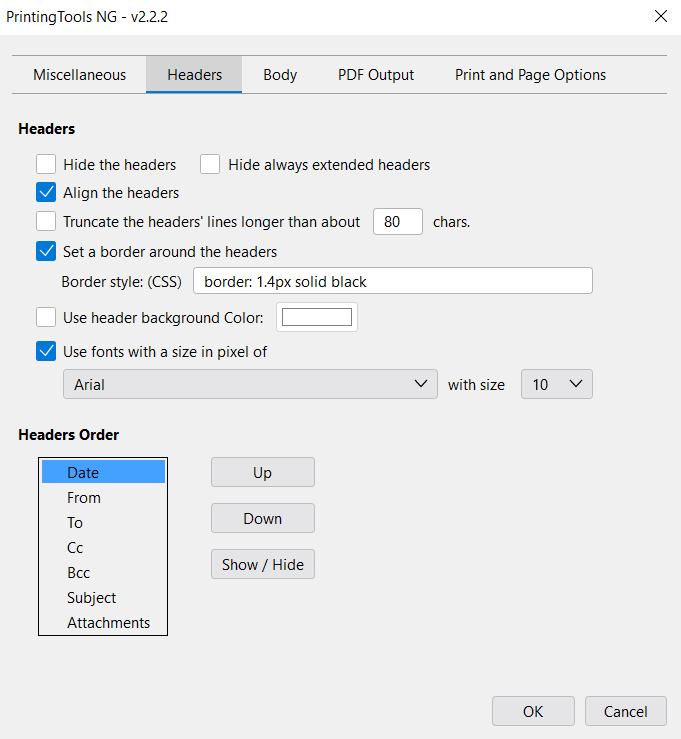

Skip PDF Output. Functions to be understood.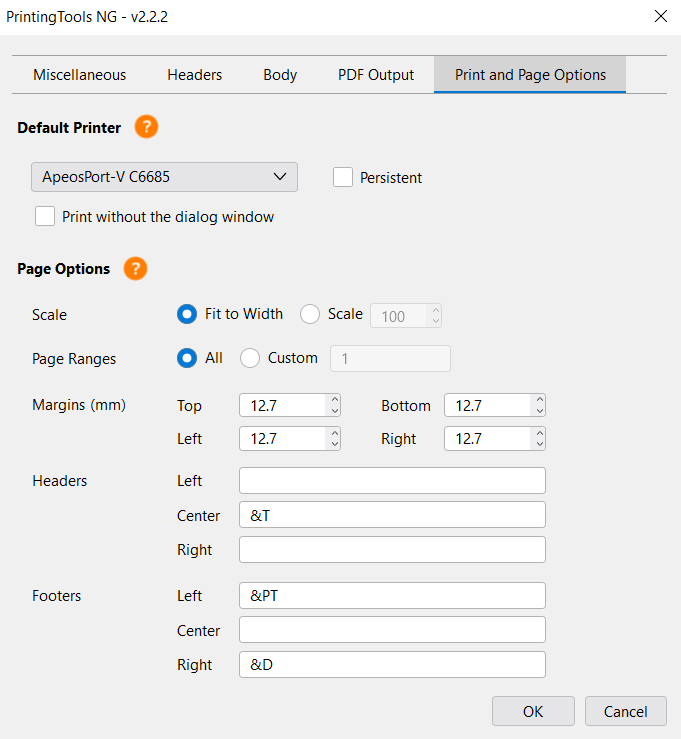
Right-click Thunderbird toolbar to customise to add the following icon:
(Section updated, 10 May 2023)
Set up SmartTemplate4
Select Tools > Add-on Options > SmartTemplate4:
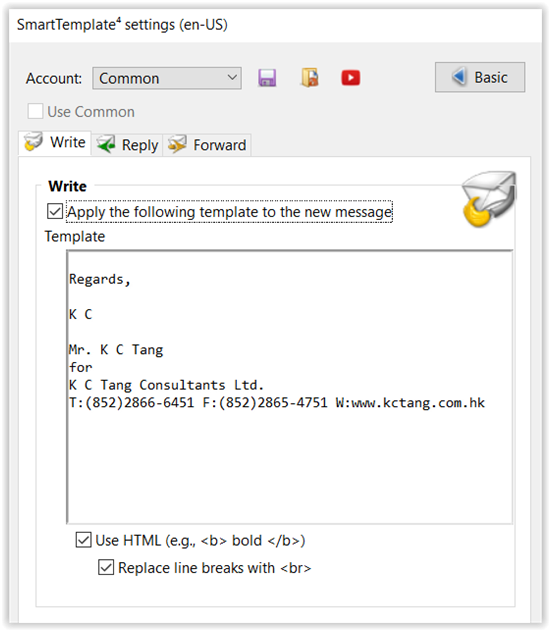
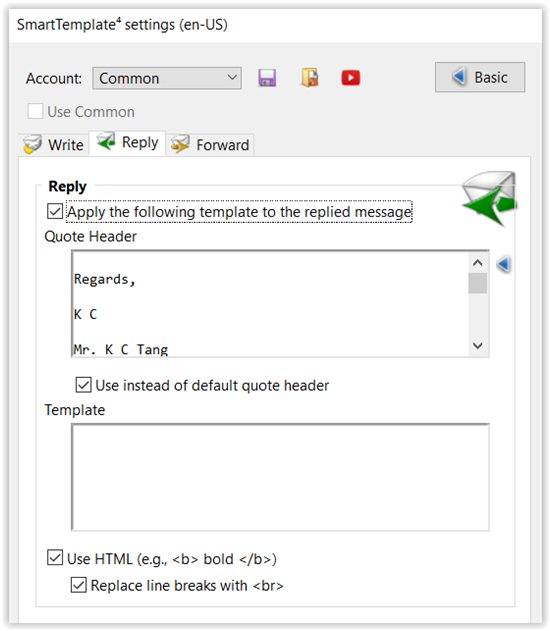

Copy and paste the following latest Code in the Quote Header of the Reply and Forward options:
<a blank line first> Regards, Mr. K C Tang <replace with your name> for K C Tang Consultants Ltd. T:(852)2866-6451 F:(852)2865-4751 W:www.kctang.com.hk <hr/> <SPAN style="FONT-SIZE: 10pt"> <b>Sent: </b>%date% <Use this to show: Sent: Mon, 14 Dec 2020 10:47:45 +0800> <b>Sent: </b>%X:=sent% %datelocal% %date_tz% <Or use this to show: Sent: Monday, Dec 14, 2020, 10:47 +0800> <b>From: </b>%from(name,bracketMail())% <b>To: </b> <SPAN style="FONT-SIZE: 8pt"> %to(name,bracketMail())%</SPAN> [[<br><b>Cc: </b> <SPAN style="FONT-SIZE: 8pt"> %cc(name,bracketMail())%</SPAN>]][[<br><b>Bcc: </b> <SPAN style="FONT-SIZE: 8pt"> %bcc(name,bracketMail())%</SPAN>]] <b>Subject: </b>%subject% </SPAN> <hr/>
(Note against date formats added, 29 Jun 2021)
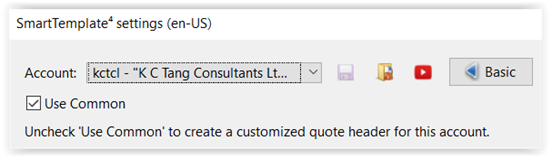
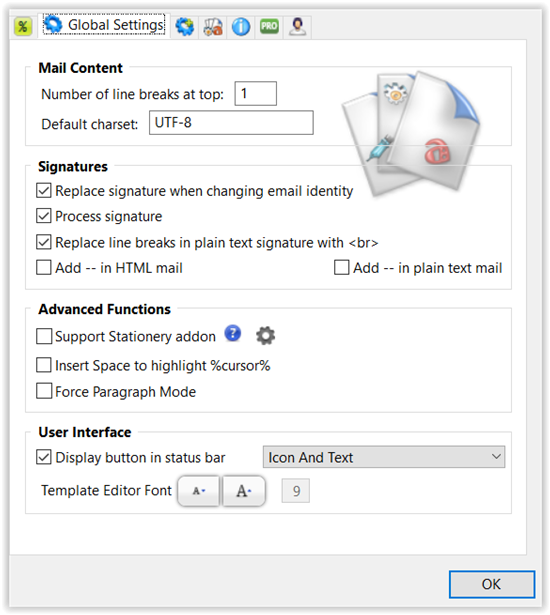

Insert license key in the next menu.
Set up CardBook (not required now)
CardBook automatically adds three columns of "From (CB), Recipient (CB), Correspondents (CB)" to the message list making the original columns on the list too narrow to read. It adds again even after the three columns are removed. This is annoying. CardBook provides many entries for the contact information beyond our normal needs. Since Thunderbird's native Address Book can now support CardDAV to connect to Google Contacts, just use the native Address Book and remove CardBook.
(Paragraph added, 16/12/2025)
Select Tools > Add-ons and Themes > Find more add-ons > Enter CardBook to find and add the App.
Select Next when the following appears:
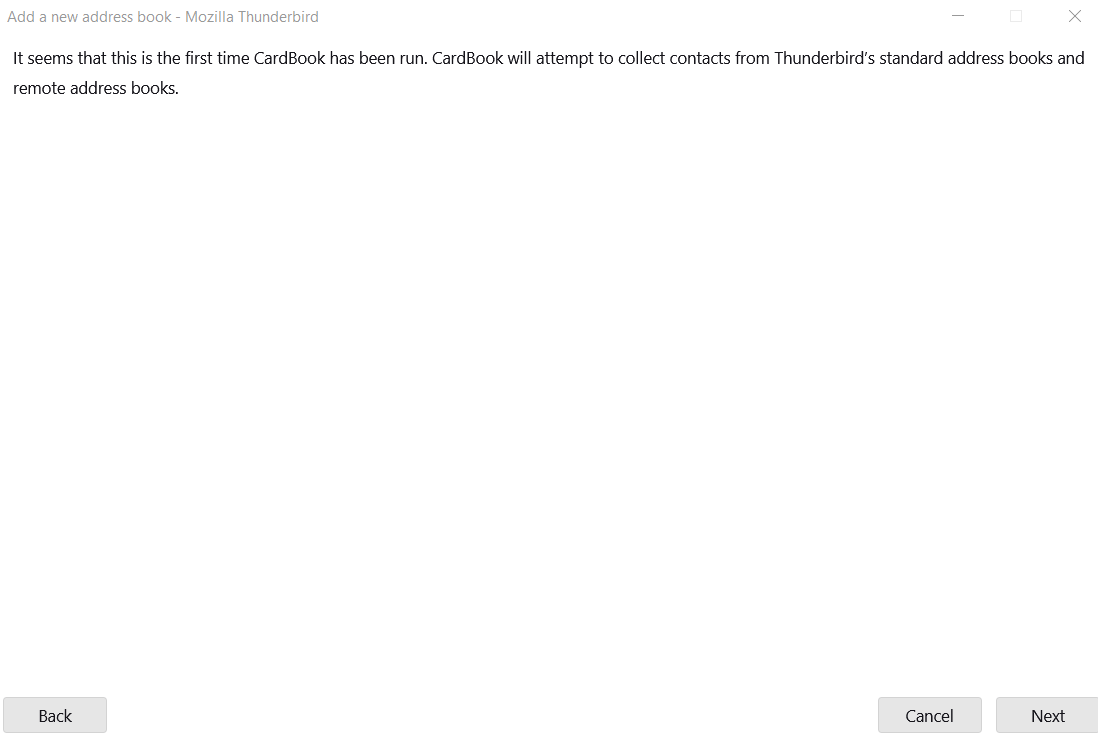
Select Validate if remote address book found (password to be entered in the next validation screen) or select Next:
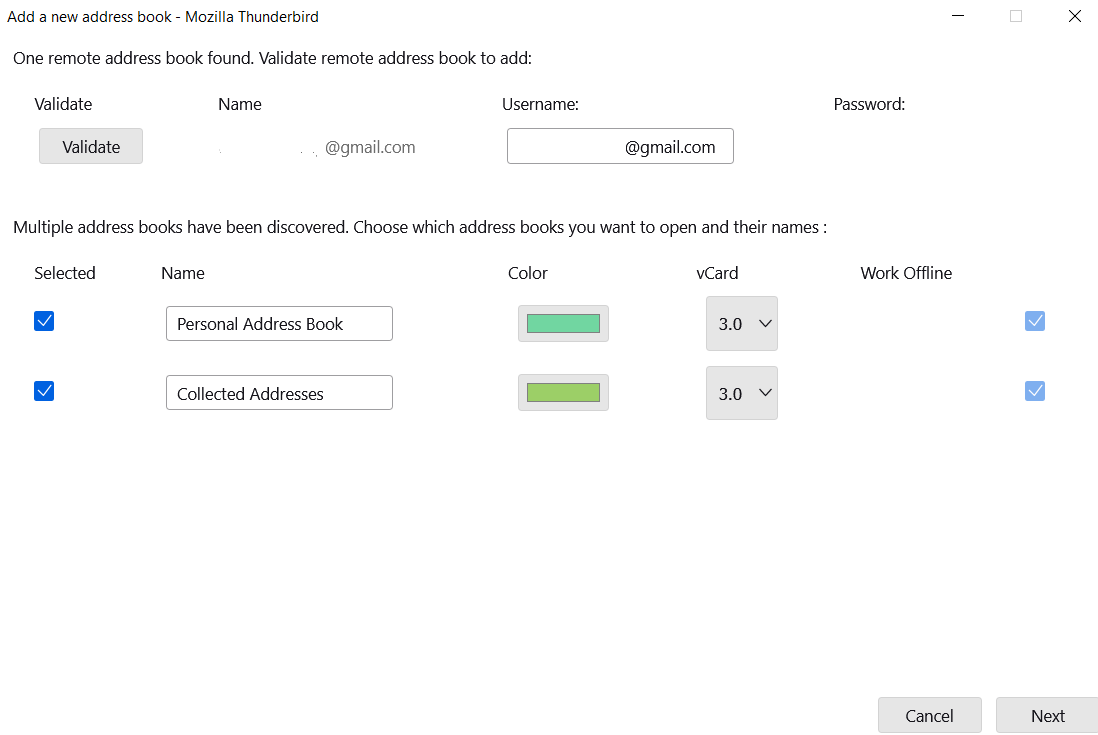
The CardBook icon will appear on the right of the Toolbar.
Right-click the Toolbar to move the icon position to the left as appropriate:
Click CardBook icon or select Tools > CardBook:
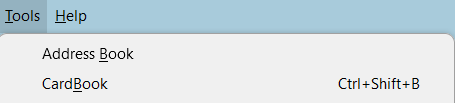
The following will show up: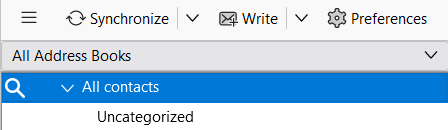
Right-click within this side window space to bring up the following and select New Address Book: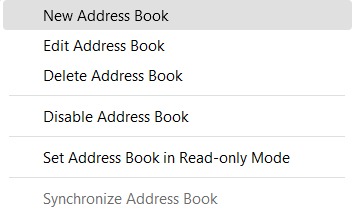
Select Remote and Next:

Select Google, enter Username and select Validate:
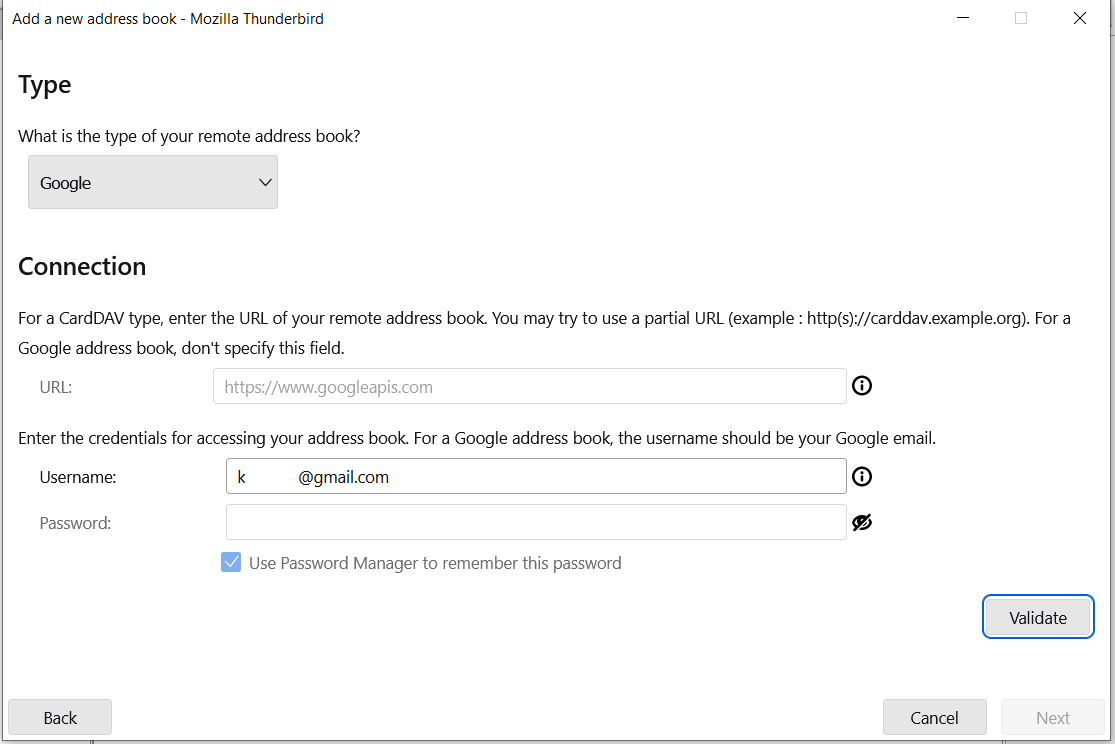
Enter password in the next Google screen and permit access to Google contacts.
The Google contacts will be synchronized for use.
Add additional address book as necessary.
Select Edit Address Book to further customise:
Select General to change Address Book colour:
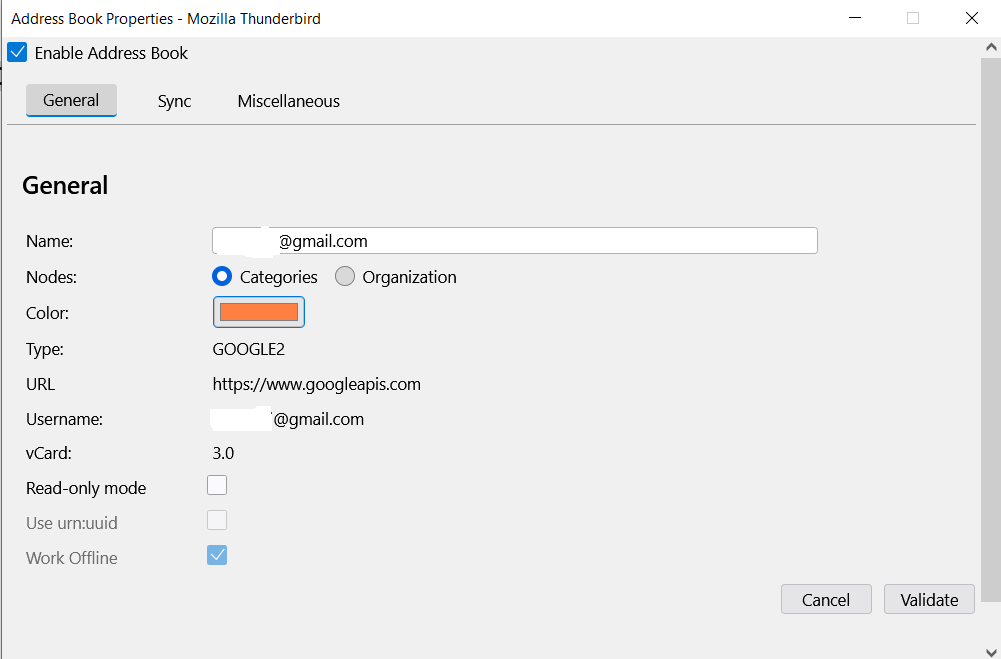
Select Sync to set synchronization interval to 15 minutes: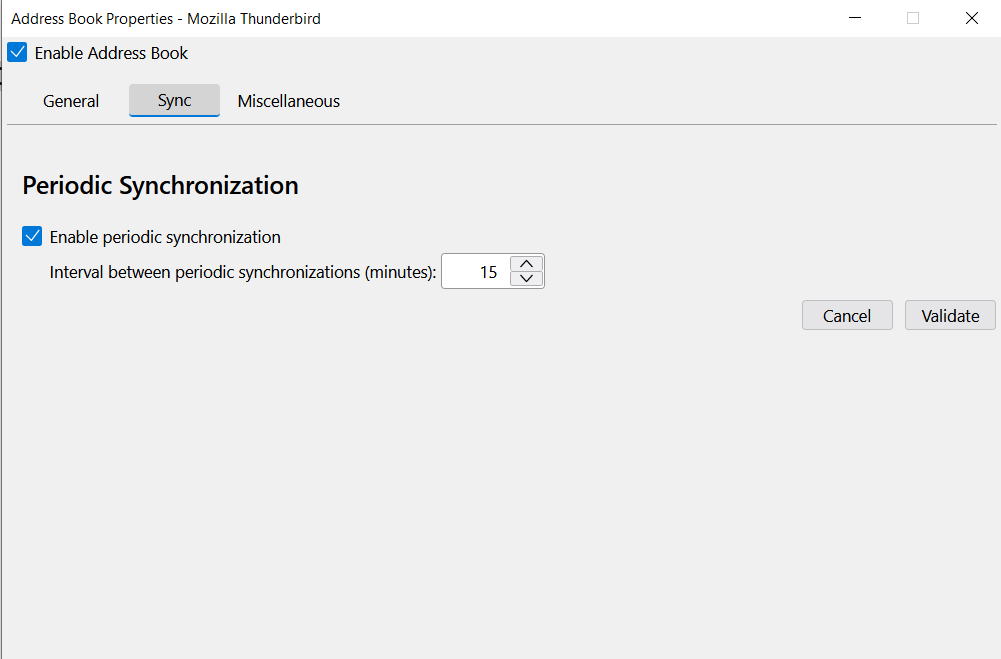
Remove the original Address Book icon from the toolbar because it will not be used anymore.
CardBook has many settings and entries for the contact but just use the simplest entries.
For the name of the contact, enter in the format of "Short company name - Full personal name" as both the Display Name and Family Name. Do not split to use Given or Other Names.
Press Synchronize in the CardBook toolbar as necessary.
(Section added, 10 May 2023)
(Updated, 11 May 2023)
Set up TbSync (not required now)
Select Tools > Synchronization Settings (TbSync):
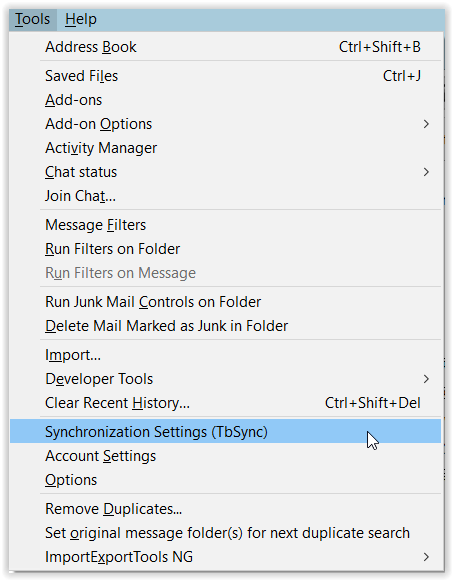
Or select Tools > Add-on Options to go to the following, then select Add new account > CalDAV & CardDAV:
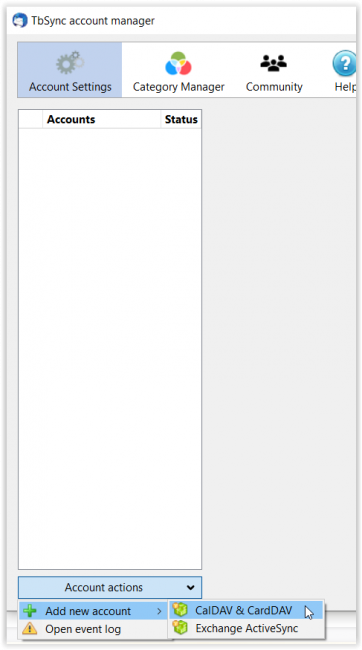
Select Install Provider > download link:
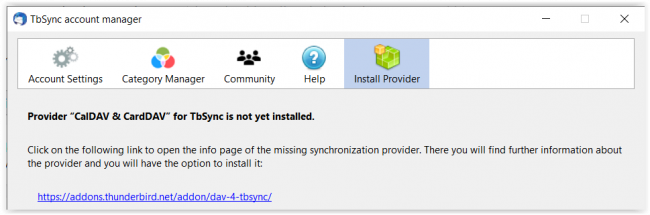
Add CalDAV & CardDAV:
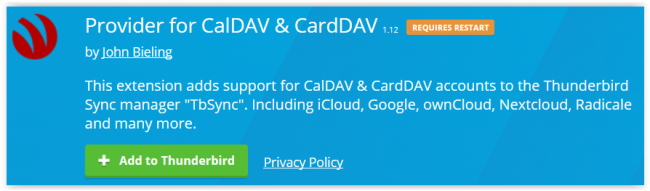
After adding, and re-starting Thunderbird as necessary, go back and select Manual Configuration > Next:
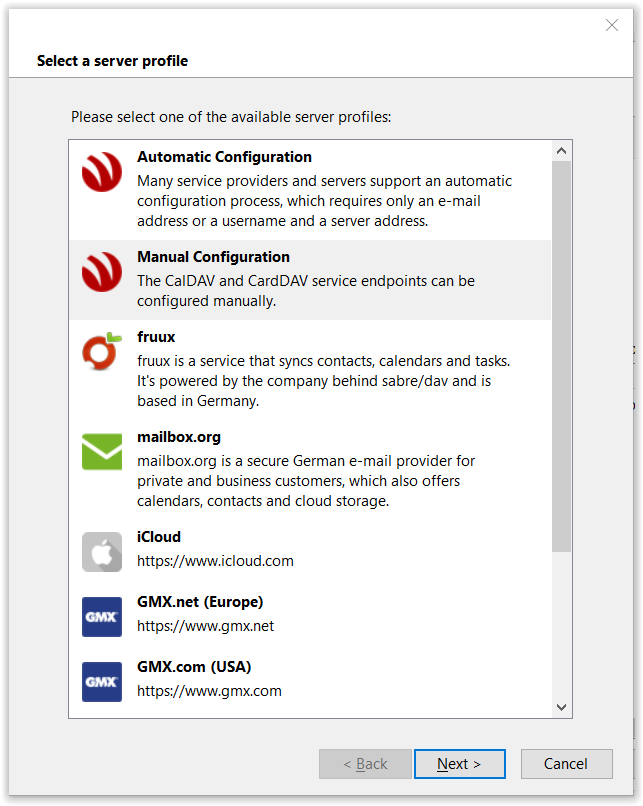
Enter
Account name: friendly account name, e.g. kctangcl
User name: gmail.com account name
CalDAV server address: https://apidata.googleusercontent.com/caldav/v2
CardDAV server address: https://www.googleapis.com/.well-known/carddav
Select Next:

(Manual configuration added, 15 Jan 2021)
The following is an older version of TbSync which provided automatic Google support. In that case, select Google > Next:
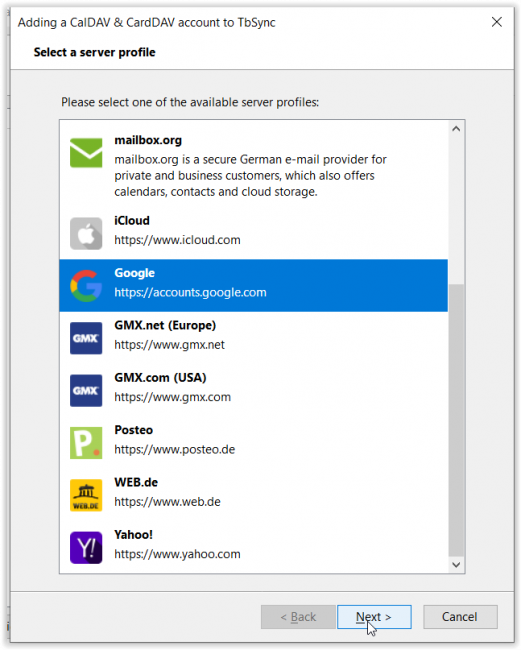
Enter a friendly account name and select Next:
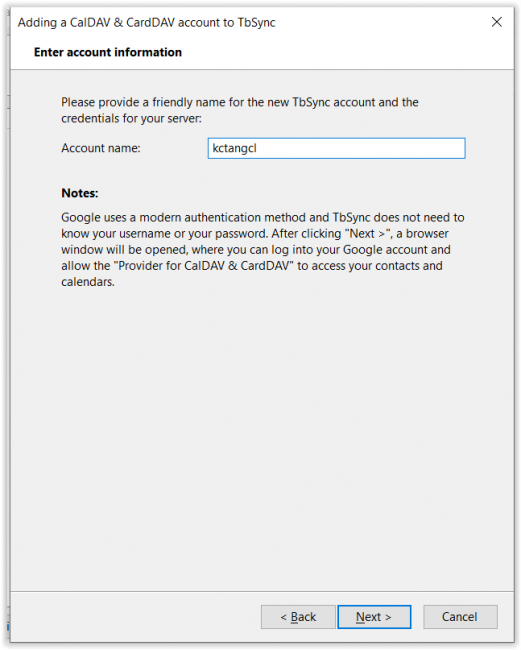
After selecting Next in the manual case or automatic case, enter Google account email address and its password (may require doing it twice):
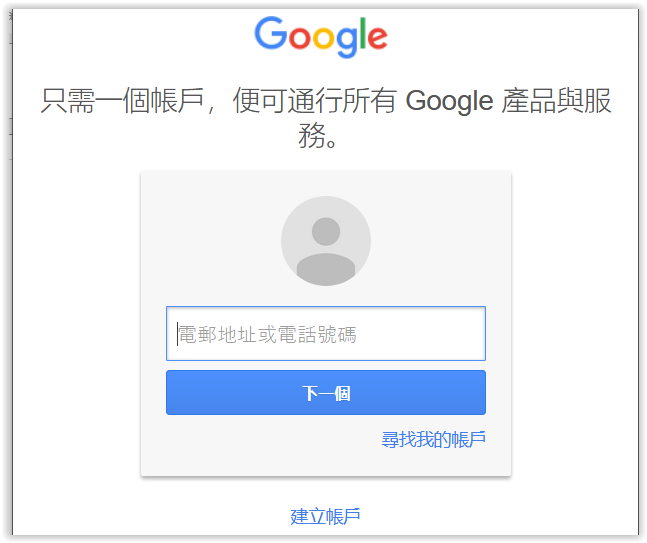
Select Finish:
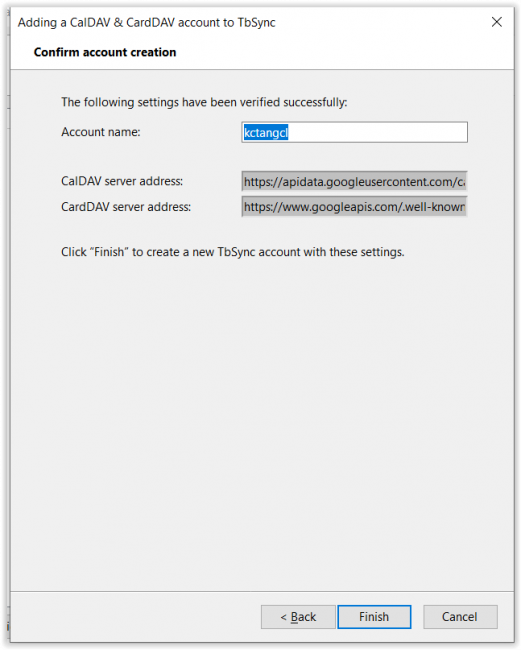
Select Enable and synchronize this account:
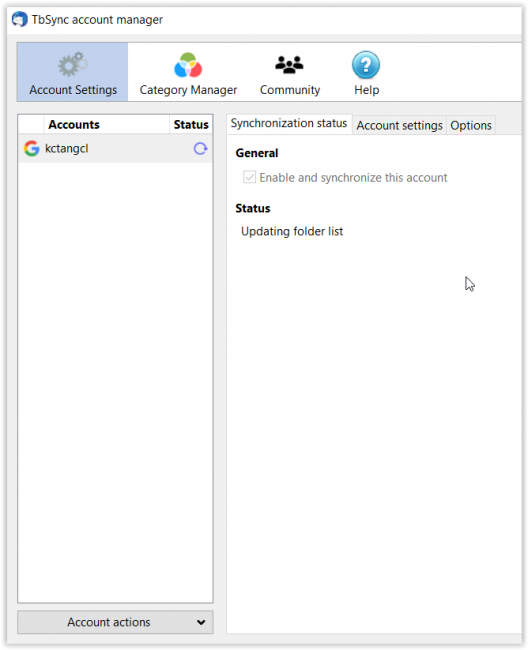
Available resources like Google address book and calendars will be displayed.
Select those to be synchronized > Synchronize now:
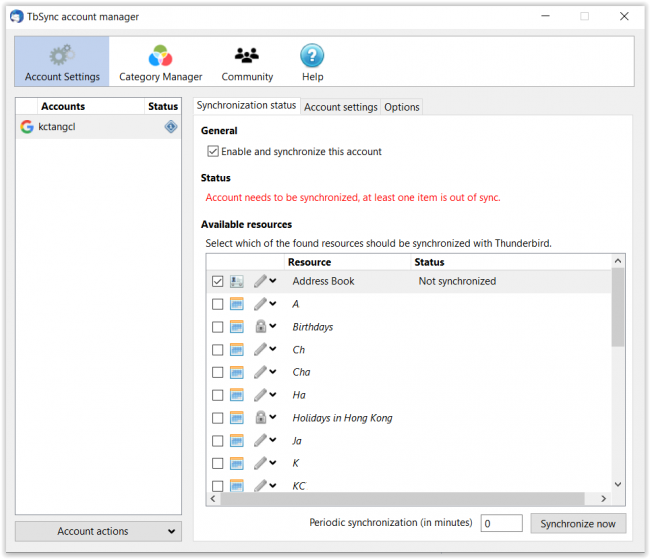
The address book and calendars will be available for use.
Change Periodic synchronization (in minutes) to 30, which is the minimum interval.
Use ImportExportTools NG to export emails
Use ImportExportTools NG to export emails for archive.
To ensure that all email attachments have been downloaded. The email folders should be synchronised.
Select Tools > Account Settings > Advanced:
.jpg)
It may not be necessary to change to "Synchronise all messages locally regardless of age". Change only if the final results show that not all messages with attachments have been synchronised. Change back after use.
Select Download against folders intended to be exported:
.jpg)
Wait a while for the messages to be fully downloaded before exporting.
Alternatively, select relevant folder > Properties > Download Now to download all messages:
.jpg)
.jpg)
Select Tools > ImportExportTools NG > Options or alternatively select relevant folder > ImportExportTools NG > Options to set options:
.jpg)
Accept default options as follows:
.jpg)
Change the "format for filenames", "cut complete file path length" and "Charset for filenames" as follows:
.jpg)
Note the Custom Date format:
![]()
Accept default options as follows:
.jpg)
Accept default options as follows:
.jpg)
Select the relevant folder name and the following options to export to HTML format (with attachment):
.jpg)
Select the destination folder under which the exported emails will be saved.
After exporting, the following sub-folder for the selected source folder "XYZ" with the date and time of exporting appended will be created:
.jpg)
The following will appear under the sub-folder. The index.html will give an index page linking to all the emails and attachments under the Messages sub-sub-folder:
.jpg)
The emails under the Messages sub-sub-folder are in html format. Their filenames follows the filename format defined above. Their attachments are in the Attachments folders, one for each email with attachments.
_0.jpg)
Check whether the attachment files have been fully downloaded. If the file size is only 1KB, it means not fully downloaded in most of the cases.
The html files cannot be imported back to the email server. Export again to eml format as a double measure:
.jpg)
The exported sub-folder will have the same pair of index.html and Messages sub-sub-folder, but the index.html cannot link to email attachments. Each email has its own embedded attachments. There will be no separate Attachments folders.
Set Up QNAP Network Attached Storage
Set Up QNAP Network Attached Storage KCTangNote
- 28 Apr 2022: OpenVPN connection added.
- 25 Apr 2022: Created.
Intro
A network attached storage is self complete with hard disks, ram and CPUs but without monitor screen to store files. It can be networked to computers and smartphones for viewing and file management.
Connect from Windows on the same local area network
Open File Explorer on Windows computer connected to the same local area network of a properly set up NAS (setting up described later below)..
Click "Network" oOpen File Explorer on Windows con the folder tree to find that the NAS appears as a connected device.
Click its icon.
Enter the username, password and confirm remembering the credential for subsequent connections.
The shared folders should appear for use.
Map the top shared folder to a drive number for easy access.
Connect from Windows from internet using OpenVPN
Install OpenVPN services if not already installed.
Copy the OpenVPN configuration file (obtained from the NAS after setting up as described later below) to Windows' C:\Program Files\OpenVPN\config\.
Unlike others, this configuration file connection needs manual connect.
To start this manually every time after rebooting, or re-connect after loss of connection after sleep or hibernation:
- Click "^" on the bottom task bar to pop up the small window
- Right-click the OpenVPN GUI icon
.PNG)
- Click the configuration file name, and click Connect
.PNG)
- Enter user name and password for the first time.
A message will appear if connected successfully.
Open file manager and enter \\10.7.0.1 to access the files.
Map folders to drive names for easy access.
Do not manually connect for other automatically connected configuration files.
If not connected successfully due to insufficient number of TAP-Windows adapters, search Windows as follows, add a new adapter and connect again:
.PNG)
If connection is still not successful, try opening Windows' command prompt and execute ipconfig /release and ipconfig /renew, and connect again.
Restart Windows as the last resort.
Map drive for quick access
Define a drive to be listed in the file manager directory to represent the server:
- Open file manager and enter \\10.8.0.1 to access the vpn server.
- Right-click the desired folder.
- Click Map network drive.
- Choose a drive name to represent the folder.
- Click Finish.
Map the top shared folder to a drive number for easy access.
Set up QVPN to connect from internet
On computers, download "QVPN Device Client" from https://www.qnap.com/en/utilities/networking..PNG)
Set up as follows:
.PNG)
.PNG)
Set as follows:
- The profile name can be decided by the user.
- The Username should be the user name registered on the NAS. He will be able to access folders and files owned by him or shared with him.
- The Pre-Shared Key should be the same as that set on the NAS (described later below).
- The VPN Port should be the external port of the router connecting the NAS which can be the default port of "443" but should preferably be another port.
- Note the selections of blue bullets.
.PNG)
Adjust "Connection" settings as follows, and select "Save" to connect:.PNG)
Open Windows' File Explorer.
Click "Network" on the folder tree.
Enter "10.6.0.1" at the top to display the shared folders (if successful):
.PNG)
Map the folder to a drive number:
.PNG)
Install new hardware
Insert hard disks in the storage case.
Connect to a computer through router.
Connect to power supply and switch on the NAS.
Download Qfinder Pro from Essentials | Utilities | QNAP on computer and install.
Use Qfinder Pro to search for the NAS on the same network.
Update the firmware
Click the row showing the existence of the NAS to bring up the following to start smart installation:
.PNG)
.PNG)
.PNG)
Initialise
Enter the user name and password of the first user to become the administrator to replace the default "admin":.PNG)
.PNG)
.PNG)
.png)
.PNG)
.PNG)
.PNG)
Create storage volume
Log in as the new administrator:.PNG)
.PNG)
.PNG)
.PNG)
Click "+" against "No Volume" to create new volume:.png)
Select "Change Type":
.PNG)
Select "Static volume" to use full disk size (backups are done elsewhere not in this NAS):
.PNG)
Unclick "Alert threshold" (optional).
Select "Set to Max"..PNG)
.PNG)
A single volume without name is created.
.PNG)
If create thick volume (not used)
If "Thick volume" was selected, click "+" against "Create Storage Pool":
.PNG)
Storage Pool 1 is created (not in the case of static volume):
.PNG)
.PNG)
Create storage pool
Do not enable "Create SSD secure storage pool" if no SSD:
.PNG)
Click to select both hard disks:.PNG)
Select "RAID 1" meaning two hard disks contain the same data and either disk can stand alone to function if another disk is faulty:.PNG)
.PNG)
DataVol1 being created for static volume:
.PNG)
DataVol1 being created for thick volume:
.PNG)
Datavol 1 is created for thick volume:.PNG)
.PNG)
Final result:.PNG)
Disable snapshot backup
No snapshot volume created yet:
.PNG)
Snapshots are used to capture the current data and their changes. Since backup of the data is done on other media, no snapshot is to be set here.
If snapshots are enabled and huge volume of data is imported to the hard disks for the first time, the snapshots taken during the long time of import will use up the snapshot space and may cause system hang and downgrading of the RAID system.
Unclick all three in green to disable "Smart Snapshot Space Management" and "Snapshot Directory" since the full disks are to be used for live data:.PNG)
Select "OK":.PNG)
View to ensure correct selections:.PNG)
Scroll down the page to view the rest.
Select "Apply" to confirm:.PNG)
Set general settings
Change the default System port of "8080" to another port to reduce the chances of unauthorised access, change the external port of the router, apply proper port forwarding from the router port to the NAS port:
.PNG)
Set date and time format:
.PNG)
Set up network
Select "Network & File Services" as shown on the left above.
Select "Win/Mac/NFS/WebDAV":.PNG)
Set Microsoft Networking as follows and select "Advanced Options" for connection by Windows computer on the same local area network::.PNG)
Set as follows:.PNG)
Set NFS Service as follows for mounting as a drive on linux computers::.PNG)
Set up shared folder
Select "File Station" on desktop:.png)
Select "Create folder":.PNG)
Select "Shared Folder":.PNG)
Define folder name and access privileges:
.PNG)
Folder is created:.PNG)
Edit shared folder permissions:.PNG)
Click open "Advanced Permissions" menu:
.PNG)
Select "NFS host access" (select "Microsoft Networking hot access" later):
.png)
Select "Access right" and add "*" to enable all hosts and IPs:.PNG)
Select "read / write", and "Apply":.PNG)
Check and apply Microsoft Networking host access as follows:
.PNG)
Enable as follows:
.PNG)
.PNG)
Set up QVPN service
Select "QVPN Service" on NAS desktop:
.PNG)
Enable QBelt service as follows:.PNG)
Enable OpenVPN service as follows:
- Change the default VPN client IP pool of "10.8.x.x" to "10.7.x.x" to avoid conflict with that used by OpenVPN on the server (not NAS).
- Change the default Sever Port of "1191" to another port to reduce the chances of unauthorised access.
- Change the external port of the router to the same.
- Apply proper port forwarding from the router port to the NAS port:
- Download configuration file (from the left box) for use.
.PNG)
Set up myQNAPcloud
myQNAPcloud is another way to access the NAS from the internet whereby an QNAP ID is given to link to the NAS through the internet.
QNAP ID can be used on computers and smartphones, and can connect to home computers without fixed external IP addresses.
However, myQNAPcloud requires access by administrators, and should not be used by non-administrators.
Select "myQNAPcloud" on the NAS:.PNG)
Select 'Get Started":.PNG)
.PNG)
.PNG)
.png)
.PNG)
.png)
.png)
Download and install "Let's Encrypt":.PNG)
.png)
.PNG)
Use Excel
Use Excel KCTangNote
11 Mar 2020: Rounding up to 2 significant digits added
17 Jan 2020: Using macros and Add-ins added.
01 Feb 2019: Bracketing negative numbers and hiding zeros added.
26 Sep 2018: Showing one-digit as two-digits added.
19 Sep 2018: First created.
Insert page number and total number of pages
Select Page Layout > Print Titles > Header/Footer > Custom Footer:
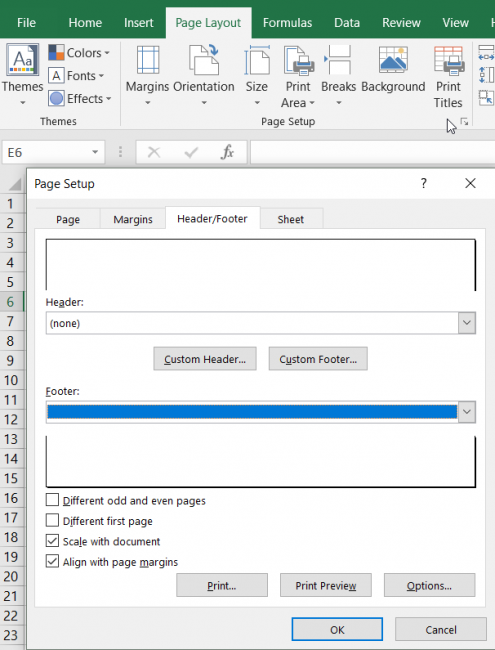
(By the way, click Scale with document and Align with page margins to enable the Header and Footer not to encroach into the margins.)
Select icon to insert Page number:

Enter " / ".
Select icon to insert Number of Pages:

Select OK.
Select Page:
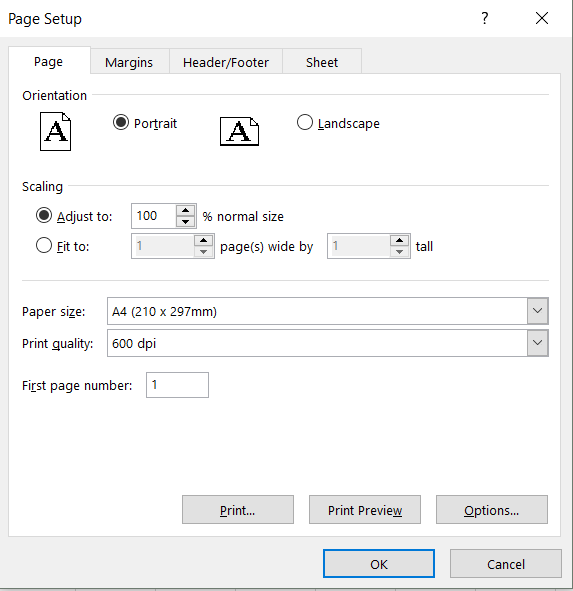
Change First page number from "Auto" to "1".
If it is "Auto", the page number of all Worksheets selected to print will run consecutively.
If it is "1", each Worksheet will start at page 1.
However, the total number of pages will be the total of all Worksheets selected printed, not the total number of the respective Worksheet. This may not be desirable.
The next is a solution.
Show total number of pages of a Worksheet
Select Formulas > Name Manager > New.
Define:
- Name: NumberOfPages
- Refers to: GETDOCUMENT(50)
Enter in a cell a formula =NumberOfPages
The displayed value will be the total number of pages of the worksheet.
Enter in a cell a formula ="Total " & NumberOfPages & " Pages" (note spaces) will display a meaningful text.
This cannot be used in the Header or Footer.
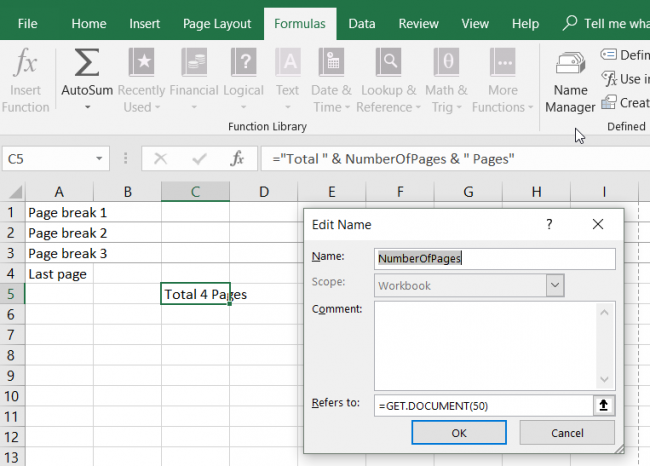
Show single-digit whole number as two-digit whole number
Press Ctrl-1 > Number > Custom,
Enter "00" against Type. Select OK.
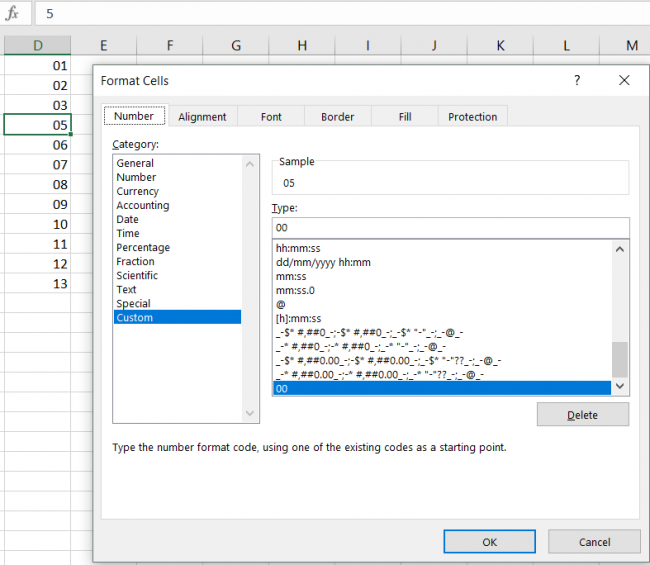
To make the double-digit number actually become a text for other uses, use the TEXT() formula, where "00" represents the Format Type used above, as follows:
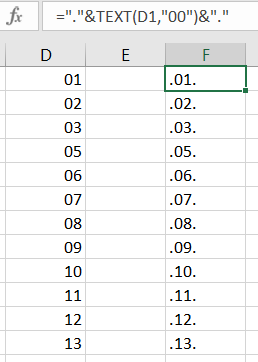
Show negative numbers in brackets
(added 01 Feb 2019)
Use:
#,##0.00;(#,##0.00)
The part before ";" defines the format of positive numbers.
The part after ";" defines the format of positive numbers.
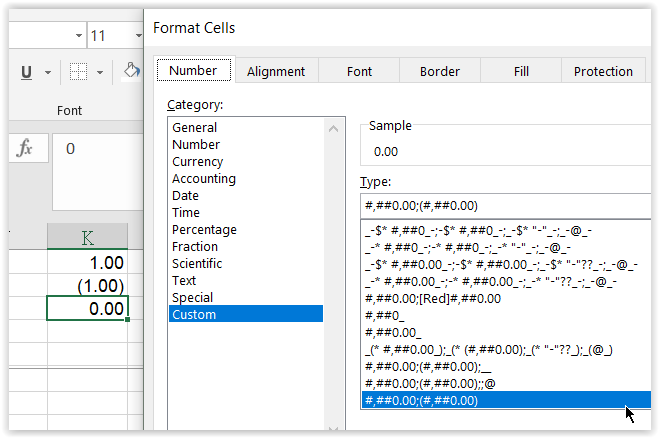
Right-align positive numbers with negative numbers before the ")"
(added 01 Feb 2019)
Append "_-" to the first part:
#,##0.00_-;(#,##0.00)

Hide zeros for individual cells
(added 01 Feb 2019)
Append ";;@" to the end:
#,##0.00;(#,##0.00);;@
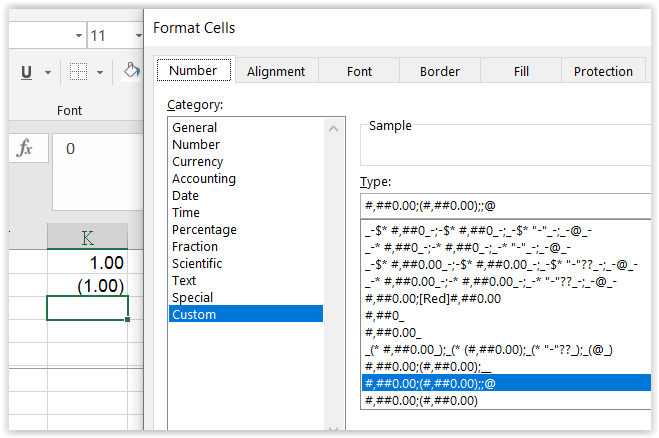
Hide zeros for the whole worksheet
(added 01 Feb 2019)
Select File > Options > Advanced.
De-select Show a zero in cells that have zero value.
All zeros will be hidden.
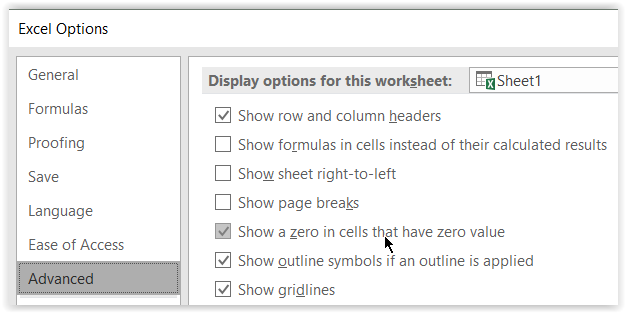
Round up numerical values to 2 significant digits
(added 11 Mar 2020)
Use formula in the cell to display:
"=IF(INT(Q)>0,ROUNDUP(Q,2-LEN(INT(Q))),ROUNDUP(Q,2))"
where Q = referenced cell address (or formula)
It can be read as: if integer of Q > 0, then round it to 2 significant digits, else round up Q to 2 decimal places.
If Q = 1831.03, then
- INT(Q) > 0.
- LEN(INT(Q)) = 4
- 2 - LEN(INT(Q)) = 2 - 4 = -2 (meaning, reduce length from 4 to 2 by -2)
- ROUNDUP(Q, -2) = 1900.
If Q = 0.1234, then
- ROUNDUP(Q, 2) = 0.13.
Application:
- The unit rates used in Cost Estimates are approximate rates.
- It would not make sense to show them in many digits and with decimal places to make them look like very accurate.
- 2 significant digits should be sufficient.
- Estimates should include buffers.
- Rounding up is appropriate.
Use macros
(added 17 Jan 2020)
Macros can be used to execute keyboard or mouse commands automatically. This will simplify the tasks if the same set of keyboard or mouse commands are repeated frequently.
Record macros:
- Select View > Macros > Record Macro
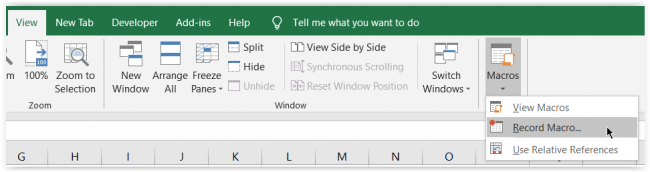
- Enter <Macro Name>
- Select OK

- Do an example of the intended task with keyboards and mouse
- Select View > Macros > Stop Recording
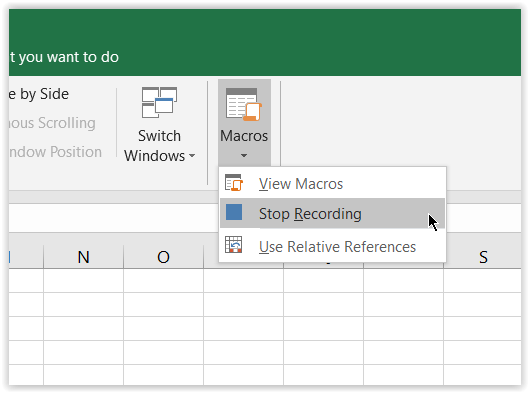
View macros:
- Select View > Macros > View Macros
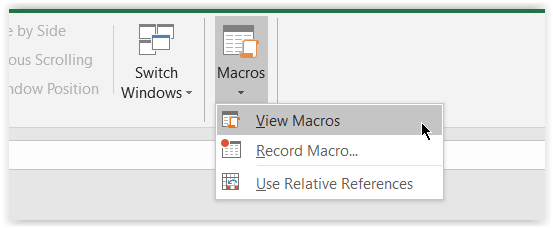
- Select the desired <Macro Name>
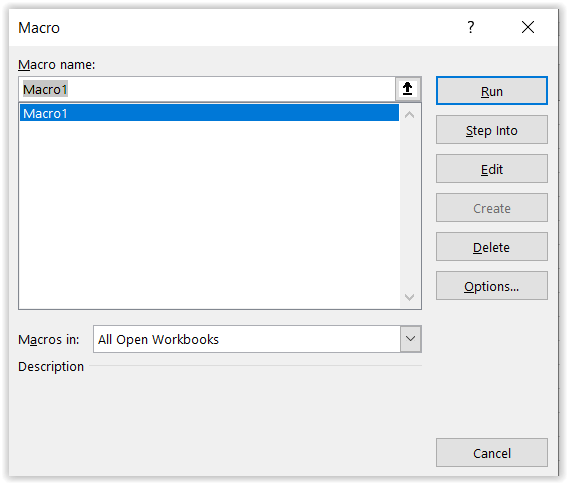
- Select Run to run the macro to execute the recorded commands
- Select Step into to run the macro step by step
- Select Edit to edit the macro
- Select Option to assign a shortkey to run the macro
Note:
- The macro will record based on the cells used when recording the macro.
- Editing is required when the same set of commands is to be run starting from a cell at a different location.
- Change the relative addresses of the cells as recorded in the macro, and test run to get the expected results.
- Once successful, the macro can be used for similar cases when the cells used are of the same relative layout.
- More complex macro would need to be written if more varying circumstances are to be handled as well.
- The recorded macro can serve as the base or give code segments for use.
Use macros on different files
To run macros on a different file:
- Save the file with macros as an macro file with ".xlsm" extension to enable it to be run, otherwise the macros must be enabled each time when they are run
- Open the macro file
- Open the target file and display the target worksheet as the active worksheet
- View macro as described above, and select and run the desired macro
Use Add-in to run macros (standard method)
The above process would need a number of steps before the macros can be run.
A simpler way is to add the macros as commands in the ribbon at the top.
Add macros to a ribbon
- Save the macro file with ".xlsm" extension as an Add-in file with ".xlam" extension, which will save it by default to the following folder:
C:\Users\<Admin or user name>\AppData\Roaming\Microsoft\AddIns
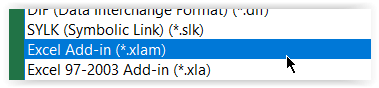
- Right-click any empty space on any of the ribbons at the top
- Select Customize the Ribbon > Add-ins
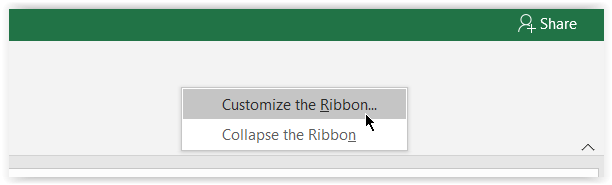
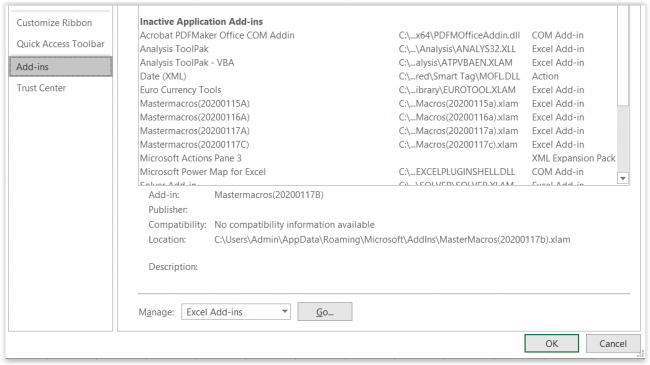
- Select Go against Manage: Excel Add-ins
- Select the desired ".xlas" Add-in file > OK
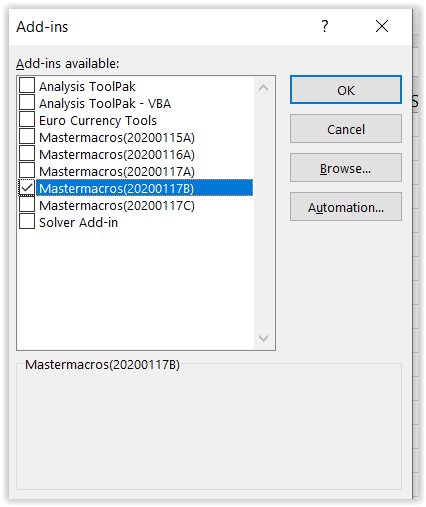
- Right-click any empty space on any of the ribbons at the top
- Select Customize the Ribbon > Customize Ribbon
- Select Macros under Choose commands from to show the available macros
- Select New Tab to create a New Tab with a New Group (Custom)
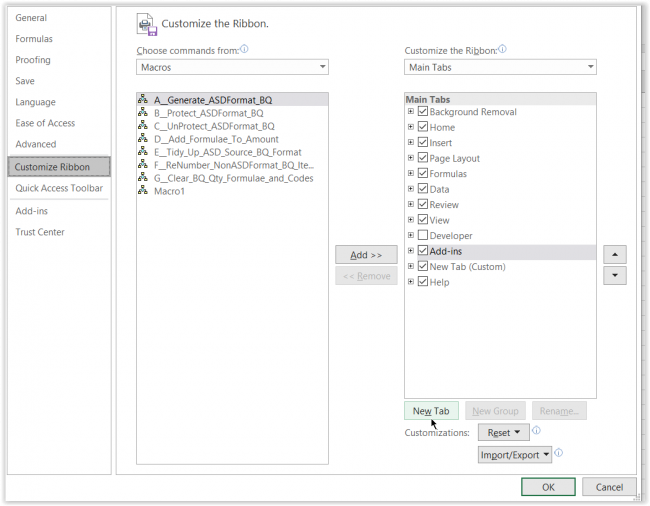

- Select the desired macro > Add to add the macro under the New Group (Custom)
- Select the existing added macro > Remove if removal is desired
- Select OK
- A New Tab with menu items for the macros should be available for use
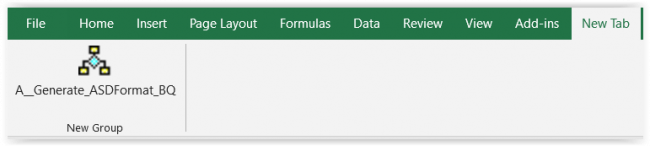
- Close Excel without the need to save
Use Add-in to run macros (quick method)
- Copy the required Add-in file with ".xlam" extension to the folder:
C:\Users\<Admin or user name\AppData\Roaming\Microsoft\AddIns
- Right-click any empty space on any of the ribbons at the top
- Select Customize the Ribbon > Developer > OK to add the Developer tab
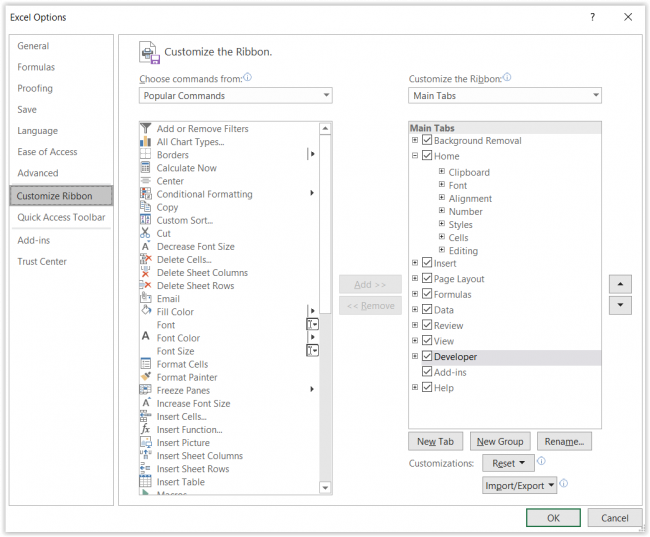
- Select Developer > Excel-Add-ins

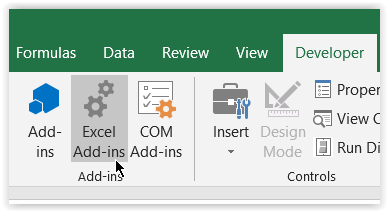
- Select the desired ".xlam" Add-in file
- De-select the superseded Add-in file in case of updating
- Select OK, which should add the Add-in tab
- Select Add-ins tab to access the menu items for the macros for use.
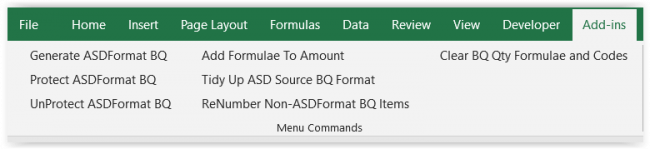
- Close and re-open Excel to see that the Add-in ribbon stays for use.
Note:
- The Add-in file with ".xlam" extension is previously created by saving the macro file with ".xlsm" extension.
- The macros in the Add-in files will not be seen in the usual View Macro menu.
- The Add-in file can be accessed by pressing Alt-F11.
- The VBA macro codes are contained under the Modules folder of the Add-in file directory structure.
- Two extra macros are contained the "ThisWorkbook" item under "Microsoft Excel Objects" item of the Add-in file directory structure.
- One of the two macros is called "Private Sub Workbook_Open()" which will remove all existing Add-in menu items and re-add new Add-in menu items when Excel is opened or when the Add-in file is added through Excel-Add-ins.
- The other of the two macros is called "Private Sub Workbook_BeforeClose()" to remove all Add-in menu items upon closing Excel.
- It has been suggested that the two macros should be named as "Private Sub Workbook_AddinInstall()" and "Private Sub Workbook AddinUnintall()" to be effected upon adding or removing the Add-in file, but the AddinInstall is not very effective because the Add-in tab will disappear after closing Excel.
Save html web pages as pdf files
Save html web pages as pdf files KCTangNote
4/5/2024: Created.
Intro
When using Windows' print function, many pdf apps installed can be selected to print html web pages as pdf files. However, not all pdf apps can keep the hypertext links in html web pages such that clicking the links in the pdf files can direct to the linked web pages.
Furthermore, the default header and footer cannot be modified.
This page shows how to resolve the problems.
Open web browser.
Choose web page.
Enter Ctrl-P to show dialog.
Select:
- Destination: Save as PDF.
- Margins: Custom (i.e. previously used):
- Drag the margin borders on the left to give 15 mm margins around (if not previously used).
- Scale: Default (i.e. 100%).
- Option: Background graphics (so as to print highlight colours).
Do not select:
- Headers and footers (so as not to use the default).
Select Save to save to pdf file. Note that the Table of Contents is included.

Use Wondershare PDFelement to open the pdf file.
May use other pdf apps with editing capability.
Select Edit > Header & Footer > Add Header & Footer:

Select top left corner position,
enter left header content,
select font type and font size, and
adjust the margin widths:

Select top right corner position,
enter right header content, and
select font type and font size:

Select Date style below and Add to add to the above content:

Select bottom left corner position,
enter left footer content, and
select font type and font size:

Select bottom right corner position,
enter right footer content, and
select font type and font size:

Select Page number style below and Add to add to the above content:

Select Add to template, and Apply:

All the pages of one pdf file for one web page will have the same header and footer:

The above will save one web page only.
To save the whole book of linked web pages, use Printer-Friendly function.
The Printer-Friendly function is intended to simplify the printout to have less formatting and colours, but this website has defined to have more formatting and colours.
Select Printer-friendly version on the top right of the front web page:
This page and all the linked pages after it will be displayed, except the Table of Contents because the Table of Contents function used by this website cannot be recognised by the Printer-Friendly function. How to set it to make it possible will be investigated.

Scroll up the linked pages to see that photos embedded in the pages are fully shown. They may take time to show up for the first time.
Add Header & Footer as the above. However, if a template has been saved before, select Add From Template:

Select the desired custom template to assign all the header & footer by one click, and select Apply:

The thumbnail image of the custom template also has options to edit or delete the template.
All the pages of one pdf file for all the linked web pages will have the same header and footer:
(this example has one web page only)

Capture or record screen using ShareX
Capture or record screen using ShareX KCTangNote
1/2/2026: Add section "Extract and concatenate parts of a video".
25/1/2026: Created.
Intro
ShareX can capture screen image and record screen video.
Install ShareX
Open web browser.
Go to https://getsharex.com
Select Download > Setup to download the setup file, open and install.
Configure ShareX
Select Windows Key and search for ShareX.
Open it.
The following main menu will appear on the left:
Select After capture tasks.
Select
- Copy image to clipboard (not bold yet below)
- Save image to file
- Show file in explorer
to make them bold:
Select Application settings > Browse to select and apply the folder to be used as ShareX personal folder.
Set Sub folder pattern, such as %y-%mo:
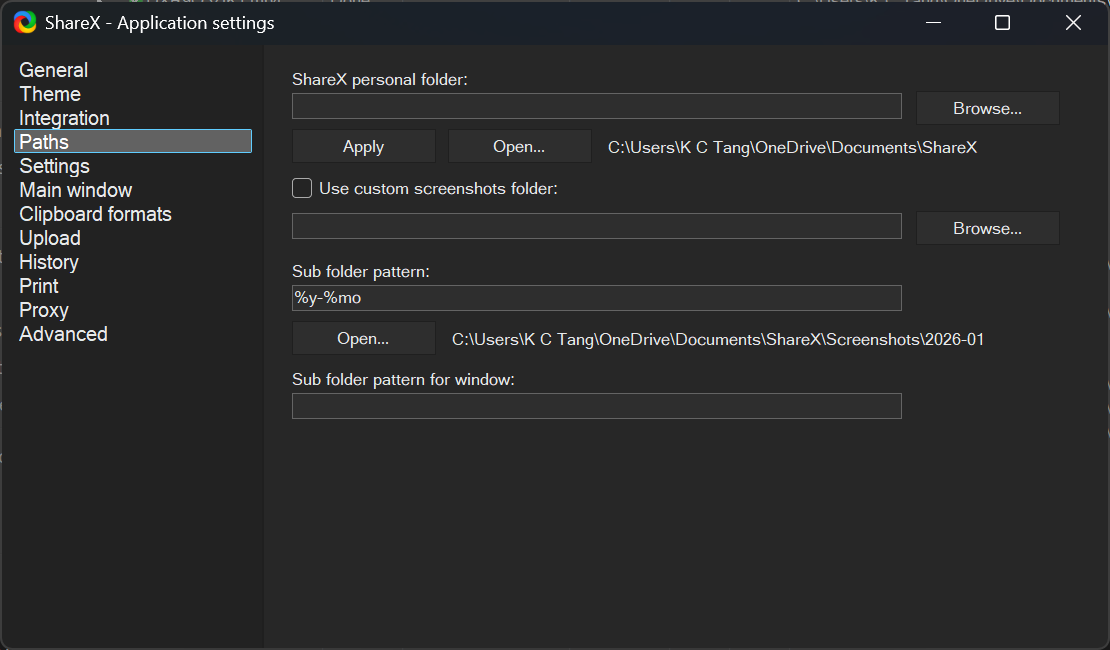
Select Task settings > Screen recorder > Screen recording options:
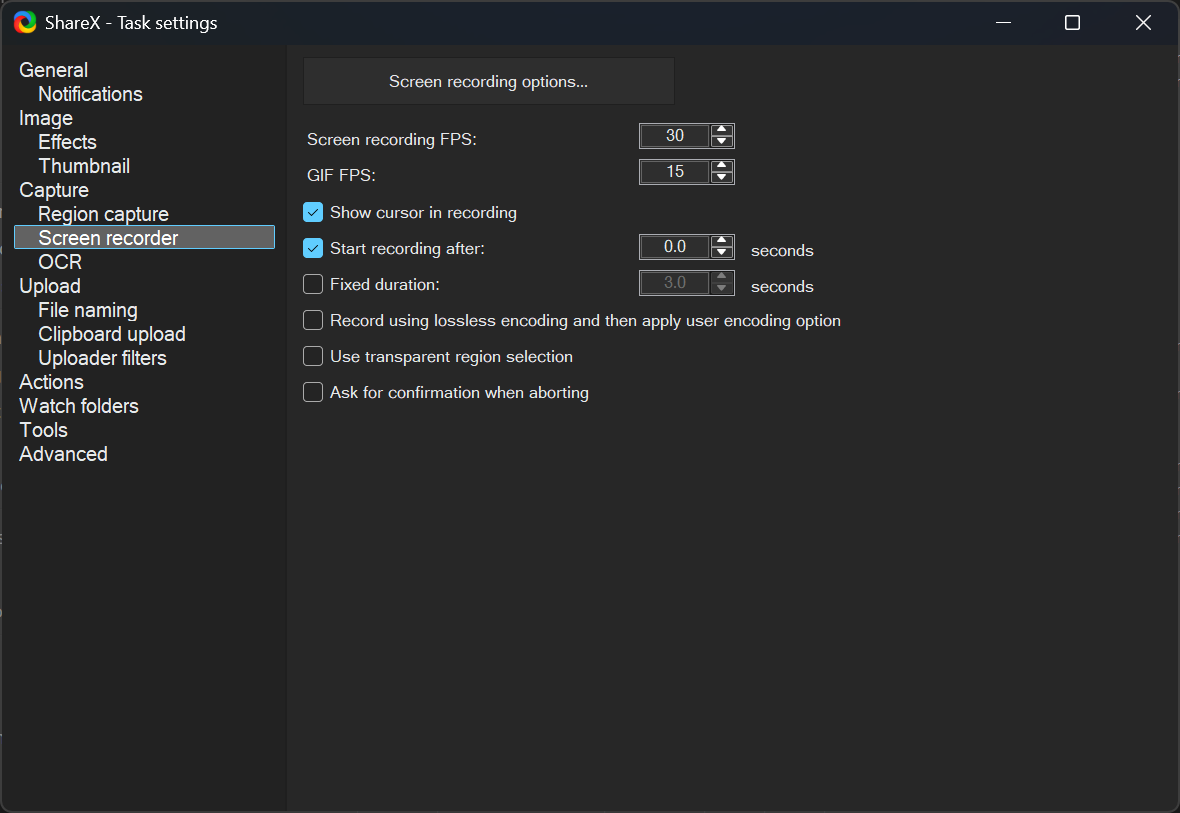
In the next screen, select Install recorder devices to install the recorder app.
If the choice is not available, select Use custom FFmpeg path, and enter the path name: C:\Program Files\ShareX\ffmpeg.exe or C:\Program Files\ShareX\Tools\ffmpeg.exe depending on the exact location.
Restart ShareX to see whether the choice is available. If available, select to install the recorder app.
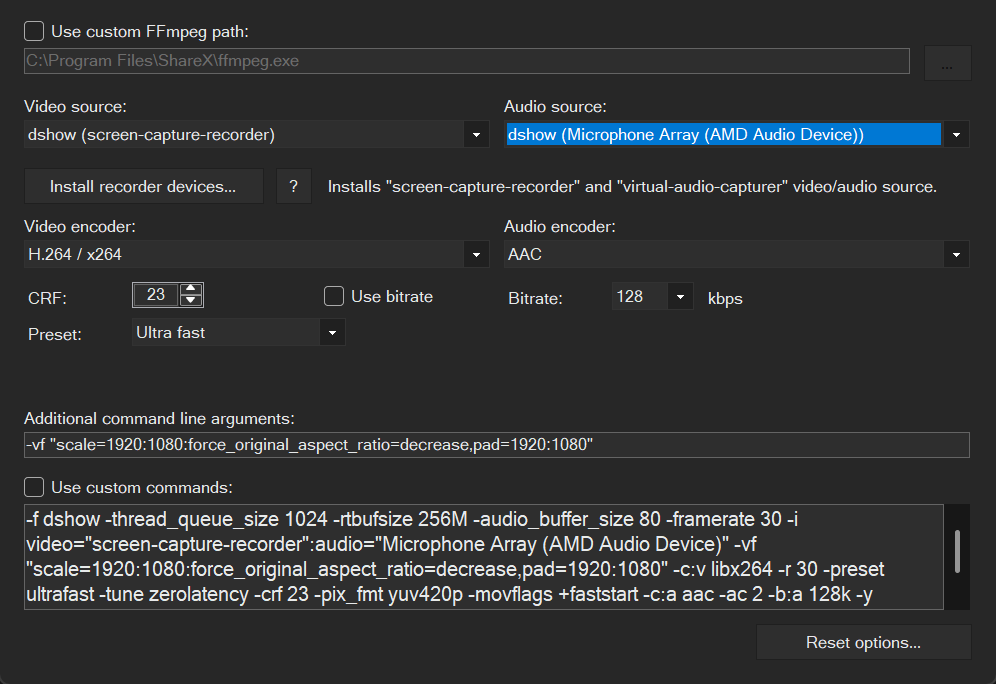
After installing the recorder app, restart ShareX.
Drop down the Video source list to select dshow (screen-capture-recorder).
Select dshow(Integrated Camera) if camera input is to be captured also.
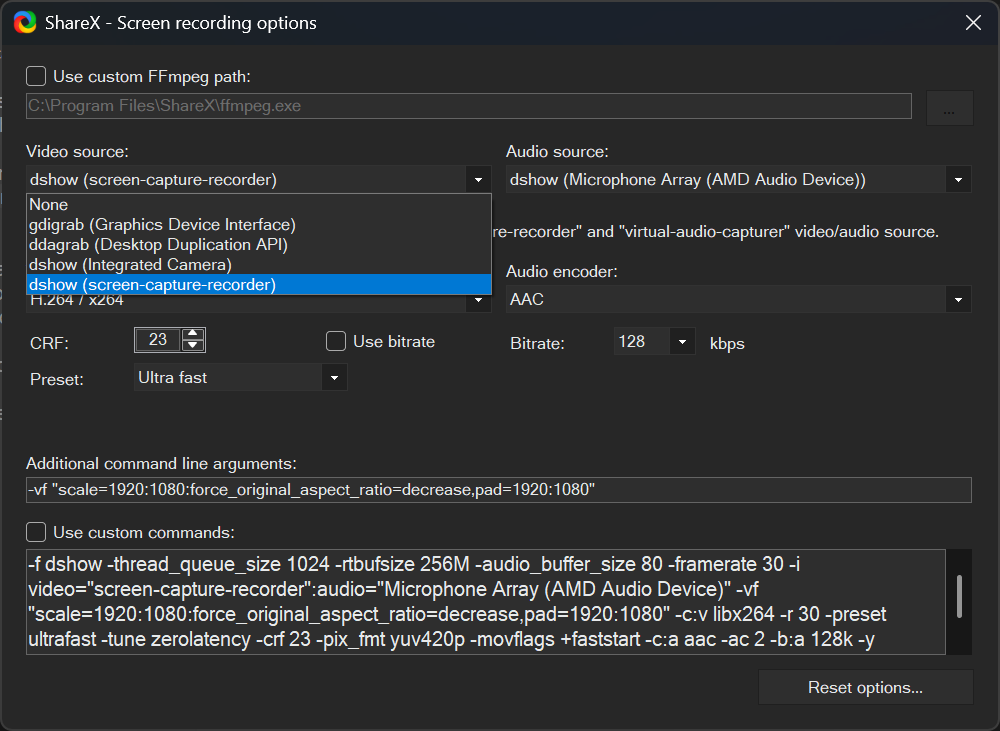
Drop down the Audio source to select the microphone device on the computer.
Set CRF (constant rate factor) = 23 to improve the video quality. Lower = better quality but bigger files.
Preset = Very fast = smaller files with a tiny slowdown.
Enter additional command line arguments:
-vf "scale=1920:1080:force_original_aspect_ratio=decrease,pad=1920:1080"
to suit YouTube requirements for aspect ratio.
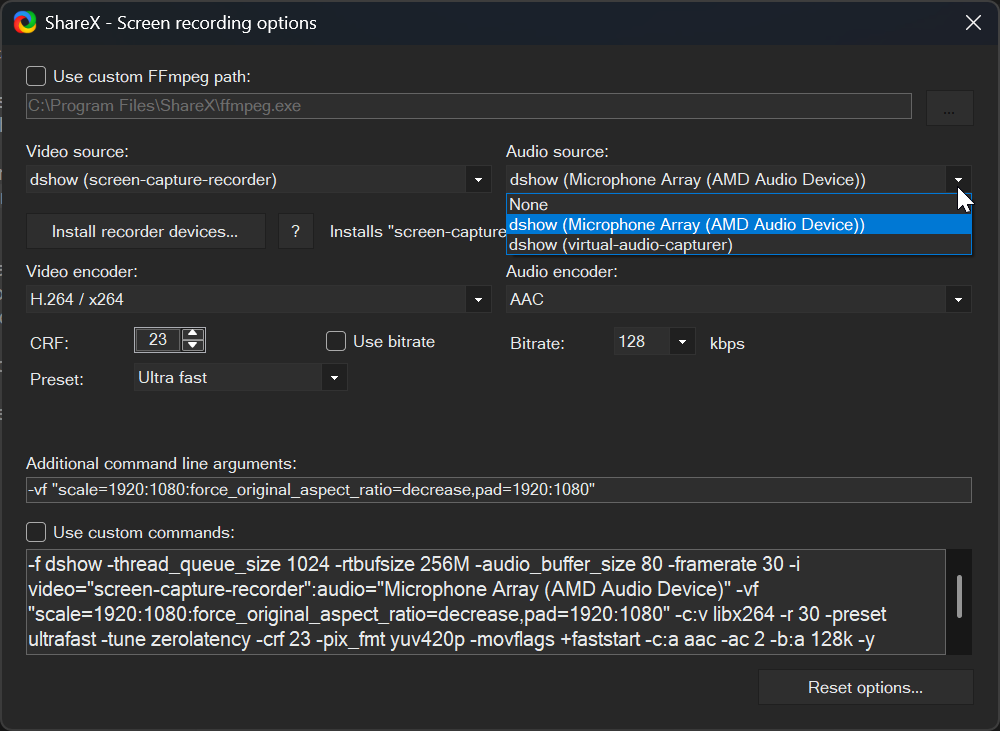
Select Task settings > File naming.
Set name patter for capture or clipboard upload: %ra{10} = random 10 characters.
Set name pattern for window capture: %pn = name of application which screen was captured, the rest should be self-explanatory.
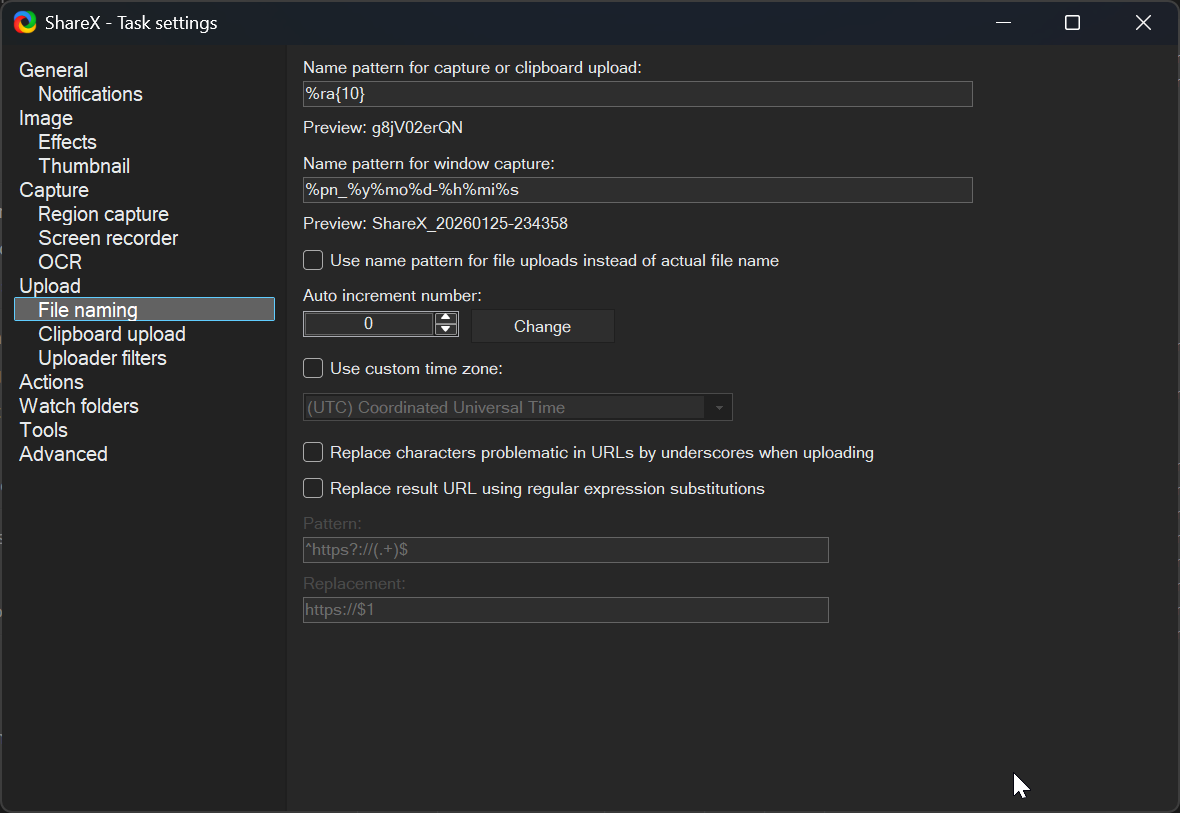
Optionally, select Task settings > Capture.
Decide whether to select the options as shown below.
Decide whether to pre configure a region as shown below. The region can be selected using Select region.
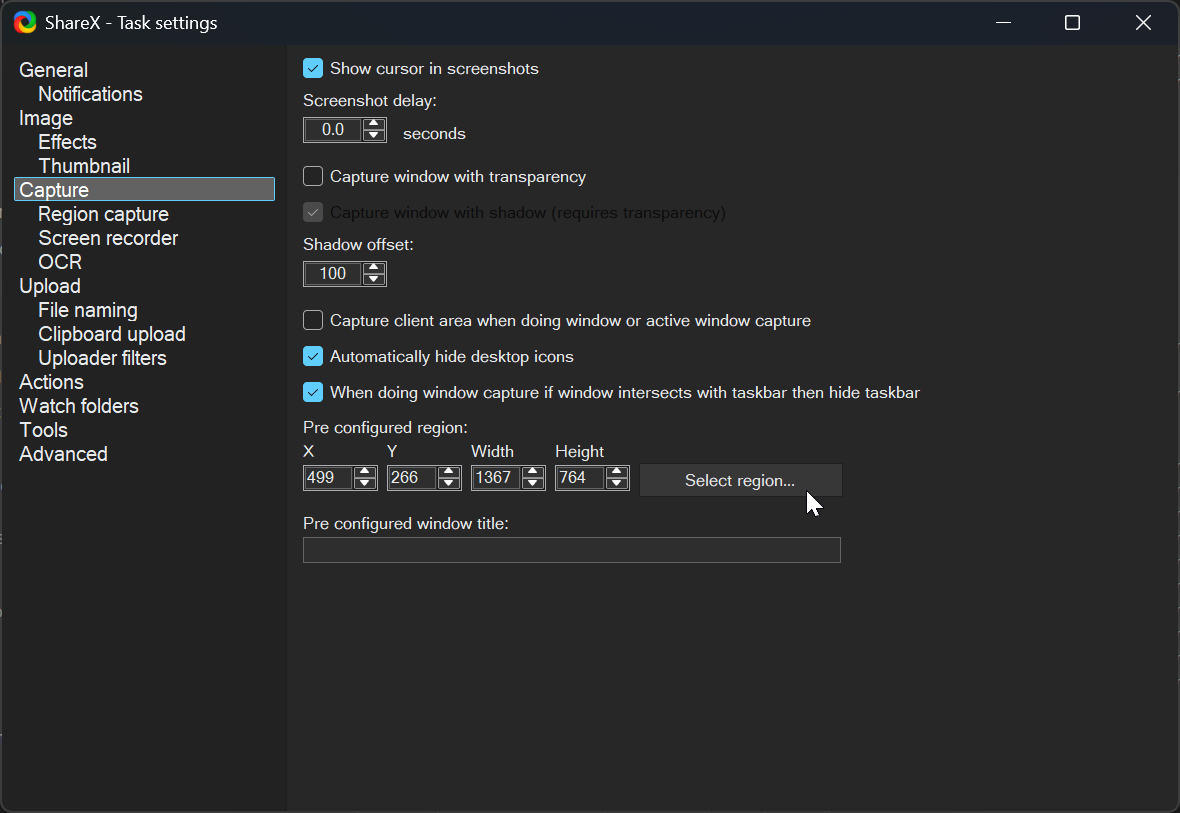
The following are the original hotkey settings:
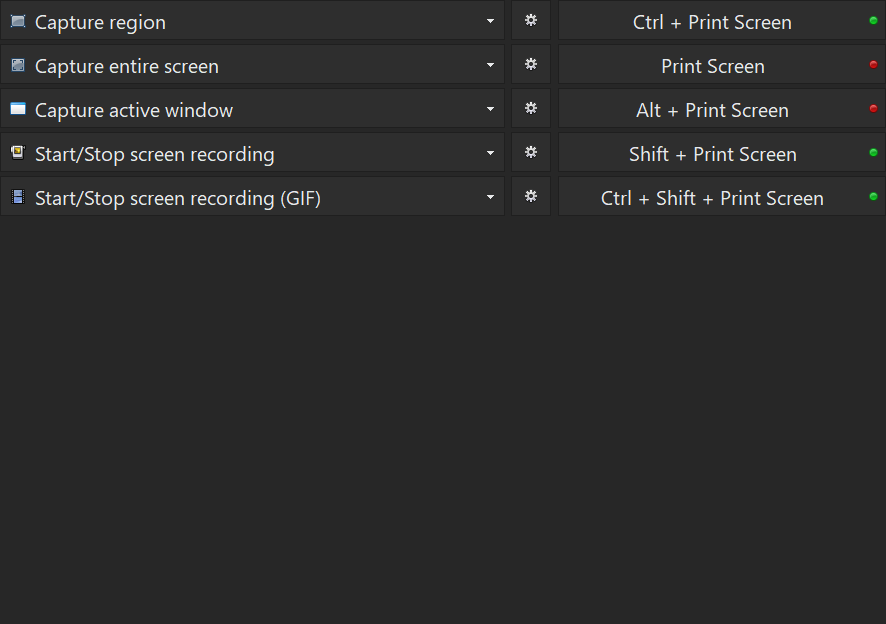
The Print Screen key may be used by other apps. To avoid conflict, re-define the keys as below.
Select Hotkey settings.
Select any definition on the right. It will become Select a hotkey.
Press the desired hotkey combinations at the same time to set.
Select the down arrow at the middle to change the action on the left.
Select Add at the top left to add more actions.
Select Reset on the top right to reset all to the default.
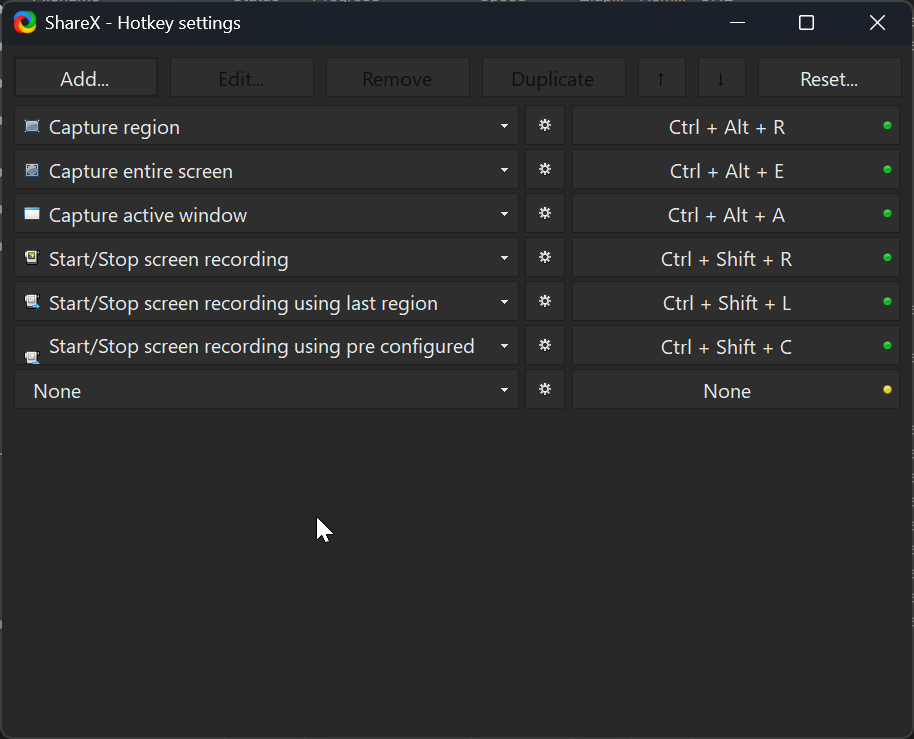
Extract and concatenate parts of a video
(section added, 1/2/2026)
Open Windows command prompt.
Change drive to the folder containing the video to be processed, which can be:
C:\Users\<user name>>cd OneDrive\Documents\ShareX\Screenshots\2026-01Create a file:
> edit mylist.txtEdit it to define the parts to be concatenated:
file 'part1.mp4'
file 'part2.mp4'
file 'part3.mp4'Use ffmpeg.exe which may reside under "C:\Program Files\ShareX\" or "C:\Program Files\ShareX\Tools".
To get the first part from the start up to 5 minutes, second part from 10 minutes to 15 minutes, and last part from 20 minutes to the end, and to concatenate the three parts to give output.mp4:
> "C:\Program Files\ShareX\ffmpeg.exe" -i input.mp4 -to 00:05:00 -c copy part1.mp4
> "C:\Program Files\ShareX\ffmpeg.exe" -i input.mp4 -ss 00:10:00 -to 00:15:00 -c copy part2.mp4
> "C:\Program Files\ShareX\ffmpeg.exe" -i input.mp4 -ss 00:20:00 -c copy part3.mp4
> "C:\Program Files\ShareX\ffmpeg.exe" -f concat -safe 0 -i mylist.txt -c copy output.mp4where:
-i = input from
-ss = start time.
-to = end time.
-c copy = copy to.
-f concat = concatenate.
A Windows PowerShell script to do the above (written with the help of Copilot):
- Script filename: editvideo.ps1
- Run in Windows PowerShell.
- Copy the source mp4 file to a new file named input.mp4 (e.g. copy source.mp4 input.mp4). Overwrite it if already exists.
- Dry-run command example: .\editvideo.ps1 ~00:10:00 00:15:00~00:20:00 00:30:00~
- Actual execution command example: .\editvideo.ps1 ~00:10:00 00:15:00~00:20:00 00:30:00~ --run
- ~00:10:00 → from start to 10min
- 00:15:00~00:20:00 → from 15min to 20min
- 00:30:00~ → from 30min to end
- No limit on the number of time ranges.
- Time ranges can overlap and be in any order. Output as listed order.
- input.mp4 will not be altered.
- Change output.mp4 to the final filename when satisfactorily extracted and concatenated (e.g. rename output.mp4 final.mp4).
- Files part1.mp4, part2.mp4, etc. and output.mp4 are temporary files which will be overwritten automatically if the script is executed again.
# ============================================================
# Flexible FFmpeg Split + Concat Script (editvideo.ps1)
# Usage example:
# .\editvideo.ps1 ~00:10:00 00:15:00~00:20:00 00:30:00~ --run
# ============================================================
param(
[Parameter(ValueFromRemainingArguments=$true)]
[string[]]$Segments
)
# --- Path to ffmpeg.exe ---
$FFMPEG = "C:\Program Files\ShareX\ffmpeg.exe"
# --- Input file ---
$InputFile = Join-Path $PSScriptRoot "input.mp4"
# --- Output file ---
$OutputFile = "output.mp4"
# --- Mode flag ---
$RUN = $false
if ($Segments -contains "--run") {
$RUN = $true
$Segments = $Segments | Where-Object { $_ -ne "--run" }
Write-Host "=== RUN MODE: Extracting and concatenating parts ==="
} else {
Write-Host "=== DRY RUN OUTPUT ==="
Write-Host "command example:"
Write-Host " .\editvideo.ps1 ~00:10:00 00:15:00~00:20:00 00:30:00~ --run"
Write-Host " give a number of time ranges separated by a space"
Write-Host " ~00:10:00 = start to 00:10:00"
Write-Host " 00:15:00~00:20:00 = 00:15:00 to 00:20:00"
Write-Host " 00:30:00~ = 00:30:00 to end"
Write-Host " append '--run' for actual execution"
Write-Host "fixed input filename = input.mp4, output filename = output.mp4, rename afterward"
}
# --- Function to extract a part ---
function Extract-Part($label, $start, $end) {
$startLabel = if ([string]::IsNullOrEmpty($start)) { "start" } else { $start }
$endLabel = if ([string]::IsNullOrEmpty($end)) { "end" } else { $end }
Write-Host "Planned: $label from '$startLabel' to '$endLabel'"
$ffArgs = @("-loglevel","error","-y","-i",$InputFile)
if ($start) { $ffArgs += "-ss"; $ffArgs += $start }
if ($end) { $ffArgs += "-to"; $ffArgs += $end }
$ffArgs += "-c"; $ffArgs += "copy"
$ffArgs += "$label.mp4"
if (-not $RUN) {
Write-Host "CMD: $FFMPEG $($ffArgs -join ' ')"
} else {
& $FFMPEG @ffArgs
}
}
# --- Parse segments ---
$index = 1
foreach ($seg in $Segments) {
if ($seg -match "^~(.+)$") {
# from beginning to END
$end = $Matches[1]
Extract-Part "part$index" $null $end
}
elseif ($seg -match "^(.+)~$") {
# from START to end
$start = $Matches[1]
Extract-Part "part$index" $start $null
}
elseif ($seg -match "^(.+)~(.+)$") {
# from START to END
$start = $Matches[1]
$end = $Matches[2]
Extract-Part "part$index" $start $end
}
$index++
}
# --- Concatenate ---
Write-Host "Generating mylist.txt..."
Remove-Item -Force mylist.txt -ErrorAction SilentlyContinue
for ($i=1; $i -lt $index; $i++) {
Add-Content -Path mylist.txt -Value "file 'part$i.mp4'"
}
if (-not $RUN) {
Write-Host "CMD: $FFMPEG -loglevel error -y -f concat -safe 0 -i mylist.txt -c copy $OutputFile"
} else {
& $FFMPEG -loglevel error -y -f concat -safe 0 -i "mylist.txt" -c copy "$OutputFile"
}
Write-Host "=== Extracted parts: part1.mp4 ... part$($index-1).mp4"
Write-Host "=== Concatenated into: $OutputFile"
The equivalent python script:
- Dry-run command example: python editvideo.py ~00:10:00 00:15:00~00:20:00 00:30:00~
- Actual execution command example: python editvideo.py ~00:10:00 00:15:00~00:20:00 00:30:00~ --run
#!/usr/bin/env python3
import sys
import subprocess
import os
import shutil
# --- Locate ffmpeg ---
# On Windows, you can hardcode the ShareX path if you prefer.
# Otherwise, fall back to ffmpeg in PATH.
FFMPEG = r"C:\Program Files\ShareX\ffmpeg.exe"
if not os.path.isfile(FFMPEG):
FFMPEG = shutil.which("ffmpeg") or "ffmpeg"
INPUT_FILE = "input.mp4"
OUTPUT_FILE = "output.mp4"
def extract_part(label, start, end, run):
start_label = "BEGIN" if not start else start
end_label = "END" if not end else end
print(f"Planned: {label} from '{start_label}' to '{end_label}'")
ff_args = [FFMPEG, "-loglevel", "error", "-y", "-i", INPUT_FILE]
if start:
ff_args += ["-ss", start]
if end:
ff_args += ["-to", end]
ff_args += ["-c", "copy", f"{label}.mp4"]
if not run:
print("CMD:", " ".join(ff_args))
else:
subprocess.run(ff_args, check=True)
def main():
args = sys.argv[1:]
run = False
if "--run" in args:
run = True
args.remove("--run")
print("=== RUN MODE: Extracting and concatenating parts ===")
else:
print("=== DRY RUN OUTPUT only, use --run for actual execution ===")
parts = []
index = 1
for seg in args:
if seg.startswith("~"):
# from beginning to END
end = seg[1:]
extract_part(f"part{index}", None, end, run)
elif seg.endswith("~"):
# from START to end
start = seg[:-1]
extract_part(f"part{index}", start, None, run)
elif "~" in seg:
# from START to END
start, end = seg.split("~", 1)
extract_part(f"part{index}", start, end, run)
else:
print(f"Invalid segment format: {seg}")
parts.append(f"part{index}.mp4")
index += 1
print("Generating mylist.txt...")
with open("mylist.txt", "w") as f:
for p in parts:
f.write(f"file '{p}'\n")
concat_cmd = [FFMPEG, "-loglevel", "error", "-y",
"-f", "concat", "-safe", "0",
"-i", "mylist.txt", "-c", "copy", OUTPUT_FILE]
if not run:
print("CMD:", " ".join(concat_cmd))
else:
subprocess.run(concat_cmd, check=True)
print(f"=== Extracted parts: {' '.join(parts)}")
print(f"=== Concatenated into: {OUTPUT_FILE}")
if __name__ == "__main__":
main()